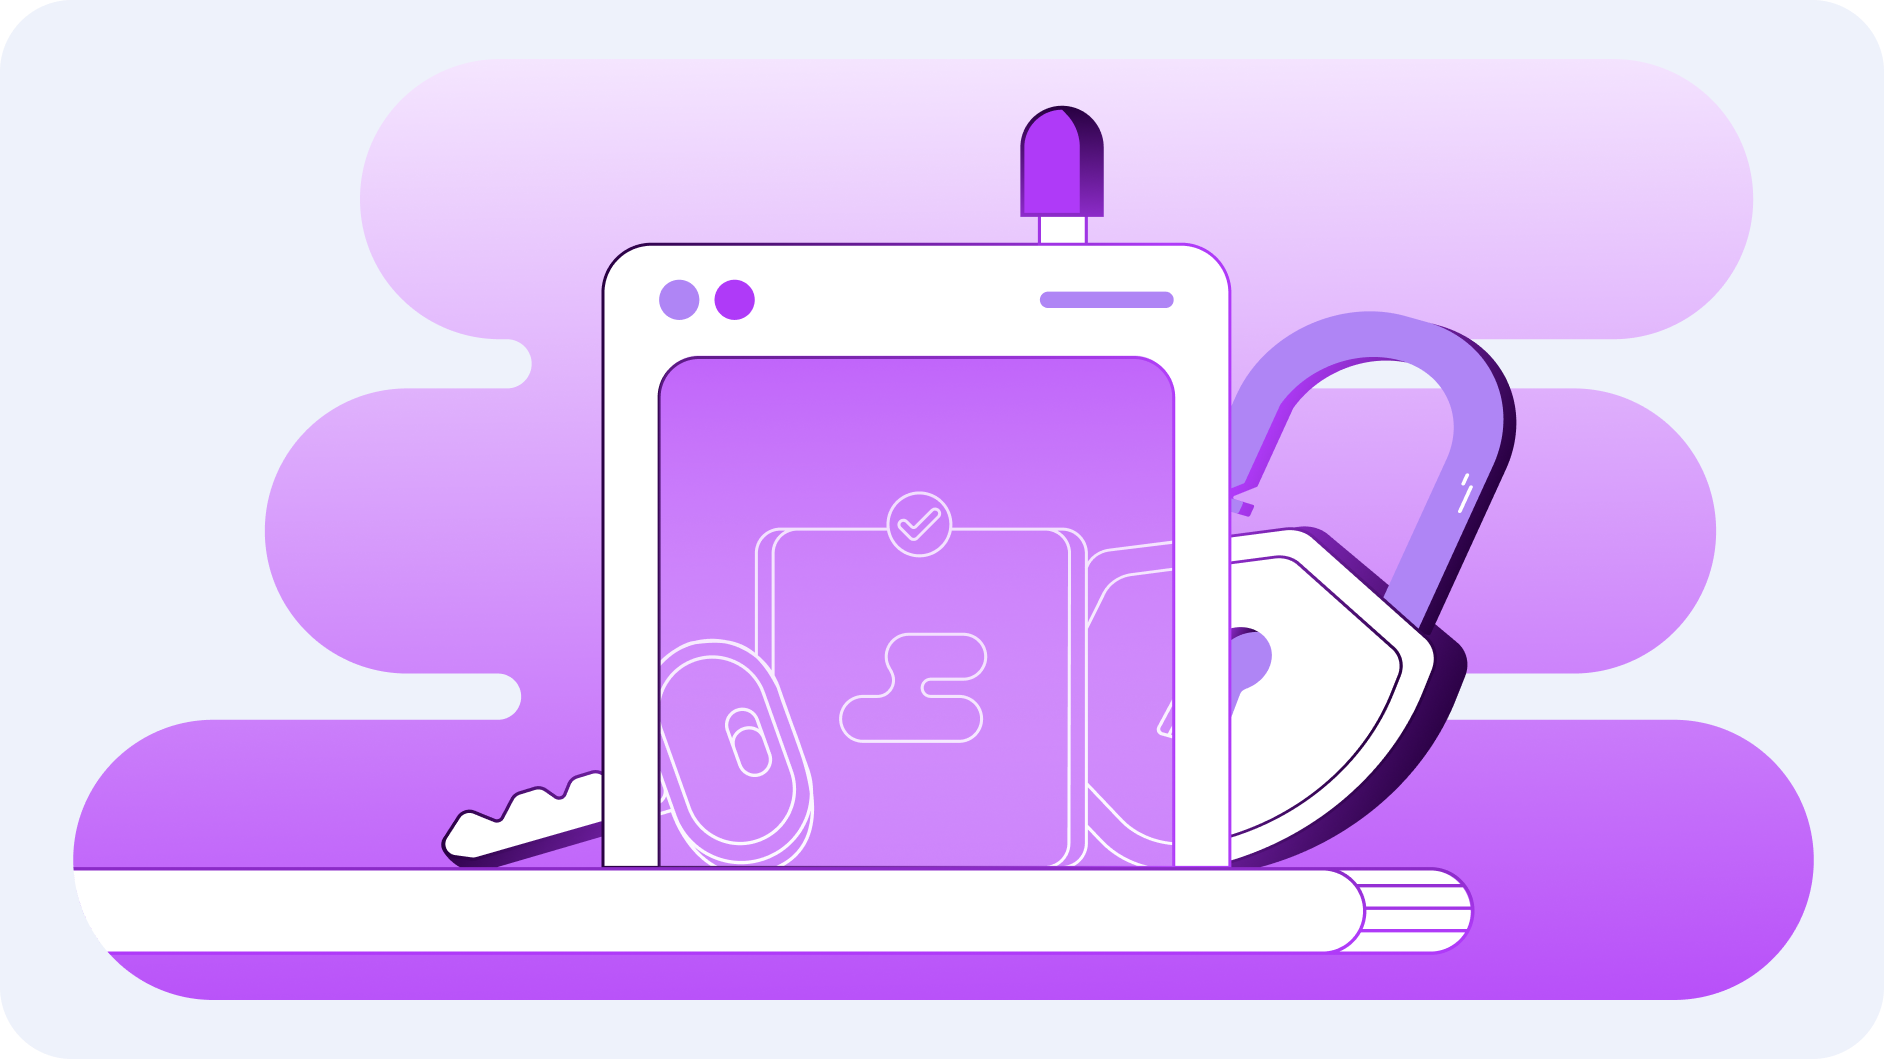
Our Blog

CloudZone

Mastering the Cloud: 5 FinTech Challenges and Proven Solutions

The dynamic landscape of FinTech companies requires regular maintenance and optimization of cloud infrastructure to stay competitive. Addressing their unique challenges requires a deep understanding of the cloud ecosystem. In this article, we'll outline the key aspects FinTechs should take into consideration and how CloudZone can support them. We have ample experience working with FinTechs and know firsthand their needs and challenges, inside out. Challenge #1 - Security & Regulatory compliance - We recognize that FinTechs are subjected to a complex and ever-evolving set of data privacy, security, and consumer protection regulations. In addition, they handle a large amount of sensitive data, such as personal identification information (PII), which requires robust security measures to protect it from unauthorized access, breaches, and loss. How can CloudZone help - We conduct regular cloud architecture assessments focusing on security pillars and implement security best practices into their infrastructure. Our approach simplifies access management and eliminates the complexity of managing multiple authentication mechanisms. Challenge #2 - Improving operations, scalability, and agility: Cloud computing allows FinTech companies to scale their infrastructure and services up or down quickly and efficiently, adapting to changing market demands. CloudZone Certified Solutions Architects can help in many ways:   Implement different architectures Serverless Architecture, Microservices Architecture, and Event-driven architecture, to enhance agility and scalability.  Use containerization platforms that provide a lightweight and scalable way to run applications, and leverage auto-scaling features to configure applications to scale resources up or down based on demand automatically.  Implement elastic load balancing to distribute incoming application traffic across multiple targets and caching mechanisms to improve performance and reduce the load on backend systems. Moreover, ix§mplement CI/CD pipelines to automate testing, deployment, and rollbacks and Infrastructure as Code to automate the provisioning and management of cloud resources.   Challenge #3 - High cloud costs can either make or break a startup and directly affect the pricing model, ROI, and competitiveness.  How can CloudZone help - Designing a new cost monitoring and governance model is key to sustaining data-driven decision-making. Our FinOps services optimize cloud resource utilization and identify & eliminate inefficiencies to maximize value without unnecessary costs.  Challenge #4: Accelerating innovation and time-to-market: Navigating the demand for accelerated innovation and swift time-to-market poses a significant challenge for startups. The pressure to develop and deploy new products and services rapidly can strain resources and disrupt strategic planning, ultimately impacting competitiveness in dynamic markets. How can CloudZone help? Staying at the forefront of cloud advancements, the company ensures that customers have access to the latest tools and features, fostering an environment conducive to innovation. Our certified Solution Architects specialize in implementing cloud services tailored to address this specific challenge. Additionally, we provide Proof of Concepts (POCs) at no cost, allowing startups to test and validate cloud solutions before making any commitments. By partnering with CloudZone, startups can access expert assistance and cost-effective solutions to accelerate their growth and success in the market. Challenge #5 - Workforce and expertise: Implementing and managing secure cloud environments requires specialized skills and expertise, which can be expensive and difficult to find. How can CloudZone help - As an AWS Managed Services provider, CloudZone’s range of experts can handle your cloud environment from A-Z. That includes Monitoring, DevOps, FinOps, Security & Access Management, DR,  Business Continuity Management, and more.  With a commitment to providing a robust infrastructure and a comprehensive suite of services, CloudZone empowers customers to scale their operations seamlessly, optimize resources efficiently, and explore new technologies.   In Summary While there are numerous challenges associated with cloud operations, the potential benefits are significant. By carefully considering the regulatory landscape, data security requirements, and other unique factors, FinTech companies can leverage the cloud to achieve their business goals while ensuring compliance and security.  About us: CloudZone is a certified and award-winning global AWS Premier Partner operating in Israel, Europe, and the United States. We help organizations leverage the cloud so that they can focus on their core business, reduce time to market, and adopt new and flexible business models. Our partnership with Uphold involves two of CloudZone’s flagship offerings: FinTech Acceleration Suite - As part of our core services suite, CloudZone assigned Uphold a dedicated team, consisting of a Customer Success Manager, a certified Solution Architect, and a FinOps analyst, as well as access to a cloud cost management tool. The team focuses on operational excellence, architecture, and cloud optimization with a strong focus on Security. Managed Services - with CloudZone’s MSP offering, Uphold enjoys end-to-end proactive monitoring of their Cloud environment as well as execution of actionable items, in close collaboration with the CISO. Essentially, our MSP team acts as an extension of Uphold’s Cloud team, filling and overcoming any skill gaps - which every CISO is so familiar with. Quote from Maggie Schneider, General Manager EMEA, CloudZone: “I am immensely proud of our partnership with Uphold. Their commitment to innovation and excellence aligns perfectly with our mission to empower FinTech companies with top-tier managed services with our MSP and Fintech Acceleration Suite offerings. Through our work as Uphold’s AWS partner, we’ve been able to efficiently manage their critical assets and infrastructure, ensuring operational reliability and security - acting as a part of Uphold’s extended team. Our proactive engagement and seamless integration within their operations have allowed us to drive success.” Need assistance in taking your FinTech to the next level? Leave your details in the form below and we will contact you as soon as possible.

Read More
CloudZone

Cloud Security in 2024

Mastering Cloud Security in 2024: The 7 Key Strategies Every Company Needs As we navigate the digital world of 2024, cloud security is an imperative, not a choice. This blog highlighted seven crucial quick wins, from Multi-Factor Authentication to strategic cloud region selection, each serving as a cornerstone in fortifying your cloud environment. These steps are more than strategies; they're essential safeguards for your digital operations. Let's dive in… Activate Multi-Factor Authentication (MFA) Think of MFA as an extra door lock. Using multiple methods to verify a user’s identity makes accessing your cloud services much harder for unauthorized users. Action to Take: Make MFA standard practice across all user authentications. Consider adaptive authentication, which requires additional verification when it notices something fishy, like a different device or odd location. Set Up Intelligent Billing Alerts Billing alerts in cloud services act as a financial safeguard, alerting you to unusual spending patterns that might indicate security breaches or unauthorized resource utilization. Action to Take: Make Billing Alerts your sidekick for quick detection of unusual activities. For a more advanced approach, consider using machine learning tools to automatically spot cost anomalies. Lock Down Public Cloud Resources Public cloud resources can be a gateway to cyber threats. Managing these correctly is crucial for maintaining a secure cloud environment. Action to Take: Implement strict policies restricting public access to cloud resources. Conduct regular checks to ensure no resource is unintentionally exposed. Implement Data Protection Protocols In cloud security, data protection is non-negotiable. It involves strategies for secure data storage and robust encryption methods. Action to Take: Define and communicate clear guidelines on data storage and encryption practices. Regularly review and audit data handling processes to prevent unauthorized access or data leaks. Deploy Web Application Firewall (WAF) A WAF serves as a vigilant protector for your web applications, monitoring and blocking malicious traffic and cyber threats. Action to Take: Deploy a WAF with advanced rule sets tailored to your specific application landscape. Ensure it’s configured to repel common threats and safeguard against unauthorized access attempts. Configure Proactive Auditing Regular auditing in your cloud environment is like having a constant surveillance system that tracks all activities and flags potential security issues, at all times. Action to Take: Integrate continuous auditing mechanisms into your cloud operations. Maintain and securely store audit logs in accordance with your security policies and compliance requirements. Choose Cloud Regions The physical location of your cloud services (regions) can significantly impact performance, compliance, and security. Action to Take: Carefully select cloud regions that align with your business needs, considering factors like performance, regulatory compliance, and regional cyber threat landscapes. Limit activities to selected regions to maintain control and efficiency. In embracing these measures, you're not just enhancing your cloud security but future-proofing your business. At Cloudzone, we're here to assist you in this vital journey. Let's collaborate to ensure your cloud infrastructure is secure, resilient, and ready for the challenges ahead. Contact us using the form below and take the next step in securing your digital future. Author Rotem Levi, Cloud Security Architect, CloudZone

Read More
CloudZone

EBS Volumes & Snapshots – Best Practices for Cost Optimization

In the ever-changing landscape of cloud infrastructure and virtual machines, Amazon Elastic Block Storage (EBS) is one of the most commonly used services. It provides block-level storage and is utilized with EC2 instances. The purpose of the EBS volumes is to build a file system on top of them and use them similarly to a hard drive or other block device. In addition, a volume's configuration, which is attached to an instance, may be changed dynamically. However, its versatility comes with potential hidden costs, often unknown to users. Navigating through the intricacies of EBS becomes paramount, considering its pivotal role in building file systems for EC2 instances. This article delves into the best practices for cost optimization, shedding light on how to leverage EBS volumes and snapshots efficiently. Whether you are grappling with different volume types, seeking to minimize costs without compromising performance, or ensuring the appropriate use of EBS snapshots, this guide will help you navigate the complexities and provide actionable insights for prudent cost management. Amazon EBS (Elastic Block Storage) is one of the main services we use when working with cloud infrastructure and virtual machines. This service has several components that may incur hidden costs you might not be aware of that can put a dent in your monthly cloud bill. How to Choose the Best Volume Type Depending on your needs, you may choose from different kinds of EBS volumes offered by Amazon Web Services (AWS). Let’s dive into the different volume types: Standard Multi-Use (SSD): The most common type, which is well-suited for many kinds of workloads, including development/test environments and small to medium-sized databases. The SSD disks can be utilized with General Purpose, gp2 or gp3, or io1 and io2, for database applications that are I/O heavy and need constant, low-latency performance. High-Density Disk (HDD): Ideal for data warehousing and log processing, two applications with huge datasets requiring frequent access. Cold HDD: Developed for workloads that aren't accessed often, emphasizing cost-effective storage. When to use each volume type Several kinds of storage options are available in EBS, each with its own price point and degree of performance. You may choose the one that's most suited for your workload. Unless application performance demands differ, utilize General Purpose for SSD volumes (gp2, gp3) instead of volumes with Provisioned IOPS, like io1 and io2. The io1 and io2 volume types are worth considering for latency-sensitive applications or workloads that are I/O heavy. Database operations and other workloads with high I/O operation sensitivity to storage consistency and performance may be able to use the provided IOPS SSD (io1 and io2) volumes. You have the option of Provisioning I/O Per Second (PIOPS) for all volume types, but the range of PIOPS differs between each type. Best Practices for Cost Savings with EBS Volumes Volume Upgrade: Upgrading to a volume of a newer generation type within the same EBS category. While gp2 volumes are still in production and are the default option when launching an EC2 Instance, gp3 volumes are the newest additions to the family of general-purpose volumes and guarantee higher performances. Upgrading from gp2 to gp3 will save you 20% of your costs. Regarding the io family, while you may still have the older io1 volume type provisioned, with the newer io2 and io2 Block Express, you will achieve better IOPS performance. Define the desired IOPS: For gp3 volumes, there are 3,000 IOPS and 125 MB/s throughput, which are included in the volumes' performance baseline with no additional costs. With gp2 volumes, you'll need 1,000 GB of storage to get 3,000 baseline IOPS. You may achieve your 3,000 IOPS performance target with as low as 1 GB of storage when using gp3 volumes. Io1 and io2 volumes also offer PIOPS of up to 64,000 IOPS per volume. However, in this case, the charges will be from the first I/O. It’s also important to choose the correct volume based on the desired number of IOPS (since gp3 is cheaper than io2, and you will get the first 3,000 IOPS for free). See below a pricing comparison of the different volume types- Unattached EBS Volumes: When deleting an EC2 instance, the disks that are attached to it by default will keep on running. Therefore, monitoring your volumes and deleting the unattached ones is imperative. Another preventive measure can be that when launching a new EC2 instance, you can choose the "Delete on Termination" option during the instance configuration. Stopped Instances: There will be scenarios where we’ll stop our EC2 instances for a while but won’t terminate them. Even when the instances are stopped, the EBS Volumes will continue to generate charges. In this case, it’s important to monitor these volumes and even modify them to Snapshots, which cost 50% of the EBS cost. Once the instances are back to running status, you can change the Snapshot to a new EBS Volume and attach it to the EC2 Instance. EBS Snapshots EBS Snapshots allows you to backup your data on EBS volumes to an Amazon S3 bucket using point-in-time snapshots. Since Snapshots are incremental, they only save the device blocks that have changed since the previous backup. Because each snapshot has all the essential information, you may use them to restore your data (from the snapshot date) to a new EBS volume. When you build an EBS volume from a snapshot, the latest volume will be an exact replica of the old one. The data is loaded in the background with the mirrored volume, so you can start using it immediately. The price of your snapshots is based on the size of your EBS Volume. Because snapshots are incremental, deleting them will not result in storage cost savings. A deleted snapshot will delete any data it referenced, but snapshots that refer to other snapshots will not. Best Practices for Cost Savings with EBS Snapshots 1. Lifecycle Policies: Define organizational policies for your snapshots lifecycle (for example, delete snapshots older than 6 months), and later create DLM policies in a way that saves only the necessary snapshots. 2. Snapshots Archive: Snapshots could be preserved as archival data. If you need to keep point-in-time copies for archiving purposes, you may utilize EBS Snapshots' archive settings or AWS Backup. You will immediately optimize your costs with these lower price categories, which provide reduced cost per GB pricing (75% discount compared to Standard Snapshots). You may manage your backups according to your archive or compliance needs by creating and maintaining archive rules using AWS Backup. See below a comparison between Standard Snapshots and Archival Snapshots In AWS Console How to find on AWS Cost Explorer Console “Filter by Service → EC2-Other” “Filter by Usage Type Group → Select like EC2: EBS entries from drop-down” “Group by → Usage Type” AWS Trusted Advisor AWS Trusted Advisor is a free-of-charge cost optimization tool. It can provide you with extra recommendations on your EBS usage. How to find on AWS Console Search for Trusted Advisor. Recommendations -> Cost Optimization. Search by keyword → EBS In summary This article provides essential guidance for optimizing Amazon EBS (Elastic Block Storage), emphasizing the importance of choosing the most suited volume types based on specific workload requirements, whether SSD or HDD. Key recommendations include upgrading to more cost-efficient volume types like gp3 for potential savings of up to 20%, strategically managing IOPS requirements, and effectively handling idle volumes. The article also underscores the significance of EBS snapshots for data backup, advocating for adopting lifecycle policies and archival methods to minimize costs. Utilizing AWS Trusted Advisor for regular assessments can further enhance cost-effectiveness and performance. These final recommendations aim to assist users in achieving a balanced approach to high performance and cost efficiency in their Amazon EBS usage. Stay tuned for Part 2! Authors Rotem Levi, Cloud Security Architect, CloudZone Vera Barzman, FinOps Analyst, CloudZone

Read More
CloudZone

Top 10 Cloud Trends that Will Shape 2024

It’s time to put 2023 in the rearview mirror and look ahead to the horizon of cloud technologies in 2024, unveiling a landscape teeming with innovation and evolution. As businesses continue their digital metamorphosis, the clouds above are not just figurative; they're the very platforms shaping the future of technology. In this exploration of 2024 cloud trends, we delve into the skies of possibility, where advancements, disruptions, and transformative shifts are poised to redefine how we harness the power of the cloud. We asked our experts which trends they see to dominate the cloud landscape this year. Here's our top 10: 1. Hybrid & Multi-Cloud Adoption As organizations seek to optimize operational efficacy, the trend of adopting hybrid and multi-cloud strategies will gain traction in 2024. This strategic paradigm facilitates the utilization of diverse cloud providers, offering unparalleled flexibility. Simultaneously, the evolution of cloud management tools will address the intricate challenges of navigating and administering complex multi-cloud environments. 2. Edge Computing Integration The symbiosis of Edge Computing with public cloud services emerges as a critical trend, driven by the imperative for low-latency processing and real-time data analytics. This integration suggests a paradigm shift, particularly beneficial for applications demanding swift and localized computational capabilities. Industries such as manufacturing, healthcare, and logistics stand to gain significantly from this fusion, fostering unprecedented possibilities for real-time data-driven decision-making. 3. AI & Machine Learning Services Cloud providers continue their commitment to advancing AI and machine learning services, providing even greater levels of pervasive intelligence within applications. The convergence of edge computing, AI, and IoT results in developing holistic solutions, particularly impactful in sectors characterized by intricate data processing requirements. The accessibility and sophistication of AI-driven capabilities represent a definitive stride toward democratizing advanced analytics. 4. Sustainability Initiatives In response to growing environmental concerns, cloud providers now proactively invest in sustainable practices, demonstrating a commitment to reducing their carbon footprint. This strategic pivot aligns with the evolving landscape of Environmental, Social, and Governance (ESG) considerations as organizations transition from optional to mandatory sustainability regulatory adherence. 5. GenAI Governance The proliferation of generative AI tools necessitates a strategic emphasis on governance frameworks to mitigate associated risks. Drawing parallels with the early stages of cloud adoption, a proactive approach to data management, adherence to AI acts, and regulatory compliance become imperative for organizations seeking to harness the benefits of AI without compromising security, privacy, and operational efficiency. 6. Platform Engineering Cloud providers will augment their platforms, shifting focus toward seamless integration with specialized tools and frameworks. This departure from conventional cloud-native services underscores a strategic shift, emphasizing the importance of Managed Service Providers (MSPs) proficient at orchestrating diverse tools within a client's cloud platform. Developer portals and next-generation software development life cycle frameworks emerge as critical components for achieving operational success. 7. Online Marketplaces A paradigm shift in software procurement strategies is coming, with businesses increasingly favoring subscription models from online marketplaces. This trend simplifies procurement, providing a centralized platform for accessing various SaaS solutions. 8. Emergence of FinOps Culture & Shift-Left Paradigm The escalating complexity of cloud environments, coupled with their dynamic consumption-based cost structures, necessitates a unification of IT, finance, and business capabilities. This integration gives rise to the Financial Operations (FinOps) culture. When it comes to the cloud's variable spend model, FinOps emphasizes financial accountability, which encourages understanding and cost control while maximizing business value. On a parallel trajectory, the "Shift-Left" approach is gaining momentum. In this instance, cost considerations are woven into development processes early, leading to precise cost-efficiency metrics for workloads and unit economics. As part of this approach, organizations seek to ensure the most reasonable use of resources from the development phase. The convergence of FinOps and Shift-Left approaches amplifies the return on cloud investments and instills a culture of financial prudence and responsibility across all spheres of cloud operations. 9. Selling SaaS Solutions on Online Marketplaces Major cloud providers, including AWS, Google Cloud, and Azure, observe an increasing demand for SaaS solutions from centralized online marketplaces. This strategic shift in procurement models streamlines the acquisition process, offering businesses a consolidated platform for accessing diverse solutions and enhancing operational efficiency and scalability. 10. Integration Services with Low Code - No Code The advent of Low Code and No Code solutions signals a fundamental transformation in integration methodologies. Platforms such as Make and Workato exemplify this shift, offering businesses streamlined integration capabilities. This trend accelerates innovation by reducing dependency on intricate coding processes and facilitating agility as well as efficiency in product and solution integration. In summary As we navigate the intricate landscape of the cloud in 2024, these trends make clear the path forward for organizations seeking to align their operations with the forefront of technological innovation. By embracing these transformative shifts, businesses stand poised to capitalize on unprecedented opportunities while effectively navigating the challenges inherent in this era of dynamic change. The convergence of these trends represents a definitive step toward a future where innovation and strategic adaptability define industry leaders in the ever-evolving cloud services domain. As a leading Partner of AWS, Google Cloud & Microsoft Azure, we have a wide range of expertise and can help you with your cloud modernization. Need assistance staying trendy? Leave us a note in the form below.  

Read More
CloudZone

Best of AWS re:Invent 2023

On Nov 27th, AWS hosted the most significant cloud event in the world, re:Invent 2023, which took place in Las Vegas. Over 65,000 cloud enthusiasts flew in from different parts of the world to learn about the latest updates from the cloud giant, and CloudZone was there to report from the field. Once again, Adam Selipsky, AWS CEO, took the stage to unveil the recent innovation in his keynote presentation. In case you weren't there, here is what you missed: 1 . Generative AI & Amazon Q Not surprisingly, the hot topic at the event was Generative AI. The keynote lecture unveiled a promising reality beyond the hype. It emphasized GenAI's accessibility within today's managed systems, presenting it as a gateway to transformative opportunities, offering insights into target audiences, and how it could bring forth a competitive edge. AWS also unveiled Amazon Q - an AI-powered assistant designed to provide businesses with actionable insights and advice. It aims to streamline tasks, expedite decision-making processes, and encourage creativity, all while ensuring robust security and privacy measures. Amazon Q has two subscription plans: Q Business, which focuses on a powerful BI engine that leverages data from SaaS solutions, and Q Builder, which encompasses all Q Business capabilities, specifically targeting developers and IT users. 2. AWS BedRock and Foundation Models The keynote continued by highlighting Amazon BedRock's continuous refinement - a suite of foundational models customized for various use cases and content types – focusing on its capability to enhance accuracy while minimizing deviations in outputs. Amazon BedRock was underscored as a transformative force in the realm of generative AI, making it more accessible and user-friendly. The introduction of GuardRails for Amazon Bedrock was announced at the event, allowing developers to apply generative AI responsibly, following established rules and guidelines. Another update to Amazon Bedrock was the availability of Model Evaluation functionality, enabling the evaluation, comparison, and selection of optimal foundation models for specific use cases. The feature allows for both human-driven and automatic evaluation options based on predefined metrics like accuracy, robustness, and toxicity. This presents an opportunity for companies that haven't yet adopted cloud-native data analytics or machine learning-aided systems. With so many well-established managed systems available for integrating an AI-based generative solution, it is possible to skip some stages and start almost from scratch. Infrastructure and Hardware Advancements Selipsky also introduced UltraClusters and next-generation AWS-designed chips: Graviton4 & Trainium2. Those advancements were highlighted for their significant increases in energy efficiency and performance at a relatively low cost. A significant focus was placed on hardware to enhance computing capabilities, particularly in fields like machine learning training and generative AI. AWS natural-born pushing in new directions, paving the road to serverless, and evolved today with the Caspian hypervisor for cooperative oversubscription until the shift to Quantum Computing with the aim for suppressing error correction of phase flips over bit flips in their in-house chip. Other Key Announcements & Services With its Fault Injection Service (FIS) launch, AWS highlighted the importance of demonstrating application resilience across multiple regions and availability zones. It was highlighted as a tool to assess system recovery and understand relevant application dependencies. As part of the AWS Management Console, AWS has released 'My Applications', an application management feature that consolidates performance, security, and health metrics. Moreover, an IDE extension for AWS Application Composer was announced, enabling enhanced visual application development with AI-generated infrastructure as code. This extension offers the convenience of a drag-and-drop experience within the IDE, facilitating seamless integration with various development tools. AWS confirmed what CloudZone already realized from working with demanding and mature customers - AWS is not just a service for every need anymore; it enables better integration with other vendors' focused-expert solutions that real builders prefer. Regarding AWS native builder, the most relevant announcements were Amazon Aurora limitless databases and ElastiCache Serverless GA. We all know that caches must always play a critical role in ensuring better availability and performance! We were particularly impressed to watch the Data Warehouse space move from query volume to query variety and how Machine Learning can be used to teach Amazon Redshift to anticipate the unexpected. With Amazon Redshift's next-generation AI-powered scaling and optimization techniques, we see how each customer's performance goals can be automatically met. Conclusion We hope you enjoyed the summary of what we thought were the most memorable and pivotal moments from re:Invent 2023, an event that embodies innovation, breakthroughs, and the pulse of technology. The announcements, insightful discussions, and the unveiling of cutting-edge advancements shaped an event that celebrated progress and sparked anticipation for the future. As we bid adieu to this year's event and reflect on its key moments, it's evident that re:Invent 2023 has set the stage for transformative advancements in cloud computing and artificial intelligence. See you next year!

Read More
CloudZone

The Journey to Streamlined ML Operations

In today's data-driven business landscape, the sheer volume of raw data has surged exponentially. To maximize their offerings, organizations can utilize Machine Learning (ML) to leverage the goldmine laying in their data. However, many plunge headfirst into ML without first laying the groundwork for a systematic, scalable, production-ready ML platform. The purpose of this article is to shed light on the challenges organizations face when embarking on ML initiatives without an organized ML lifecycle process in place, how they can overcome these challenges, and how to lay the groundwork for building a high-performing ML  pipeline in a robust manner. The Perils of Building ML Models Without a Systemized Operation Clients often turn to us for guidance after facing frustrating failures while attempting to implement ML into their organizations. In most cases, these failures are rooted in a lack of understanding regarding the necessary processes and tools for MLOps.  See if any part of the following description resembles your organization. A Data Scientist ventures into model development using a script found online, makes a few changes to match their goal, and runs it. The data they require is scattered across various locations, making it difficult for the Data Engineers to fulfill the Data Scientist’s request while keeping things managed and secure. There's little understanding of the timeline regarding the processes from development to production within the CI/CD pipeline. A Model registry is a distant dream, with no historical records of model versions, making comparisons and rollbacks a nightmare.  Security is an afterthought. Collaboration is hindered, accessibility is limited and risk looms over the absence of mitigation plans.  It's a chaotic reality, desperately begging for a systematic approach. If even a quarter of the above description sounds familiar, you can take comfort in the fact that many other organizations have started their ML journey in this fashion. There are professionals who have seen it all and can help get you on the right track. We at CloudZone do exactly that. Why Establishing an ML Operation Is Crucial The road to realizing tangible value from data using ML is paved with choosing the right infrastructure, processes, and tools matching your organization. Without these essential components, your journey may hit frustrating roadblocks.  Neglecting to implement this necessary groundwork can prove counterproductive in numerous ways. It could open doors to security breaches, leaving sensitive data exposed and vulnerable. Without streamlined processes, operations may grind to a halt, causing costly delays. Resources, both financial and human, might be squandered as inefficiencies multiply. In essence, the absence of a well-structured ML operation could impede progress and undermine the very goal you set out to achieve. What MLOps Done Right Looks Like To incorporate machine learning effectively, businesses must focus on many foundational aspects of becoming data-driven organizations.  While much of the effort will depend on internal expertise, specific tools and services from cloud providers are essential for addressing complex challenges. Let’s look at what we consider to be foundational priorities: Tracking and Versioning for Experiments and Model Training Runs Meticulous tracking and versioning of experiments and model training runs are fundamental to a successful MLOps strategy. The ability to reproduce a successful model is highly important. Services such as AWS SageMaker can enable the recording of these essential details, ensuring transparency, collaboration, and reproducibility. This enables organizations to learn from both successes and failures, continually improving their machine learning models. Setting Up Deployment and Training Pipelines Once a model proves its fortitude in the experimental phase, the next step is development. This process is complex and requires structured training and evaluation pipelines. AWS sageMaker has the ability to manage it for you with SageMaker Pipelines, such as performing proper model monitoring to prevent model skew and data drift which helps your organization keep a vigilant eye on model performance. These mechanisms ensure models function optimally in real-world scenarios and allow for swift intervention in the event of predictions. Streamlining Workflow Efficiency Efficiency is at the core of MLOps. Streamlining the model lifecycle process requires well-defined workflows that minimizes bottlenecks and maximizes resource utilization. CI/CD practices tailored to the ML training process automate the transition from development to production, reducing manual interventions and speeding up the deployment process. An optimized workflow ensures quality models are readily available for decision-makers. Scaling MLOps to Business Needs Scalability is a paramount consideration in MLOps. Organizations must design systems and workflows that can seamlessly adapt to evolving business needs, increased data volumes, and growing model complexity. Investing in a scalable platform and building an optimized architecture ensures that the ML development process remains flexible and aligned with the organization's growth trajectory. Dealing with Sensitive Data at Scale For organizations handling sensitive data, security and compliance are non-negotiable. Robust data encryption, stringent access controls, and adherence to industry regulations are crucial when operating at scale.  Embrace the Power of the Cloud - Amazon SageMaker as an Example Let’s briefly highlight a few of the benefits of using their ML operations cloud service called SageMaker. Fully Managed Amazon SageMaker handles everything, from the development IDE (jupyter notebooks) to training pipelines, model registry, Hyperparameter optimization and deployment.  AutoML Capabilities Automatically generate and fine-tune machine learning models based on your own data imported from S3 while maintaining control and visibility. Without the need to perform feature engineering and model development.  Security and Compliance Built-in security features, including encryption, access control, VPC support, network isolation, and audit logging, ensure data and models remain secure. High Scalability SageMaker dynamically scales resources, optimizing costs and achieving remarkable scaling efficiency. Work With Experts and Move to the Cloud  In conclusion, it's time to say goodbye to an archaic model development process, server-based approaches, and data management chaos. Instead, bring order to your ML model lifecycle by transitioning to an mlops platform in the cloud. Don't Reinvent The Wheel We at CloudZone are here to offer our guidance. Chances are, we have witnessed and resolved similar challenges in countless organizations like yours. Our expertise lies in bridging the gap between Data Scientists, ML Engineers and DevOps teams, enabling collaboration, scalability, and reliability in the ML lifecycle. Ultimately, we are here to help your organization streamline and automate machine learning models for greater efficiency, scalability, and at lower risk.  Ready to take the first step in streamlining your MLOps journey?  Our team of ML experts is here to help. We'll review your Machine Learning operation and guide you on how to optimize it for maximum business value from your data. Don't let your ML potential go untapped; let's make it work for you. Reach out to us today for a personalized consultation!

Read More
CloudZone

From Raw Data to Insights: The Power of Data Platform

In today's digital landscape, organizations that want to improve decision-making and gain a significant advantage must be data-driven, as data is a crucial resource for increasing efficiency and effectiveness. Organizations leveraging data in decision-making can gain valuable insights into their business operations, products, and industry trends. In doing so, they optimize performance, improve services, and reduce costs. To do so, data-driven organizations often invest in advanced data analytics tools and technologies and have skilled data teams to interpret insights. However, ensuring fast response times and accommodating diverse use cases while capturing, storing, and processing datasets can be challenging for organizations handling large data volumes – one of the most significant challenges being data silos (refers to scenarios where data is not shared or integrated across different systems or departments). Over time, the industry rose to the occasion, responding to this challenge by providing an evolving solution, data platform. What is a Data Platform? A data platform serves as a central repository for managing an organization's data, allowing data-driven decisions to be made. It is a set of technologies, tools, and infrastructure that enable data collection, processing, storage, visualization, and governance. The architecture of a data platform should be scalable and flexible to handle various data types and formats, including structured, unstructured, and semi-structured data. A data platform is built upon several layers, each serving a specific purpose. These layers work together to provide a complete end-to-end data management solution in one place, functioning as a central location for an organization's data (SSOT). Platform's Layers Data Sources Data sources are the various systems (external or internal to an organization) from which data is collected, such as operational databases, streaming applications, etc. Furthermore, data sources may include structured, semi-structured, or unstructured (i.e., spreadsheets, JSON, or images). Ingestion Layer The ingestion layer collects data from various sources into a central repository (such as a data warehouse or data lake). This layer involves the creation of data pipelines, connecting data connectors to different data sources, as well as data quality testing and data cleansing. The data ingestion pipeline (batch-based or streaming) uses an ETL (Extract, Transform, Load) process where data is extracted with the original format, transformed, and then loaded into a destination. A use case for ETL is an e-commerce site with sales data from multiple countries. ETL is used to extract data from each country's database, transform it into a standardized format, and load it into a central data warehouse. The result is a comprehensive view of sales data. Once the updated data is collected in the ingestion layer, it must merge with the existing data. However, before this merge can occur, raw data must first undergo data cleansing and quality: this includes standardization, validation, deduplication, transformation, etc. By utilizing the ingestion layer in combination with data quality and cleansing, the collection and analysis of incomplete data is avoided. This helps prevent unnecessary waste of organizational resources. Another similar process is ELT (Extract, Load, Transform), which can load raw data as quickly as possible before the transformation. In other words, the data is transferred in raw form without modification or filtering. When the data load is completed, it’s transformed inside the target system. Processing Layer The processing layer is where raw or collected data is processed into meaningful information for various purposes, such as analysis methods, ML models, applications, and more. It performs a series of operations on large amounts of data to prepare such data for user, system, and application consumption. Techniques from machine learning, data mining, and data analytics are used to enrich data in the processing layer and prepare it for further use. These techniques include extracting insights and knowledge from large datasets. This layer provides tools for stream and batch processing. Stream and batch processing Stream processing refers to the ability to analyze and manipulate data created in real-time. It enables organizations to process data from multiple sources at a higher refresh rate, allowing them to analyze and act upon it quickly. On the other hand, batch processing involves processing large volumes of data in batches with a lower refresh rate (typically done overnight, during off-peak hours, or on a regular schedule). Batch processing is often used for tasks that require significant computational resources as it can take a long time to complete (i.e., report generation).  As noted above, ELT (Extract, Load, Transform) involves extracting raw data from source systems, loading it into a target system, and transforming it as needed. The last step of ELT is transformation. This step involves processing the loaded data through data cleansing, normalization, and enrichment (among other processes) to ensure that data is prepared as required. Storage Layer The storage layer refers to the cloud infrastructure that manages and stores data efficiently (includes data lakes, data warehouses, etc). Depending on the use case, the layer can consist of RDBMS, S3, DHW, NoSQL databases, etc. In addition, this layer is critical to ensure data availability, security, and low latency – with the choice of storage depending on several factors, such as cost, performance, structure, and scalability. Serving Layer The serving layer provides availability and quick access to data for end-users, including BI analysts, data scientists, customers, applications, and dashboards. This layer enables end-users to analyze and interact with the data in various ways. It promotes transparency and collaboration by using data visualization, which provides easy-to-understand visual information displays. Additionally, the serving layer supports different data access patterns through a data catalog that contains metadata describing various datasets and data assets. The data catalog helps organize, classify, and document data assets in a standardized way, making it easier for end-users to find and access the necessary data. Governance Layer The governance layer is responsible for how an organization uses data through policies and procedures. This layer ensures data is secure and compliant with relevant industry standards. The effective governance layer involves several key processes that are essential for guaranteeing the accessibility and integrity of an organization's data. These processes include data catalog, data observability, and orchestration. Data catalog, data observability, and orchestration A data catalog creates an inventory of an organization's data assets, including information about their location, format, and metadata, making it easier for organizations to find and access their information. Data observability is understanding, monitoring, diagnosing, and managing data health across the platform's lifecycle. This includes an essential process that involves tracking data from its source (where it was initially created) to its changes until it's consumed, providing a complete picture of how data moves through an organization's systems. This helps identify situations before they have a significant impact on the business. Finally, there is orchestration, the essential part of this layer. It refers to the coordination of tasks and enables the automation of data workflows, reducing the risk of errors and inconsistencies. Conclusion Data platform layers must work seamlessly together to provide end-to-end data management capabilities and create a central location for organizational data. This is exactly why organizations need to choose a platform that caters to their specific requirements to achieve optimal performance at the lowest cost. That said, whether you're a startup or an established enterprise, it's time to embrace the power of a data platform and unlock the full potential of your data. If you’re considering a shift to a data platform or want to learn more, contact us. In the meantime, how about giving part two of our data platform series a read? 

Read More
CloudZone

Virtual Private Cloud (VPC) Flow Logs: What They Are and Why You Need Them

As businesses increasingly move their operations to the cloud, it has become more important than ever to ensure the security and performance of cloud-based networks. Cloud environments like Amazon Web Services (AWS) offer a wide range of tools and services that can help users manage their networks, but it can be difficult to gain visibility into network traffic and activity. One of the key tools available for monitoring and optimizing network performance on Amazon Web Services (AWS) is VPC Flow Logs.  In this blog, we'll explore what VPC Flow Logs is, how it works, and why AWS users might need it. We'll also provide a short tutorial on how to enable them. Gain invaluable insights VPC Flow Logs is a logging mechanism that provides detailed information about the network traffic flowing in and out of your Virtual Private Cloud (VPC) on Amazon Web Services (AWS). By enabling VPC Flow Logs, you can gain valuable insights into the types of traffic entering and leaving your VPC, in addition to metrics, such as the amount of data transferred. This useful feature can provide a wealth of information, including source and destination IP addresses, ports, protocol, traffic direction (ingress or egress), and more. Analyzing this information can be highly beneficial for a range of purposes such as identifying and resolving network issues, improving network performance, and monitoring network traffic for security-related concerns. Debug and analyze network issues By using VPC Flow Logs, you can also gain deeper insights into high traffic rates within a specific VPC or even at the subnet level. These insights can be invaluable for debugging and analyzing network issues, as well as identifying the reasons behind high costs. For example, if a client is concerned about the high cost of their NAT Gateway transfer, you can enable VPC Flow Logs in the subnet associated with the NAT Gateway. This will provide detailed information about source and destination IP addresses, ports, and packet counts, sorted by the highest number of packets transferred. With this information, you can identify the reason for the high usage of the NAT Gateway and determine if it is justified or if additional actions are required to minimize costs. The greatest benefit: Analyze your logs with ease One of the main benefits of VPC flow logs is that they can be analyzed by using various different AWS Services, for example, CloudWatch Logs insights that can help reduce text and make it easier for users to analyze their logs. This is because VPC flow logs can capture a large amount of data about network traffic, but they do so in a structured format that can be easily analyzed using tools and scripts. For example, instead of having to manually parse through text-based logs to identify patterns and anomalies in network traffic, you can use VPC flow logs to quickly identify issues such as security threats or performance problems. By analyzing the flow logs, you can gain insights into how your applications and services are using network resources, and identify areas where you can optimize network configurations. Get Familiar with Flow Logs Costs The VPC Flow Logs service incurs a charge for streaming logs to a destination, which is based on the amount of data streamed in gigabytes (GB) to the chosen endpoint. The cost of streaming varies depending on the endpoint type and the region it is located in. The available endpoints are S3 Bucket, CloudWatch log groups, and Kinesis Firehose. For a detailed breakdown of the costs associated with the VPC Flow Logs service, please refer to the "Logs" tab under the "Vended Logs" section on the AWS pricing page (assuming you are in the Paid Tier). There, you will find more in-depth explanations about the different costs associated with the service, and further information on how to calculate the total cost based on your specific usage requirements. A short guide to enabling Flow Logs Flow Logs can be enabled on the entire VPC or the subnet level Go to the AWS console and go to VPC. Find the desired VPC or subnet, click on the checkbox next to the desired VPC or subnet, and go to the Flow Logs tab. Click on ‘Create flow log’. In the Flow Log page, do the following: Give a name to the Flow Log. Since we want to focus on the CloudWatch destination, check that the ‘Send to CloudWatch Logs’ option is selected. Create a log group and choose it (How to create a log group). Create an IAM role for log streaming (How to create an IAM role for CloudWatch destination streaming). Choose either ‘AWS default format’ for your log, or choose a ‘Custom format’(How to choose the log record format). NOTE: It is important to mention that once the Flow Log is created, the log record format, IAM role, and destination log stream cannot be changed. To change one of these parameters, the previous Flow Log needs to be deleted, and an entirely new one has to be created with the correct configuration. Click on ‘Create flow log’. After creating a flow log, the page should look like this:   How to create a log group Go to CloudWatch and open the menu on the left side. Choose ‘Log groups’. Click on ‘Create log group’. On the ‘Create log group’ page, give a name to the new log group and click ‘Create’. How to create an IAM role for CloudWatch destination streaming Go to the IAM console and create a new role. Try to choose a name related to the flow logs stream to CloudWatch, e.g. VPCFlowLogStreamToCloudWatch) Follow this AWS documentation: https://docs.aws.amazon.com/vpc/latest/userguide/flow-logs-cwl.html. In the role, choose ‘Custom trust policy,’ copy the trust policy for the streaming from the official documentation, and paste it. === START POLICY === {    "Version":"2012-10-17",    "Statement":[       {          "Effect":"Allow",          "Principal":{             "Service":"vpc-flow-logs.amazonaws.com"          },          "Action":"sts:AssumeRole"       }    ] } === END POLICY === After clicking ‘Next,’ you’ll be directed to the policies page where you can choose ‘Create policy’ in order to begin creating a new policy. Again, try to name it in a way that corresponds to the role name. Choose ‘JSON editor’ for the permissions, copy the permissions for the streaming from the official documentation, and paste it. === START POLICY === {    "Version":"2012-10-17",    "Statement":[       {          "Effect":"Allow",          "Action":[             "logs:CreateLogGroup",             "logs:CreateLogStream",             "logs:PutLogEvents",             "logs:DescribeLogGroups",             "logs:DescribeLogStreams"          ],          "Resource":"*"       }    ] } === END POLICY ===   How to choose the log record format You can choose the default option for the Flow Log form. This gives you basic information, such as source or destination addresses and ports, as well as packet count and size. ${version} ${account-id} ${interface-id} ${srcaddr} ${dstaddr} ${srcport} ${dstport} ${protocol} ${packets} ${bytes} ${start} ${end} ${action} ${log-status} Alternatively, choosing a customized log record can give you additional information such as flow direction (ingress or egress traffic), traffic path, and more. To read more about the options, follow this link: Available fields for Flow Log records formatting. Once the flow logs are created with the specified or default fields, it is important to know the order in which they are created. This is critical for later querying. In order to access this information, open the AWS CLI, and enter the following command: === START CODE === aws ec2 describe-flow-logs --flow-log-ids "<flow log id>" === END CODE === The output should look like this. === START OUTPUT === {    "FlowLogs":[       {          "CreationTime":"<flow log creating time stamp>",          "DeliverLogsPermissionArn":"arn:aws:iam::<account_id>:role/<flow log streaming role>",          "DeliverLogsStatus":"SUCCESS",          "FlowLogId":"flow-log-id",          "FlowLogStatus":"ACTIVE",          "LogGroupName":"<destination log group streamed to>",          "ResourceId":"<VPC ID>",          "TrafficType":"ALL",          "LogDestinationType":"cloud-watch-logs",          "LogFormat":"${account-id} ${action} ${bytes} ${dstaddr} ${dstport} ${end} ${flow-direction} ${instance-id} ${interface-id} ${log-status} ${packets} ${pkt-dst-aws-service} ${pkt-dstaddr} ${pkt-src-aws-service} ${pkt-srcaddr} ${protocol} ${srcaddr} ${srcport} ${start} ${traffic-path}",          "Tags":[             {                "Key":"Name",                "Value":"<flow log name>"             }          ],          "MaxAggregationInterval":600       }    ] } === END OUTPUT CloudCatch log group querying Go to CloudWatch and choose ‘Log groups’ in the menu. Select the destination log group you created for the flow logs, choose the specific log group in the selection box next to it, and click on ‘View in Logs Insights’. Upon entering Logs Insights, you will see a page like this one: Query syntax for flow logs in CloudWatch Insights CloudWatch Insights has a specific syntax for querying. Also called InsightsQL, It is similar to SQL syntax. For flow logs, we need to understand how the flow log record structure is built before starting to build a query for it. Log group record structure seen in cloudwatch logs. The message field contains the flow log record message and is the field we need to analyze. The message body is built by the log record format (order included) we saw in the ‘describe flow logs’ output in the AWS CLI (Reminder). The logic of the query is to break the message body into distinctive segments, alias each segment, filter according to our needs, and build a more organized output table for us to understand. We will use this example query and work to understand each line: === START CODE === parse @message "* * * * * * * * * * * * * * * * * * * *" as account_id, action, bytes, dstaddr, dstport, end, flow_direction, instance_id, interface_id, log_status, packets, pkt_dst_aws_service, pkt_dstaddr, pkt_src_aws_service, pkt_srcaddr, protocol, srcaddr, srcport, start, traffic_path | stats sum(packets) as packetsTransfered by flow_direction, srcaddr, dstaddr, protocol, action | sort packetsTransfered desc | limit 5 === END CODE === Parse @message. === START CODE === parse @message "* * * * * * * * * * * * * * * * * * * *" as account_id, action, bytes, dstaddr, dstport, end, flow_direction, instance_id, interface_id, log_status, packets, pkt_dst_aws_service, pkt_dstaddr, pkt_src_aws_service, pkt_srcaddr, protocol, srcaddr, srcport, start, traffic_path === END CODE === The parse ‘@message’ serves to break the message body into smaller segments. The ‘*’ is the number of different individual segments taken from the message body, so it is VERY IMPORTANT to match the number of ‘*’s to the aliases afterwards. For example, a message could be built with the following fields: (srcaddr, srcport, dstaddr, dstport). If that is the case, the message will be built as follows: @message 10.0.1.45 64536 142.45.56.10 80 parse query: === START CODE === parse @message "* * * *" as srcaddr, srcport, dstaddr, dstport === END CODE === NOTE: Remember, the order HAS to match the order shown in log record format as every ‘*’ represents a segment in the message body. Stats, as, by line. === START CODE === | stats sum(packets) as packetsTransfered by flow_direction, srcaddr, dstaddr, protocol, action === END CODE === The stats line represents the new formatted table we want to see as an output to our query, containing the relevant information for the situation. For example, in the above query, we want to inspect the sum of packets (stats sum(packets)) and push it into a column and rename the column name to ‘packetsTransferred’ (as packetsTransfered) and build the structure of the output column by other fields we parsed from the message (by flow_direction, srcaddr, dstaddr, protocol, action). NOTE: It is important to remember that we can build stats based on the fields we extract from the message parse. This means that, if we do not have critical information, like an alias for dstaddr, we cannot build out stats by dstaddr. Example parse “* * *” as srcaddr, dstaddr, packets | stats sum(packets) as packetSum by srcaddr, dstaddr Sort line === START CODE === | sort packetsTransfered desc === END CODE === This line represents a sort by logic where we want to sort the counts stat in descending sorted column (desc) or ascending sorted column (asc). Example If we have a stat of counts, sum, or any other numeric metric we created in the output, we can sort it into descending or ascending order. Limit line. === START CODE === | limit 5 === END CODE === This line represents the limit of the number of rows we want to see in our output stat column. For example, if we write ‘| limit 5’ we will see only 5 rows in the output result. But, if we say ‘| limit 50’, we will see up to 50 rows. In cases where the end result has only 20 rows, we will only see 20 rows, even if we set the limit to 50). Filter line. === START CODE === //Not shown in the example but still relevant | filter flow_direction like 'ingress' === END CODE === The filter command helps to filter in specific field values that are relevant. So, if we only want to see the ingress traffic that goes into a desired VPC, we add a filter command so that the stat output will show only the traffic_direction that has the value ‘ingress.’  An example of query and the result: Query and Result Example === START CODE === parse @message "* * * * * * * * * * * * * * * * * * * *" as account_id, action, bytes, dstaddr, dstport, end, flow_direction, instance_id, interface_id, log_status, packets, pkt_dst_aws_service, pkt_dstaddr, pkt_src_aws_service, pkt_srcaddr, protocol, srcaddr, srcport, start, traffic_path | stats sum(packets) as packetsTransfered by flow_direction, srcaddr, dstaddr, protocol, action | sort packetsTransfered desc | limit 5 === END CODE === Final Thoughts VPC Flow Logs are a critical component of any security and compliance strategy for AWS users. It offers a simple yet powerful way to capture and analyze network traffic within the VPC, providing valuable insights into potential security threats and network performance issues. By enabling VPC Flow Logs, users can gain more control and visibility over their AWS environment and take proactive measures to safeguard against cyber threats. VPC Flow Logs is an essential tool for any organization using AWS and should be a part of their overall security and compliance strategy.

Read More
CloudZone

Simplifying Your Data Access

Amazon S3 Multi-Region Access Point: Simplifying Your Data Access Across AWS Regions Amazon Web Services (AWS) offers a range of Cloud storage solutions, including the popular Amazon Simple Storage Service (Amazon S3). Due to its durability, scalability, and low cost, Amazon S3 is widely used by businesses of all sizes. However, as your data needs grow and your business expands globally, you may need to access your Amazon S3 data from multiple regions. This is where the Amazon S3 Multi-Region Access Point feature comes in. What is the Amazon S3 Multi-Region Access Point? The Amazon S3 Multi-Region Access Point is a feature that simplifies the process of accessing your data across multiple geographic regions. It allows you to create a single endpoint that can subsequently be used to access your S3 buckets from across multiple regions. This means it’s significantly easier to manage your data and reduce your costs because you no longer need to manage a separate endpoint for every region. How does it work? Before you can use the Amazon S3 Multi-Region Access Point, you’ll need to create an access point (or a unique name that identifies a specific S3 bucket) in each region where you want to store your data. Once you have created an access point, you’ll decide who can access the data, how it can be accessed, and what actions can be performed. Next, you’ll create a Multi-Region Access Point, which is a virtual endpoint used to access your data across multiple regions. You’ll assign the previously created access points to your Multi-Region Access Point, and you’ll set up routing rules to control which access point is used for which requests. This allows you to optimize data transfer and reduce latency. If you have questions while creating a Multi-Region Access Point, you may refer to: https://docs.aws.amazon.com/AmazonS3/latest/userguide/MultiRegionAccessPoints.html  The S3 Multi-Region Access Point Architecture The diagram below is a reference architecture to access S3 Objects from private EC2 instances, using VPC Endpoint to access the S3 Multi-Region Access point. This diagram uses the AWS PrivateLink to connect and to avoid exposing data to internet traffic. Accessing S3 Objects from AWS Private EC2 Instances In order to access S3 objects from EC2 instances using AWS CLI, you must use the S3 Multi-Region Access Point arn and the S3 protocol. You are not able to list or copy S3 objects by referring only to the name on each different region’s S3 bucket. Below, you can find some AWS CLI examples for reference: The command below demonstrates how to copy S3 objects from another region to a local EC2 instance EBS, as well as how to upload files from the local EC2 to an Amazon S3 bucket in another region. What are the benefits of the Amazon S3 Multi-Region Access Point? Simplified data access: By creating a single endpoint that can be used to access your data across multiple regions, you simplify the process of managing your data and reduce the need for multiple endpoints. Reduced costs: Using a single endpoint can reduce the number of requests to S3, which can help reduce your data transfer costs. You can also use routing rules to optimize data transfer and further reduce your costs. Improved performance: Both the optimization of data transfers and the reduction of latency can help improve the overall performance of your applications. Enhanced security: You’ll be able to assign policies to control who can access your data, how it can be accessed, and what actions can be performed. Each of these steps help enhance the security of your data. Simplifying Your Data Access Across Regions Amazon S3 Multi-Region Access Point is a powerful feature that can help simplify data access while also reducing costs, improving performance, and enhancing security – all by creating a single endpoint to access your data across multiple regions. If you are using Amazon S3 and need to access your data from multiple regions, the Amazon S3 Multi-Region Access Point is definitely worth considering.

Read More
CloudZone

Making Your Solution SaaS Ready

How to prepare and leverage your solution’s listing on AWS Marketplace?  The AWS Marketplace offers an efficient and effective sales channel where software companies can sell solutions to AWS customers – and scale globally – without needing to handle all of the complicated or time-intensive tasks associated with AWS Marketplace Listings.  However, the process required to prepare your solution for listing on the AWS Marketplace can be lengthy and complex, especially if it’s your first time. Still, this process is critically important to assess the readiness of your SaaS and develop it far enough to achieve AWS validation through the Foundational Technical Review (FTR).  The Far-Reaching Influence of AWS Marketplace  By listing your solutions on AWS Marketplace, you’re signing on to access potentially game-changing benefits for your company. This platform enables you to accelerate the growth of your business, drive customer acquisition at scale, reduce the timeline of your go-to-market, and leverage both the power of AWS co-selling and the reach to new territories.  So whether you need the freedom to focus more on your core business or the skill set to best utilize this advanced and services-rich cloud platform, the far-reaching influence of AWS Marketplace could help you reach exponential growth.  Preparation Leads To Hassle-Free Sales  However, before you can experience any of these benefits, it’s critical to assess your SaaS readiness. There are many questions to consider during this preparation process, but a few should be top of mind:  Are you going to migrate an existing solution or do you already have a SaaS solution? What SaaS migration approach is best for you?  Is your SaaS ready to support a large volume of use and an increased customer base?  What are your plans for pricing? Are you thinking about a contract-based model, pay-as-you-go or a combined model? What gaps exist in your current architecture?  What still needs to be done to have the design of your SaaS product ready for market?  By answering these questions with your team – and building actionable steps to address them – you’ll help to streamline your migration to the AWS Marketplace.  Attaining the AWS FTR Validation for Your SaaS After you’re confident with your SaaS readiness, the next most significant hurdle is to attain AWS validation, often referred to as the Foundational Technical Review (FTR). In order to list list your SaaS on the AWS Marketplace, your solution will need to be examined for security risks and design gaps, as well as, prepare an in-depth migration plan and submit for approval. Without attaining the FTR, it’s not possible to guarantee that your product can be successfully sold on the AWS Marketplace.  Tackling the AWS Marketplace with CloudZone  At CloudZone, we’re working to simplify the go-to-market journey for your solution. By partnering with our team of experts for both a SaaS Readiness Assessment and SaaSification, we’ll be able to enhance the potential of your go-to-market solution while also reducing the time-to-market between today and your solution going live on AWS Marketplace. We will take care of listing your solution, ask the important questions, and alert you to any gaps in the solution so you can focus on the core of your business. If you need support with streamlining the buying and selling process, and expanding your solution’s audience in a shorter amount of time, reach out to our team today to apply for SaaScribe. 

Read More
CloudZone

AWS Summit TLV 2023

What We’re Looking Forward to at AWS Summit TLV 2023 The highly anticipated AWS Summit Tel Aviv is back on May 31, bringing technologists together to connect, collaborate, and learn about all things AWS. Attendees will discover firsthand how the Cloud is accelerating innovation for businesses of all sizes. With 60+ interactive sessions, insightful talks, and hands-on workshops to look forward to, this free in-person conference will equip attendees with the skills to effectively build, deploy, and operate infrastructure and applications. Here are 4 standout sessions that the CloudZone team looks forward to the most: From Software to SaaS to Co-Selling Opportunities with AWS: Amir Hazoom, SaaS Solutions Architect at CloudZone, will present our best-practice methodology for delivering Software as a Service (SaaS) efficiently and flexibly. The session will cover critical areas for success, including architecture, security, user experience, pricing, deployment to the market, and the Foundational Technical Review (FTR). AWS Marketplace can be a gamechanger for companies looking to expand their business and co-sell with AWS globally, with the opportunity of getting in front of 1 million potential customers. Attendees can expect valuable insights and practical guidance on achieving optimal SaaS delivery,  maximizing collaboration with AWS and exploring co-selling opportunities. What's New with AWS Cloud Operations: Attendees will receive an overview of the key technical capabilities in the AWS Cloud Operations portfolio. This session will highlight how these capabilities help customers operate securely and efficiently in the cloud. Key customer use cases, such as observability, governance, compliance, centralized operations, and cloud financial management, will be discussed. The session will also demonstrate how many services in the AWS Cloud Operations portfolio can operate in hybrid and multi-cloud environments. AWS Loves Startups: AWS has been supporting startups in their growth and scale for over 14 years. In this session, attendees will hear real-life examples of Israeli startups that have accelerated their businesses with AWS support and programs. It's an opportunity to learn how AWS can contribute to the success of startups throughout their journey from early stages to scale-ups. Develop your ML Project with Amazon SageMaker: This session focuses on developing a complete machine learning (ML) project using Amazon SageMaker. Attendees will explore data pre-processing and feature engineering techniques, train ML models with SageMaker's capabilities, and deploy them using SageMaker hosting. Additionally, insights into utilizing SageMaker Studio as an integrated development environment (IDE) for machine learning will be shared. The CloudZone team will be available at our booth to answer any questions and discuss the various opportunities AWS Marketplace offers for startups and tech companies. AWS Marketplace provides an alternative revenue stream and an effective sales channel to sell solutions to AWS customers and scale internationally. Our Cloud specialists are dedicated to simplifying the listing process and ensuring a smooth journey. Whether you're a seasoned AWS professional or just starting your Cloud journey, the AWS Summit Tel Aviv 2023 promises to be an enriching experience - offering the opportunity to unlock new AWS platform skills. Don't miss the unique chance to connect and learn from AWS experts. Secure your spot by registering here, and we'll see you there!

Read More
CloudZone

Maximizing Revenue: The Power of AWS Marketplace

AWS Marketplace is a New Stream of Revenue for SaaS Startups and Tech Companies - and the Benefits are Game-changing  As a startup or tech organization, you’re on the lookout for new revenue streams, but you may be missing out on a substantial opportunity to get exactly that.  AWS Marketplace is an initiative by AWS that lets SaaS startups and tech companies get in front of AWS customers globally. Marketplace offers companies an alternative revenue stream - a new, effective sales channel to sell your solutions to AWS customers and scale internationally. The recent market downturn has been a cause for concern for many startups worldwide, but for those seeking a respite, AWS Marketplace could be a much-needed sigh of relief. This journey to expansion, however, can be tedious if you’re not familiar with it - and that’s where we at CloudZone step in. Our team of experts ensures that the entire process is as smooth as possible, so you can focus on what matters most - your core business.  One million potential customers for your SaaS solution With one million potential customers on AWS’ database in 25 regions, it’s a no-brainer - the platform is abundant in opportunities for tech companies to expand their reach. Our mission at CloudZone is to help simplify the journey. Our team of experts and convenient automated processes enable you to reduce your time to deployment. Apart from simplifying the buying and selling process and reducing time spent on procurement processes, you’ll be able to unlock co-sell opportunities leveraging CloudZone’s AWS presence and extensive customer base for a widespread, global reach. We help you meet the requirements. If your organization’s solution is not already a SaaS solution - or is, but doesn’t already adhere to AWS’ guidelines, we’ve got you covered. The CloudZone team is at your service to help convert it into one. Get in front of a global audience in just 5 steps “Where do I even begin?” is a common question from organizations looking to list on AWS Marketplace, and why CloudZone introduces a helpful step-by-step approach to getting started: Step 1: SaaS Readiness Assessment Step 2: SaaSification Step 3: Product listing (SaaS/AMI/PS) Step 4: Marketplace Enablement Step 5: Marketplace seller as a service - optional  Take your AWS Marketplace game to the next level with MaaS (Marketplace as a Service) Once you’ve completed our SaaScribe process and your solution is successfully listed on AWS Marketplace, you can continue working with us. This is an (optional) ongoing consulting service dedicated to maintaining and optimizing your SaaS solution on the Marketplace platform. For a one-time fee, the CloudZone team will provide you with ongoing support managing your SaaS solution, quarterly technical consulting sessions, and metric analysis to make your AWS Marketplace listing experience hassle-free. We promote your solutions on our site and customer portal - providing global reach, and support on your go-to-market strategy (such as joint promotion on CloudZone social media, etc.). Your AWS Marketplace listing is an avenue to endless opportunities in a fragile economic market. Why embark on the journey alone, especially when the path can be time-consuming? Let us do the heavy lifting while you focus on your core business! We at CloudZone help accelerate your business and drive customer acquisition at scale by listing your solution in AWS Marketplace - taking the lead and simplifying the process. Contact a member of our team today to get started. For more details, read our latest article on the subject here.

Read More
CloudZone

AWS CloudOps by CloudZone

As an AWS Premier Partner who manages more than 300 AWS environments, we understand that managing your cloud environment from an operational aspect can be challenging and time-consuming. To allow our customers to focus on their actual business we have created tools for Cloud Operations on AWS. Our highly experienced team offers monitoring services for your AWS account, which tracks both your infrastructure and your applications that are hosted on your AWS cloud account. We operate 3rd party tools that allow us to visualize, analyze metrics/logs and track your AWS account resources. CloudZone proactively identifies issues, troubleshoots problems, optimizes performance, and integrates AWS services like CloudWatch to obtain deeper insights into our customer’s system behavior. Our advanced monitoring tools allow us to quickly respond to any incidents and minimize their impact on our customers, 24/7. We operate our own FinOps team of experts who provide consultancy around best practices and cost optimization of your AWS environment. Our FinOps services include: Training around cost optimization best practices and approaches, as well as basic training for 3rd party visibility tools. Saving Recommendations - We will proactively provide you with reports on potential savings, required actions, and tasks to help you maintain a FinOps culture. Visibility & BI Platform – Our team will create tailor-made reports which will be automatically sent to the relevant stakeholders, and show resources and service costs. Commit Services – We will create a commitment strategy and apply RI and Saving Plans commitment recommendations to reduce short and long terms costs. Governance & Monitoring – We will define life cycle rules and automatic procedures to control costs, and implement policies. We will also define a threshold budget, set alerts, and tag all relevant resources in your Pricing Model KPIs – We will break down your Cloud costs into business units so you can easily understand how your costs are allocated to the different products in your organization.

Read More
CloudZone

Google Cloud Day is Returning to Tel Aviv!

Here Are the Top 3 Sessions We Can't-Wait to Attend The renowned Google Cloud Day seminar returns to Tel Aviv on 27 March 2023. This one-day extravaganza offers attendees the golden opportunity to learn from Google Cloud experts, explore the latest cloud tools, and discover new trends. If you are passionate about building tomorrow’s innovations today, you won’t want to miss out on learning how Google Cloud can help you to do so. Here are the top 3 event features that the CloudZone team is looking forward to the most… The serverless platform engineering workshop In Track 1, “The serverless platform engineering workshop”, you will gain hands-on practical experience with cloud services, event-driven architecture, and serverless frameworks, as well as best practices for security, scalability, and cost optimization. This part of the agenda is designed for professionals who are interested in learning about the latest trends and techniques in platform engineering, and how to build, deploy and operate scalable and highly available platforms.  The kick-off session will be, “The importance of platform engineering in a serverless world”, where attendees will explore the key skills and best practices that platform engineers need to master in order to succeed in this fast-evolving landscape. We can’t wait! Transformative databases with Google Cloud: build better applications faster  Applications are getting faster and smarter, and each one creates more velocity, more complex computations, and demands minimum latency. This informative session in track 2 will dive into GCP modern Databases that allow you to serve those applications with the best cost efficiency and most importantly, scalability and reliability. Later on, the “Google Cloud well-architected data security at scale” session will cover the security capabilities and best practices of Google Cloud for securing data. The rapid growth of cloud-based data analytics has increased the need for effective security measures to protect sensitive data and prevent unauthorized access. Google Cloud offers a range of security features, including segmentation, role-based access control, data classification, data catalog, and much more that we are excited to learn about! The Infrastructure and Operations Track The Infrastructure and Operations track will offer a wealth of knowledge and hands-on experience with the latest advancements in managing and optimizing infrastructure on Google Cloud. With a focus on hands-on learning and expert insights, attendees will delve into a range of topics, from securing web applications to maximizing performance and efficiency and advancing their skills with innovative tools and services.  We at CloudZone are passionate about Infrastructure and Operations, and our team of certified senior solution architects is available for ongoing professional consulting advice. The team is highly experienced in a wide range of technical domains including Cost Oriented Cloud Infrastructure, Big Data Analysis, App Modernization, Security, DevOps, MLOps, Migration, Cost Oriented Design, and more. With so much in store, our team of cloud experts can’t wait to experience Google Cloud Day - feel free to come say hello! What better place to discuss the latest cloud news, and see how you can utilize them in your organization? Register here and we’ll see you at our booth!

Read More
CloudZone

Migrating to AWS Is Not a Moonshot

By Sérgio Santos, Solutions Architecture Lead, CloudZone Iberia Amazon Web Services (AWS) is not housed in the sky – although AWS’ focus on the cloud may lead some to think otherwise. Instead, AWS functions because of a massive (earthbound) infrastructure, built to provide highly affordable, available, reliable, scalable, and secure computing power as well as unlimited storage. For every web service that Amazon provides, there is a well-defined model for its deployment and configuration, as well as its security, access management, operations, and usage charging. The key to understanding these varied models is the AWS Shared Responsibility Model. From the moment that you decide to launch a web service in the form of Infrastructure (IaaS), as a Packaging Platform (PaaS), or as a comprehensive Software (SaaS), this document breaks down which operating, securing, and managing responsibilities fall to you and which are covered by AWS. Preparing for AWS Adoption The first step in planning a migration is preparing for adoption. After studying the platform, trying it out, and evaluating your experience, you’ll be best equipped to create a plan for how your business and your team members will work together to operate and secure it. All of this should be established over a Governance baseline; this will manage the project planning, the benefits to leverage, the risks to assess and control, the financial model to implement and, of course, the primary focus of a migration mission: your applications portfolio and your data. With AWS, there is no need to re-invent the migration process. Rather than leave you to your own devices, the Cloud Adoption Framework pairs you with an experienced AWS partner in order to assess your migration readiness, uncover gaps, and identify next steps that will enable you to build the sound foundational capabilities you’ll need. The Costs of Migration If you’re thinking about migrating your applications and data, you’re likely already running supporting infrastructure somewhere. It’s also likely that your existing setup required a significant investment in hardware and software systems, licensing, the tools to operate, secure, and manage these, as well as the technical ability to continuously develop and maintain the infrastructure. Considering this, it’s important to understand how migrating to AWS will change your Total Cost of Ownership (TCO), as well as what factors influence these numbers and what your options now are for your previous investments. There are numerous free-to-use tools and services that AWS provides for gathering and mapping existing resources, empowering you to look at the numbers for as many scenarios as you’d like before you make your final decision. Technical debt is another important concern for you to manage, but AWS boasts a well-defined learning and certification flywheel while also offering up-to-date training platforms and public web resources where cloud developers and engineers can continuously develop their technical skills. In addition, there are specific AWS programs and portals available for accredited partners looking to organize training plans and offer immersion days to customers that want to make the most of the Amazon Web Services. Building Mobilization Teams In order to understand what the next portion of the migration plan will look like, you need to know what teams and roles will be required at each subsequent phase. Not only does this require a detailed assessment of which workloads to migrate, but it also requires a deep dive into the infrastructure inventory and dependencies, as well as their operation criticality. Only at the end of these steps will you be able to envision what migration and modernization patterns will apply and what exactly your migration plan should look like. Next comes the mobilization phase, which is your opportunity to prepare for migration. This is when you need to define an Operating Model and identify which business and engineering team members will make up your Center of Excellence, as these will be the people focused on leading cloud adoption across the organization and maintaining alignment with your objectives and key results. These same engineers will be responsible for establishing the core platform’s capabilities; building operational standards; defining, monitoring, and enforcing security policies and controls; as well as enabling and implementing patterns the consumer teams can follow for integrated automation. Whether for reasons related to deployment, failure detection, self-healing response, application testing, data consistency validation, or remediation, automation is critical for a product-oriented delivery. Depending on the complexity and operational requirements of the workloads you’ll be migrating, preparation may require more or less effort; regardless, it is important to understand and explore every Amazon Web Service that could be leveraged for your unique needs. How the AWS Landing Zone Works for You Although mobilization workstreams are unique for every customer, there is one well-built, multi-account environment that is scalable, secure, and enables any organization to quickly launch and deploy workloads with confidence in this infrastructural environment: the AWS Landing Zone. The technical decisions involved in building a landing zone do require study of your account structure, networking, security, and access management in accordance with your organization’s growth and business goals. Numerous capabilities and features are included in AWS, empowering you to configure and customize your landing zone to fit your needs; these include AWS ControlTower, Service Control Policies, Guardrails, and Stacksets. The uses of these tools can also be expanded when used with other AWS partners’ solutions that are available in the AWS Marketplace. Implementing Mobilization Workstreams There are other mobilization workstreams to execute after the AWS Landing Zone in order to confirm the feasibility of the migration pattern and to decide on the proper combination of tools for supporting and managing the workload migration. As AWS is continuously investing in solutions for automating migrations at scale – and ensuring consistency and performance at the target state – there are multiple solutions available, including AWS Application Migration Service and Database Migration Service. If you’re facing the challenge of migrating many legacy enterprise workloads, there are also a lot of available tools that can aid in the migration and conversion of end-of-support OS or even refactor packaged solutions. (Yes, Cobol’s included!). Rather than only support the most relevant operating systems and database engines, AWS continuously develops enhanced features in order to meet the real needs shared everyday by customers and partners. Alternatively, it’s no problem if you’re already using on-premises data centers or public clouds to run microservice architectures over Kubernetes or OpenShift platforms. AWS has multiple aiding tools to help you re-ship your code without any modification needed. Many third party technology providers invest in their integrations with AWS, including the big players whose tech you want to continue using seamlessly. Migrating to AWS doesn’t require you to rush through the learning process for a new platform or to discard everything you’ve previously built; instead, we can leverage your existing mastery and develop operations in the ways you’re used to managing. Whether you have an existing contract in place with complex procurement processes or you need to ease the adoption process because you’re a new customer and are concerned about long procurement approvals, third party vendors prioritize launching new features and enhancements for AWS because they understand it is the main platform of the majority of their customers. Confidently Begin your Automated Migration Once all mobilization workstreams are completed, your AWS Landing Zone is ready, and your migration strategy, execution tools, and orchestration have been confirmed, you can start the definitive migration of your applications and data.In order to assuage concerns, it’s important that you first prepare the tools you need to manage your automated migration with confidence. Don’t ever try to migrate first and operate later. Instead, for example, start by leveraging common CloudWatch metrics to help you make informed decisions and integrate AWS Systems Manager into your source environment so you can set a standard configuration and operation before you ever begin migrating any resources. Keep in mind that migrations don’t need to be risky, nor do they have to happen overnight.   Key Takeaways AWS is not just another data center. Actually, it is a platform you can leverage to establish a new operating model, to package software services for your business, to deliver more quickly and at an enhanced level – all without technical limitations and with affordable, best-in-class security and operational-aiding services. AWS is for every type of workload, from legacy or enterprise-class to modern microservices-oriented applications. A vast number of services and tools are developed and continuously improved by AWS and their partners in order to make each migration phase a success. So rather than starting a migration alone, choose the right partner with the right amount of experience and the necessary competencies for managing all applicable AWS programs for you. Be sure to involve all business stakeholders from the beginning. Incorporate their input when it comes to decisions regarding candidates for pilot migration, compliance with industry regulations and standards, setting requirements for the AWS Landing Zone, establishing migration priorities, and planning out the transition. Collectively celebrate every workload migration. Today, migrating to AWS is a well-proven journey, supported by a rich set of programs and tools to make your endeavors successful. Migrating to AWS is not a moonshot.

Read More
CloudZone

CloudZone Customer Portal is Now Live!

A New, Transparent Way to Manage Your Cloud. Ever feel like managing your Cloud is unnecessarily confusing and difficult to navigate? We hear you. While our team of experts at CloudZone is always here to advise, consult and simplify Cloud for our customers – we are also constantly looking for more ways to improve Cloud management for our customers. That’s what makes today’s announcement so exciting. We are proud to announce the launch of the brand-new CloudZone Customer Portal – a one-stop shop that will help you manage your Cloud transparently and intuitively, from billing to FinOps and beyond. Here’s what you can expect from the new portal: Accessibility and transparency CloudZone Portal makes Cloud information more transparent and accessible to our customers. This one-stop shop is simple to use and caters to absolutely all of your Cloud management needs. That’s right. You’ll have access to all Cloud information without the need for emails or phone calls - unless you’d like to get in touch, of course. View your Cloud invoice breakdown, add and manage contacts from your organization, browse your agreements, manage billing and payment methods, view your FinOps savings per Cloud vendor and learn more about the Cloud via CloudZone Academy. 24/7 support The new portal is designed to hold your hand throughout your Cloud management journey. Support is more intuitive than ever and we can’t wait to hear the feedback after you’ve given it a try. You can easily view past support cases and open new ones efficiently. The process is hassle-free and will allow you to focus on what you do best while we take care of any case you need. Once a month, we will ask you to rate us so we can improve your experience. The marketplace The marketplace is another exciting component of the new portal. Here, you can learn about other offerings and services that could be beneficial on your Cloud journey. These add-on products help to increase efficiency and remain up-to-date for all your Cloud needs. This section of the portal offers extensive opportunities for you to take advantage of additional services - enabling you to find readymade or custom solutions from CloudZone and our partners. Are you ready to accelerate and optimize your Cloud environment with maximum efficiency? If you’re a CloudZone customer, we can’t wait for you to experience the new portal and benefit from it. You can start exploring it right away! Browse everything we covered here, get in touch with our support team and also read the latest updates from CloudZone, from the leading Cloud vendors, and from other partners that can make your Cloud journey smoother. To get started, reach out to our support team at portal@cloudzone.io to get access now. We can’t wait to see you on the portal!

Read More
CloudZone

Couldn’t Attend the IL Cloud Summit? Here’s What You Missed

We had an incredible time at the IL Cloud Summit! In celebration of Israel’s new Google Cloud IL region. Cloud natives, newbies, and industry leaders came together to learn how to make the best of Google Cloud. The event served as an opportunity to discover how Google Cloud can help enterprise companies and public sector organizations innovate further, make smarter data-driven decisions, scale to improve customer service and enjoy all the benefits of the Cloud according to a business’ unique standpoint.  If you couldn’t make it to the event, you missed out, but we’ve got you covered! Here’s what the CloudZone team enjoyed the most: Riveting insights from the keynote speaker Boaz Maoz, Managing Director of Google Cloud Israel, joined the stage to share insights on how Google Cloud is helping businesses gear up for the future, adapt to today's challenges, and build new opportunities. He shared information on exciting new product launches and how they can help customers accelerate digital transformation. Attendees felt inspired to build for the future, and of course - celebrate the launch of the new Google Cloud Region in Israel. Technical sessions and demos Google Cloud product experts, engineers and industry leaders (including our own experts at CloudZone) delivered technical sessions and demos about data, AI, and security. Those who attended got the opportunity to learn about the vital tools necessary to develop, deploy, and manage data pipelines and ML models at any scale. The audience discovered how to run and operate securely, and defend an organization’s infrastructure against emerging threats at a modern scale. We got to experience these solutions live as our experts showcased them directly from the stage! We learned to build fast data analytics - in minutes Event attendees learned how to build fast data analytics with open source and Google Cloud Platform, in a 15-minute session entitled, ‘From collection to insight in minutes’. We were walked through a use-case taking live data from Helsinki’s transport network to show how a complete real-time data streaming pipeline—from collection to insights—can be created in a matter of minutes using familiar infrastructure-as-code and visualization tools - fusing the best of open-source data infrastructure with the power of Google Cloud Platform. Game time! Those who were after a little fun couldn’t resist joining the fast-paced, hands-on lab gaming experience. We got to test our skills against other engineers and developers in a friendly competition to become a Cloud Hero! Cloud Hero games ran all day long, on topics such as infrastructure, Kubernetes, security, and BigQuery. Each gameplay lasted 45 minutes,  and the first three people to complete the Challenge Lab of each game were crowned the winners and received SWAG! Every participant received free 30 days of access to Google Cloud Skills Boost to complete the associated Google Cloud Skill Badge. Skill Badges are shareable credentials that recognize one’s ability to solve real-world problems with cloud knowledge. The event was a colossal success, and the CloudZone team couldn’t imagine a better way to celebrate the Cloud built for Israel. Enterprise organizations and public sector companies can finally dream, build, and scale in ways that were once only possible for Israeli high tech companies. The launch of the new Cloud region will require more organizations to build an infrastructure of automated landing zones. CloudZone is proud to offer this service as the growing demand for Cloud services in Israel continues to expand. Get in touch with our team of experts about your unique Cloud requirements.

Read More
CloudZone

What to Expect at re:Invent

The most inspirational event in tech has returned - here’s why you should be at AWS re:Invent conference For 10 years, the global Cloud community has come together at the AWS re:Invent conference to meet, get inspired, and rethink what’s possible in the tech industry. This year, from November 28 to December 2, Las Vegas will again be home to the event - which aims to be the biggest, most comprehensive, vibrant conference in Cloud computing. Here are some key highlights that the CloudZone team is looking forward to the most…  Hear from top industry experts Adam Selipsky, Chief Executive Officer of Amazon Web Services, will be sharing the ways that forward-thinking builders are transforming industries and even our future, powered by AWS. He highlights innovations in data, infrastructure, and more - helping customers achieve their goals faster, take advantage of untapped potential, and create a better future! Other keynote speakers include industry leaders such as Peter DeSantis, Senior Vice President of AWS Utility Computing, and Swami Sivasubramanian, Vice President of AWS Data and Machine Learning. They will unpack how AWS continues to push the boundaries of performance in the Cloud, and also reveal the latest AWS innovations that can help you transform your company’s data into meaningful insights and actions for your business! If you can’t make it in person, you’re in luck - all talks will be live-streamed.  Take your AWS knowledge to the next level At the AWS re:Invent leadership sessions, you’ll be able to learn from AWS leaders about key topics in Cloud computing. Among other sessions, diversity, equity, and inclusion will highlight how to integrate a human-centered, culturally aware approach into product development workstreams and build more trust with customers. In the tech industry, innovation is critical. The executive Cloud insights slot is thus aimed at helping attendees learn how leaders who focus on cultivating a Cloud-ready culture can help their organizations become more innovative. Many organizations save time and money with AWS Cloud Operations, achieving up to a 241 percent return on investment over three years. AWS Cloud Operations helps organizations run their infrastructure and applications in the Cloud, on-premises, and, using hybrid environments with high availability, superior automation, and proven security. The highly anticipated Cloud operations session will deep-dive into this! Get inspired by the global Cloud community This is your opportunity to join the most inspirational tech community in the world! AWS re:Invent has become the place for the AWS Cloud community to meet each other annually and look to the future collectively. It’s an occasion to celebrate achievements, reconnect with old friends, and make some new ones. The AWS re:Invent 5K run, ping pong tournament, and artist installations are some of the exciting events you can expect on campus, inviting you to the vibrant community! Build your future with AWS The AWS re:Invent bootcamps offer the opportunity to deepen your confidence with AWS services and solutions - and get ready for your AWS certification! In the breakout content learning session, you’ll be able to choose your level, discover new ways of working, and practice with AWS experts. The Expo at re:Invent is a space where attendees can network with peers, liaise with experts, and experience riveting interactive demos. To top it off, you’ll gain Cloud experience in a live AWS sandbox environment, where you can learn at your own pace with expert AWS guidance! What better way to fastrack your AWS future?   Every full conference pass for this renowned event includes access to hundreds of sessions, including breakouts, chalk talks, workshops, and builders’ sessions - all covering core AWS topics and emerging technologies. The CloudZone team can’t wait to meet you there - be sure to stop by! What are you looking forward to the most? If you haven’t already, register today to join us in Las Vegas or watch online for free! https://reinvent.awsevents.com/register/?trk=direct   

Read More
CloudZone

The AWS Spain region is now available !

AWS Launches (again) in Spain! Here’s why CloudZone is Proud to be a Premier Partner Amazon Web Services will be launching its eighth infrastructure region in Spain. Developers, startups, entrepreneurs, and enterprises, as well as government, education, and nonprofit organizations will now have even greater choice for running their applications and serving end users from data centers located locally - using advanced AWS technologies to drive innovation. CloudZone is extremely proud to be a Premier AWS Partner in the new infrastructure region. Here are the 3 reasons why we’re most excited: The benefit to the Spanish economy AWS estimates that its spending on the construction and operation of the new region will support more than 1,300 full-time jobs, with a planned $2.5 billion (approx. 2.5 billion Euros) investment in Spain over 10 years. AWS also estimates that the new region will add $1.8 billion (approx. 1.8 billion Euros) to the Spanish gross domestic product (GDP) over 10 years. As part of its commitment to the region, AWS also announced a $150,000 (approx. 150,000 Euros) AWS InCommunities Fund in Aragón, where the AWS Europe (Spain) region is located, to help local groups, schools, and organizations initiate new community projects.  Innovation that will improve businesses AWS is delivering on its promise to build new, world-class infrastructure locally to help customers in Spain achieve the highest levels of security, availability, and resilience. The investment in the AWS Europe (Spain) region reflects AWS's long-term commitment to support the country's economic development, job creation, and business growth. On the topic of innovation, Prasad Kalyanaraman, vice president of Infrastructure Services at AWS had this to say: “The cloud enables organizations of all types and sizes to speed up innovation, improve business processes, and reinvent experiences for their customers and end users.”  Pedro Sánchez, prime minister of Spain, said: “We welcome the investment of one of the world’s leading technology companies in Spain. The opening of the AWS Europe (Spain) region is a significant milestone that helps position our country as a leading digital economy”. Increased Availability Zones mean customer convenience The AWS Europe (Spain) region consists of three Availability Zones and joins seven existing AWS European regions in Dublin, Frankfurt, London, Milan, Paris, Stockholm, and Zurich. Availability Zones are located far enough from each other to support customers’ business continuity, but near enough to provide low latency for high-availability applications that use multiple Availability Zones. Each Availability Zone has independent power, cooling, and physical security and is connected through redundant, ultra-low latency networks. AWS customers focused on high availability can design their applications to run in multiple Availability Zones to achieve even greater fault tolerance! As an AWS premier partner, CloudZone offers best-in-class consulting, and operational and professional services for every aspect of cloud technologies. We’re ecstatic to be embarking on this journey with AWS and look forward to helping customers quickly set up a secure, multi-account AWS environment based on AWS best practices. For any inquiries, get in touch with one of our expert team members today! 

Read More
CloudZone

CloudZone’s Landing Zone and its benefits

Understanding CloudZone’s Landing Zone and its 4 main business benefits When companies want to set up a multi-project environment, they often lack the time or skills to implement and maintain a security and network configuration of multiple projects and services. That’s where CloudZone’s Landing Zone for Google Cloud comes in - offering an expert understanding of Google Cloud services. Let’s unpack what Landing Zone is, and how it could benefit your business. What is the Landing Zone? A Landing Zone is a modular and scalable configuration that enables organizations to adopt Google Cloud Platform for their business needs. Often, a landing zone is a prerequisite to deploying enterprise workloads in a Cloud environment. This is a starting point from which your organizations can quickly launch and deploy workloads and applications with confidence in their security and infrastructure environment. The Landing Zone focuses on the following pillars: Organization Hierarchy Logging & Monitoring Networking Identity and Access Management Labeling Security and Compliance Who is it aimed to serve? Israeli customers have, for a long time, been waiting for the launch of a local Google Cloud Datacenter - and usually have high demands when it comes to latency, security, and governance that allows them to build their workloads only in the Israel region. While Google Cloud Platform brings the Datacenter closer to the customer, CloudZone offers automation and best practices for building a secure Landing Zone and Cloud redlines for Israeli customers. Here are 4 reasons why Landing Zone is the ideal route to the automation and setup of a secure and reliable multi-project Google Cloud Platform environment:  1. A unique solution offering 360 degree Cloud services support The Landing Zone is not an off the shelf product, but rather a live one that changes over time. In addition to the Landing Zone solution, CloudZone provides product updates to the Landing Zone. This includes customization to the changes and adoption of new Cloud services and best practices. CloudZone also offers additional layers of expertise to the Cloud journey through services like; FinOps, DevOps, MSP, and architecture review. These services allow customers safe, easy and secured migration to the new Israel Google Cloud Platform Datacenter. 2. Quick and efficient setup Customers are able to quickly set up a secure, multi-project Google Cloud Platform environment based on Google Cloud Platform best practices. With many design options, setting up a multi-project environment can take a significant amount of time, and requires a deep understanding of Google Cloud Platform services. 3. Saves time The Landing Zone solution can help save time by automating an environment's set-up for secure and scalable workloads. This is done while implementing an initial security baseline through the creation of core projects and resources. 4. Implements Cloud baseline environment best practices The Landing Zone provides a baseline environment to get started with a multi-project architecture, identity, and access management, governance, data security, network design, and logging. The goal of a CloudZone Landing Zone is to create a baseline of the following elements: Organization Hierarchy, Logging & Monitoring, Networking, Access Management, Labeling, Security, and Automation using infrastructure such as code. Our team of experts at CloudZone is eager to assist you in getting started en route to setting up your multi-project environment!

Read More
CloudZone

Google Cloud region is coming to Israel!

A new Google Cloud region is coming to Israel! Here’s why it’s revolutionary For the past 20 years, Israel has been recognized globally for its booming tech scene. Yet, because of the country’s small size, there were no local Cloud regions, limiting the viability of Cloud migration for the public sector, traditional organizations, and highly-regulated industries.  Thanks to Project Nimbus, Google will soon be launching a local Cloud region in Israel - aiming to drive significant change in the technology landscape of the public sector, enterprise, and SMB markets in the country. Here’s what this history-making move means for the Israeli tech industry: Better service for local Google Cloud customers Google’s global network of Cloud regions is the foundation of the Cloud infrastructure built to support customers. Worldwide, there are 25 Cloud regions and 76 zones delivering in-demand services and products for Google Cloud’s enterprise and public sector customers.  With each new Google Cloud region, customers get access to secure infrastructure, smarter analytics tools, and an open platform. Having a region located in Israel - instead of relying on regions abroad - will make it easier for local customers to serve their users faster, more reliably, and securely. “Even before Project Nimbus, we have experienced accelerated adoption from organizational customers. Nimbus will accelerate this even more and will initiate the organizational Cloud revolution in Israel. Google heavily invests in Israel, including in building the local Cloud infrastructure.” - says Shay Mor, Head of Government, Defense, and Public Sector, Google Cloud Accelerated innovation This landmark move is expected to accelerate innovation for customers of all sizes, and Israeli tech companies who require Google Cloud services can expect improved access and exponential growth opportunities in the near future.  Moti Gutman, CEO at Matrix says, “We are very excited that leading vendors like Google are investing and launching a local cloud region in Israel. This will make a significant change in the technology landscape of the public sector, enterprise, and SMB markets in Israel. Matrix is proud to be a major part of the transition to the cloud,”. When it launches, the Israel region will deliver a comprehensive portfolio of Google Cloud products to private and public sector organizations locally. Injecting innovation into the public sector will boost the efficiency of government services (for citizens) and public systems as a whole. Public Cloud powers the digital revolution that will simplify processes, help improve service and cut costs, as well as provide insights, and facilitate collaboration between government branches and public sector segments. Google Cloud makes it easy to start a service on the Cloud, and easily migrate to on-premise or a different public Cloud entirely. Automated landing zone infrastructure  Are you ready for the new region? The launch of Israel’s new Google Cloud region will require more organizations to build an infrastructure of automated landing zones. CloudZone is proud to offer this service as the growing demand for Cloud services in Israel continues to expand. Tech companies will be able to leverage data to solve their biggest business challenges, build and innovate faster in any environment, and collaborate at any time and place with strong and secure security.  Google Cloud is hosting the IL Cloud Summit in Tel Aviv Israel’s Cloud revolution is here to mark a new era of innovation for the entire nation. In celebration, Google Cloud is hosting the IL Cloud Summit on 9th November in Tel Aviv. The event serves as an opportunity to discover how Google Cloud can help businesses innovate further, make smarter data-driven decisions, scale to improve customer service and enjoy all the benefits of the Cloud according to a business’ unique standpoint. Across six tracks, beginning with Open Cloud - Modernize Infrastructure and concluding with Create Business Impact From Your Data, we will hear from industry leaders such as Kiran Shinoy (Google Cloud Product Manager), Inna Weiner (Google Cloud Senior Engineering Manager) and Iman Ghanizada (Google Global Head of Autonomic Security Operations), to name a few.  The event will include a fast-paced, hands-on lab gaming experience that will test the skills of attendees against other engineers and developers in a friendly competition to become a Cloud Hero! Whether a Cloud-native or just beginning your Cloud journey, the IL Cloud Summit will offer the chance to join an elite group of industry leaders and learn all you need to know to make the best use of Google Cloud. Register here  The Cloud built especially for Israel is aimed at supporting the growing customer base in the country, and CloudZone is thrilled to help facilitate this vision. Reach out to our team of experts today about your unique Cloud requirements for your business.  

Read More
CloudZone

Volatile market? Here’s how you can cut Cloud costs with FinOps

Looking to cut exorbitant Cloud costs? Here’s how you can start implementing FinOps By now, you will likely have discovered that for companies looking to be market downturn-ready, FinOps is the way to go. If you’re still figuring out what FinOps is all about and why it’s a good idea to cut your Cloud costs in the current environment – look no further than our previous blog post. However, if the question you’re asking is, “How do I get started?”, you’ve come to the right place. First, you’ll need to understand the business values that define the implementation of FinOps. This proactive organizational culture is a true game-changer hinged on collaboration, accuracy, and efficiency. A company with a healthy FinOps culture implements these 6 core principles Team collaboration: Typically, cost optimization is not a shared challenge among teams. FinOps, however, is about cultural change that breaks down these historical silos. Decisions are driven by the business value of Cloud: The role of FinOps is to help maximize the utilization of Cloud resources created by the spend. Everyone takes ownership of their Cloud usage: Everyone using the Cloud is incurring costs. FinOps pushes Cloud spend accountability across all levels of the organization. FinOps reports should be accessible and timely: Real-time decision-making is about getting data quickly to the people who deploy Cloud resources. A centralized team drives FinOps: A central FinOps function drives best practices into the organization through education, standardization, and cheerleading. Take advantage of the variable cost model of the Cloud: Rightsizing, scheduling, spot usage, and RI/CUD purchases are based on actual usage data, instead of possible future demands. Whether it’s a small business with only a few staff members or a large enterprise with thousands of employees, FinOps practices can and should be implemented to maximize efficiency and reduce Cloud costs. Each, of course, will require different levels of tooling and processes. Remember that all teams have a part to play, as it is everyone’s job to help the company operate faster. Eager to get started? Here are some actionable steps you can take in each of the 3 key phases of your FinOps journey When approaching FinOps, CloudZone recommends beginning at the Inform stage before approaching Optimize or Operate. The reason is that it is crucial to gain visibility into what’s happening in your Cloud environment - and do the hard work of cleaning up your cost allocation to know who’s truly responsible for what - before making any changes. Phase 1 - Inform All activity in the FinOps lifecycle begins and ends with the Inform phase. At this crucial stage, the aim is to understand cost drivers, allocate spend, and benchmark efficiency. It may be very useful in the future for you to also map spending data to the business units and types of environment - defining budgets per account or business unit Start by doing this: Familiarize yourself with your preferred BI tool to set you up for cost management success. It’s vital that you understand the cost and usage of your Cloud resources on a daily basis. Phase 2 - Optimize It’s now time to measure potential optimizations and set goals based on a defined strategy. Identifying usage and spend anomalies, finding and measuring usage optimization, and comparing services and workload placement are some ways to do this. Start by doing this: Identify your 5 largest cost allocations, pin-point the unutilized resources of each service, and implement cost optimization best practices on the rest.   Phase 3 - Operate Once your objectives have been formulated, you’ll need to define processes to ensure your actions achieve your goals. A key aspect of this phase is ensuring that teams take the necessary action required - it’s time for implementation. Optimization ownership by long-term commitment should be centralized, responsibilities, as well as governance and controls, will be defined, and ultimately - you will continuously improve and automate! Start by doing this: Define monitoring policies and set alerts for unexpected usage. Implementing recurring processes (daily, weekly or monthly) and defining the process owner who is responsible for verifying resource utilization, clearing waste, and verifying KPIs will be extremely helpful.   With FinOps you are able to drive better utilization with constant visibility into Cloud spend. The data-driven processes and real-time reporting offered results in cost-efficiency that can not only save but make the business more money. Contact CloudZone today to kickstart your FinOps journey and help you cut unnecessary Cloud Costs and achieve overall efficiency.

Read More
CloudZone

During a market downturn, turn to FinOps

It’s no secret that stocks in 2022 are off to a less than favorable start, and tech investors are becoming increasingly selective about the risks they’re willing to take - many pulling back from parts of the market that are sensitive to inflation and rising interest rates. Businesses big and small - and particularly startups - are understanding the need to tighten their budgets due to the shift in the market, with top startup accelerator Y Combinator advising its founders: “You can often pick up significant market share in an economic downturn by just staying alive.” But it’s not all doom and gloom.   Managing your Cloud spend could help cut costs significantly While organizations look for ways to cut costs in the seemingly obvious places, they often miss the fact that Cloud spend is one of their biggest expenses. In fact, according to Gartner, public cloud spending will reach a whopping $360 billion by 2022. The truth is that Cloud spend is often the largest spend for organizations (after salaries),  especially for tech companies big and small,  both bottom and top lines for enterprise P&Ls. It has become exorbitant and it is likely to increase further.   That’s where FinOps comes in Often, CFOs, COOs and team leaders feel as though they can’t control Cloud costs, allocate the costs to the various business units, or explain these costs to management or investors. But it doesn’t have to stay this way. FinOps is the most efficient way in the world for companies to manage their Cloud costs. At its core, it is a cultural practice that enables companies to drive better utilization with constant visibility into Cloud spend. Organizations with a healthy FinOps culture are able to be more efficient (do more with lower spend), better control their costs and cost allocation, gaining clearer visibility into how to price their product and improve product pricing by cutting down costs significantly. Data-driven processes and real-time reporting are key FinOps functions and result in cost optimization efficiency. For example, teams can accelerate business decisions based on an accurate cost allocation of the required cloud resources. . Amid talks of a brewing recession, FinOps offers companies the reassurance of not just saving money, but making money. A healthy FinOps culture can cut spending by 20-30%. After all, an efficient Cloud spend can drive more revenue for the business.   How do you begin? CloudZone has you covered. CloudZone can help you build a FinOps culture within your organization, providing you with full control over the resources and forecasting to put you back in the pilot seat! We’ll hold your hand along your FinOps journey through a simple, three-phased approach: Inform: This is the first phase in the FinOps journey, empowering organizations and teams with visibility, allocation, benchmarking, FinOps best practices, which can reduce your costs dramatically. Optimize: Goals are set for measured improvements to the Cloud. You will receive a list of tasks/action items and their potential savings. Once organizations and teams are empowered, all they need is to define priorities based on the ROI and the estimated efforts.  Optimization of the cloud footprint is immediate and visible Operate: Organizations start to continuously monitor their cloud spend, eliminate Zombies and constantly adjust cloud resources to the actual requirements. Evaluation  of business objectives and the metrics they are tracking against those objectives, are clear for Finance, Product, Teach teams and management Our job is to make sure that when you get your (usually highly complex) Cloud bill, you already know how to cut the costs. Leveraging our deep understanding of the public Cloud, we adopt a proactive approach - casting a fresh eye over all your Cloud usage and carrying out continual monitoring to assess your position. Whilst uncertain times can be uncomfortable, they can also bring enormous opportunities. Contact the CloudZone team today to learn more about FinOps and how to get started.

Read More
CloudZone

Missed Out On AWS Summit Madrid? We’ve Got Your Back.

‘Action-packed’ and ‘knowledge-filled’ would accurately describe our AWS Summit Madrid experience. For us at CloudZone, this was especially meaningful, since after 10 years of leading the Israeli market, we have launched our branch in Iberia earlier this year to support customers in Spain and Portugal. AWS Summit Madrid was our first official event since launching to this region. The CloudZone team, led by GM of CloudZone IL Adi Heinisch and GM of CloudZone Portugal, Nuno Tavares, had great fun attending sessions, participating in discussions, and networking at our booth.  In between sessions, we caught up with our hardworking  team to ask them about their highlights from AWS Summit Madrid, the impact of launching to the Iberian market, and their top must-know takeaways from the ultimate tech extravaganza of the year: Bringing a New Cloud Partnership Model to Iberia “The culmination of a lot of work and the beginning of an exciting road ahead,” is how our GM of Portugal, Nuno Tavares, describes launching CloudZone to the Iberian Market at AWS Summit Madrid. The event was tremendously important to confirm that there is a meaningful match between what our customers want from an AWS partner and what we have to offer to help scale their businesses, said Nuno.  Most importantly, CloudZone is bringing a differentiated business model to this market: No additional costs, no limits and no attachments. “This model will allow our customers to focus on their business and work alongside us to maintain and scale their businesses,” explained our GM of Portugal. CloudZone Business Director João Sena Carvalho felt the excitement in the air: “The excitement we felt from AWS teams, ISVs, Startups, DNBs when talking to us. They felt that our model is very disruptive and we are here to help them grow.” When asked about the future of the region, João had big expectations: “This is a market that is moving very fast to achieve a higher maturity level. We have a lot of people willing to do more and we are in the spotlight of investors.” But with great growth, come great challenges, and the CloudZone team is here to help digital native companies conquer them. “There is a point in time when companies need to focus on growth and not on technology. This allows them to develop new business without investing time or resources to maintain and evolve the technology that supports the business,” said Nuno Tavares. But fret not - because there’s help on the way: “That’s exactly where we can help. We are our customers' trusted Cloud co-pilot, providing strategic, technical and FinOps guidance. Adding our technical expertise with our growth co-pilot track-record.” João agrees and drives the point home: “With our help, you can focus on the things that really matter to your business: Vision, strategy, sales, etc.” Spreading the FinOps Culture One of the key highlights for our team was the FinOps session by CloudZone’s very own  Solutions Architect Tech Lead and Senior Data Solutions Architect, Danny Farber and Elad Rabinovich. In their session, they  unpacked how to leverage the power of AWS cloud with CloudZone FinOps Framework. We caught up with them to make sure you don’t miss the key takeaways, even if you couldn’t make it to the Summit. FinOps is such an important topic, can you recap a few key points from your session which growth-stage startups should absolutely not miss? Elad: “How we store our data today will have a direct effect on data consumption in the future, both in performance and in cost.” Danny: “Companies should closely pay attention to control over costs and usage of the Cloud resources, cost Optimized for the startup workload, continuous monitoring of  costs and usage, and lastly, proactive alerts for Cloud consumption and cost peaks.” How does CloudZone help tech companies implement FinOps culture and why is it so important? Elad: “Our world is moving fast, so do companies and startups. Sometimes during this fast development, the focus on FinOps is neglected, and is only revisited later on, once the bills start hurting the company’s budget. At that point, converting the infrastructure or relevant services to something less costly can  become a real challenge. That’s where we at CloudZone come in. With our extensive FinOps expertise,  we can guide our customers to reduce future costs while keeping their focus on their product.” Danny: “One of the most relevant aspects of FinOps culture is to avoid any unexpected cost. That motivates the importance of having FinOps culture and best practices implemented accordingly.” What is a new technology or methodology you’re excited to help CloudZone customers implement? Elad: “The Data-Mesh concept  is helping organizations make their data into a central product to share across the organization.”   What Else? Here Are Our Team’s Favorite AWS Summit Madrid Highlights:   1. Business acceleration and transformation are the AWS agenda As the pace of the world increases, leaders of all companies are looking for ways to innovate faster to accelerate their business. Day 1 featured more than 20 CEOs, CIOs, CDOs, founders, professors, authors, and work futurists from various industries. They discussed challenges facing leaders and companies around the world today while developing new strategies to respond to the pandemic - and build the future.  ‘Accelerating your business with new technological trends in the Cloud’ was a favorite among the day’s tracks, where event attendees gained deep insight into maximizing the value of their business with AWS and achieving profitability in the Cloud.  2. For current and aspiring founders, the AWS Startup Loft was the place to be! The AWS Startup Loft offered a space dedicated to highlighting the innovation of some of the most successful startups in Spain. Attendees got to: Hear how AWS plans to support startups on their journey to the cloud. Attend specific sessions for startups. Learn how to implement innovation mechanisms in the investment ecosystem in Web 3.0. Discover the AWS programs for startups, and how to start using them now to start building and growing. Participate in a networking session at the Founders Bar, where they had the opportunity to meet investors and other startups that attended the AWS Summit Madrid. 3. For the first time, Cloud optimization is shifting the Iberian market  The Cloud is rapidly promoting innovation within tech companies throughout Iberia. Many of these organizations use AWS to drive cost savings and accelerate innovation to fuel their business mission.  At AWS Summit Madrid, attendees were able to learn about the extraordinary commitment of AWS in Spain with the digital transformation of various organizations. Spanish and Portuguese entrepreneurs can now enjoy access to professional resources and reliable solutions that will fuel business growth by maximizing AWS Cloud benefits. 4. Working with a Cloud reselling partner is a globally successful model  CloudZone helped event attendees understand the immense benefits of working with a cloud reselling partner. We unpacked:  How to regain control of your Cloud costs and budget. How to accelerate and optimize your CDN consumption, reducing it by 60%. How to  gain useful business insights from our Cloud Lakehouse Best practices. How to get 360° support for your 24/7 production needs.  We had a blast meeting new contacts and old friends at AWS Summit Madrid! With so much potential in the Iberian Market, we are excited to build the future with our new partners. Visit our website to learn more.   #AWS #AWSSummit #AWS_Partner #lifeatcloudzone   

Read More
CloudZone

What you don’t want to miss at AWS Summit Tel Aviv this year

AWS Summit Tel Aviv is back! The AWS Tel Aviv Summit has made a much-awaited return to Israel, and is happening right now! Back with increased momentum and innovation-centric activities, the event is packed with new, golden opportunities to discover industry-leading solutions offered by AWS partners.    What will I gain from attending the Tel Aviv Summit this year? Among many other educational sessions, at the AWS Summit, you can hear about the key technical abilities in the AWS containers and services portfolio, learn to build event-driven applications on AWS, and discover how quickly you can move to the AWS cloud without making disruptive business changes.  This year’s summit in Tel Aviv will be action-packed with never-before-seen exclusive content, demos, activities, and discussions of exciting topics from how to optimize and accelerate the adoption of AWS Cloud, to building analytics MVP in one sprint.  And don’t forget about the AWS partners and professionals from all over the country, with whom you can network and collaborate.    What you don't want to miss… You’ll be able to deepen your AWS cloud knowledge and gain new skills to design and deploy solutions in the cloud to accelerate your business mission. Here are some of the key highlights and opportunities our team at CloudZone is most excited for:  Discover how to leverage AWS services, teams, and partners to transform your business while optimizing costs Learn to solve common business problems with AI and ML Explore 7 migration strategies that AWS sees customers implement to migrate to the cloud Hear about best practices for onboarding modern workloads to the cloud, making the best use of AWS managed storage services Learn about architecting account security & governance across your landing zone from Shir Turel, Head of Delivery & Customer Success at Shield Hear from CloudZone’s very own, Haim Ben Haim (Business Development ManagerCEO) and other AWS consulting partner leaders in the ‘Drive Customer Success with Partners’ session   In-person eventing…finally!  A little out of practice after 2 years? Don’t despair! If you’re planning or thinking about attending, here are 5 ways you can prepare to make the most of your AWS Summit experience. Get familiar with the agenda Click here to discover everything you need to know about AWS Summit Tel Aviv, including sessions, experiences, and activities.  Whether you’re working in a startup, an enterprise organization or in the public sector, use the agenda to choose your own adventure Utilize the agenda to identify the best learning path for you. You have the opportunity to pick and choose the types of sessions and experiences you’d like to attend, based on what might be best for you on your cloud journey.  Certain sessions have been specially curated for existing AWS partners to learn about new programs, benefits, resources, and tools, and see how AWS is investing in their growth and success. New startup founders are encouraged to attend the summit to learn how they can benefit from programs specifically designed for startup success including AWS Activate, AWS Founders Club, AWS Startup Loft Accelerator, and AION Labs - to name a few.    Take advantage of the chance to learn from the leaders in tech Hear from AWS leaders about what they have accomplished together with AWS partners, gain an understanding of the trends being identified, and how partners can capitalize on these trends and grow with AWS.  Attendees are eager to learn more about AWS’s endless possibilities from the global Vice President & General Manager for the Amazon Simple Storage Service (S3), Kevin Miller, as well as the other exceptionally experienced architects, developers, technologists, managers, team leads, CEOs and founders who will be leading the sessions. These sessions include, “Mistakes founders make”, ‘Building the future of search together” and “Data-driven software development - Elevate the experience of your users”.   Catch the latest stories from your peers accelerating their missions with the cloud You’ll learn about the latest innovative advancements happening across the public sector and hear key learnings on how to continue to push boundaries with the cloud.    Tune in remotely with on-demand viewing If you’re unable to attend sessions in person, you can watch remotely with the on-demand streaming site.  Whether you are looking for computing power, cloud optimization, content delivery, or other functionalities, AWS has the services to help you build sophisticated applications with increased flexibility, scalability, and reliability. The summit is a key opportunity to learn more than ever before about AWS and the partners involved, and unlock how you can leverage their revolutionary offerings for the benefit of your business.  We at CloudZone are proud to be a partner solution running on AWS, and can’t wait to help you learn how to accelerate the adoption of AWS cloud at the CloudZone booth!   #AWS #AWSSummit #AWS_Partner #lifeatcloudzone  

Read More
CloudZone

Here are 5 reasons why you need to be at AWS Summit Tel Aviv this year!

Calling all business and technology leaders: Here are 5 reasons why you need to be at AWS Summit Tel Aviv this year! Back with more momentum than ever before, AWS Summit Tel Aviv will present new, golden opportunities to discover industry-leading solutions offered by AWS partners. From CEOs and DevOps engineers to data scientists and CFOs, this free, in-person event is an absolute must to attend. Here’s why:   1.     Develop the skills you need to build, deploy and operate effectively The summit is designed to deepen your knowledge about AWS products and services, and to help you operate your infrastructure and applications with maximum efficiency in the ever-changing world of tech. Sessions are delivered by AWS subject matter experts and customers who have successfully built solutions on AWS.  In the ‘Drive Customer Success with Partners’ session, you’ll hear from CloudZone’s very own, Adi Heinisch (CEO) and other AWS consulting partner leaders, as they share insights into how they have successfully harnessed AWS technology to win in Israel. Across the three dimensions of solutions, competencies, and specialization, speakers will dive deep into how they are building the winning culture with AWS through technology, and innovation.   2.     You’ll discover revolutionary ways to optimize your AWS cloud with CloudZone  Here’s what you can expect to learn from the experts at the CloudZone booth: How to optimize and accelerate the adoption of AWS Cloud How to simultaneously implement processes to control and monitor your resources Understand the efficiency in adopting the AWS well-architected framework Unpack cost optimization methodologies in growth. CloudZone has recently introduced its new and unique pod model. CloudZone customers will be assigned a dedicated Customer Success Manager and Solutions Architect. The aim of this dynamic team is to proactively seek new opportunities to optimize your AWS Cloud. You’ll be able to hear all about it and more at the CloudZone booth!   3.     Shift your technical gears into max at the Builders Playground!  Specially curated for builders, the Builders Playground is an interactive learning experience centered on modern app development. Here’s a small taste of the opportunities to come:  Learn architecture patterns and best practices for composing end-to-end architectures with queues. Unpack why rate-limiting is so important in modern systems. Discover how to design a system that operates as a better neighbor to all systems around it. Look at the permutations of architecture and code.  Learn how to optimize the end-user experience through client-side data on application performance with Amazon CloudWatch Real User Monitoring (RUM).   4.     Participate in AWS Gameday: F1 League  Grab up to 4 teammates and take your technical skills for a 90-minute ride! AWS Gameday featuring F1 is an interactive team-based learning exercise designed to give players a chance to put their AWS skills to the test in a real-world, gamified, risk-free environment. Most importantly, it is an extremely fun way to learn more about the potential of AWS without the step-by-step instructions provided in workshops or classroom-style sessions.  If you are seeking an open-ended, and at times ambiguous, style of training then Gameday is the perfect challenge for you. Register here and don’t forget that each teammate needs to bring his/her own laptop.    5.     Receive invaluable guidance and expertise from the leaders in tech Shir Turel, Head of Delivery & Customer Success at Shield, will be speaking about architecting account security & governance across your landing zone. CloudZone was privileged to work with the Shield team on the architecture at Shield and we are looking forward to hearing from Shir, along with Dotan Paz and Rony Blum from AWS as they cover these important topics: Updates to multi-account strategy best practices for establishing your landing zone New guidance for building organizational unit structures Security patterns, such as identity federation, cross-account roles, consolidated logging, and account governance Considerations on using AWS Landing Zone, AWS Control Tower, or AWS Organizations   In addition to over 50+ lecture-style presentations delivered by AWS experts, builders, customers, and partners, AWS Summit has so much more in store this year. The AWS training team will guide attendees through more than 100 online labs, and the Ask an AWS Expert booth provides a space where you can get a 1:1 session with a member of the AWS expert teams.  Here you’ll find leading cloud technology providers and consultants who can help you get the most out of the AWS Cloud. We at CloudZone are looking forward to sharing our expertise on FinOps, data, and achieving cost and operational efficiency. The AWS Summit aims to bring together business and technology professionals to connect, collaborate and learn about AWS. With so much in store, what are you looking forward to the most? Register for free here to secure your seat at the most innovation-filled event of the year, powered by the leaders in tech. Let us know in the comments if you’re planning to be there! We’d love to see you at the CloudZone booth.   #AWS #AWSSummit #AWS_Partner #lifeatcloudzone  

Read More
CloudZone

What you don’t want to miss at AWS Summit Madrid

Firstly, what is AWS Summit Madrid? AWS Global Summits are informative, innovation-centric events that bring the cloud computing community together. Summits are held in major cities around the world and attract technologists from all industries and skill levels who want to discover how AWS can help them innovate quickly and deliver flexible, reliable solutions at scale. The AWS Summit Madrid is happening right now, on May 4-5th, and is a golden opportunity to learn about all things AWS! [embed]https://youtu.be/ZGd1dMdu6cg[/embed] What will I gain from attending the Madrid Summit? At the AWS Summit, you can discover how to choose the right database, modernize your data warehouse, and drive digital transformation using AI, among many other educational tracks. This year’s Summit in Madrid will be action-packed with brand new and exclusive content, sessions, demos, and activities. The AWS team is busy working around the clock to develop a multitude of exciting sessions to discuss topics from how to optimize and accelerate the adoption of AWS Cloud, to perspectives on fostering innovation and transformation through culture, talent, and leadership. And don’t forget about the AWS partners and professionals from all over Europe, with whom you can network and collaborate.   What you don't want to miss… You’ll be able to deepen your cloud knowledge and gain new skills to design and deploy solutions in the cloud to accelerate your mission. Here are some of the key highlights and opportunities our team at CloudZone is most excited for:   Hear from keynote speakers Miguel Alava, Managing Director AWS Iberia, and Miriam McLemore, AWS Enterprise Strategist, who will share their vision on innovation and digital transformation in companies. Attend technical breakout sessions featuring customer stories Experience demonstrations and interactive workshops Engage with AWS experts to get your questions answered Learn from our very own Solutions Architect Tech Lead and Senior Data Solutions Architect, Danny Farber and Elad Rabinovich, as they unpack how to leverage the power of AWS cloud with CloudZone FinOps Framework Participate in team challenges Connect, collaborate and network with AWS partners, customers and Cloud thought leaders in general In-person eventing…finally! A little out of practice after 2 years? Don’t despair! If you’re planning or thinking about attending, here are 5 ways you can prepare to make the most of your AWS Summit Madrid experience. 1.   Get familiar with the agenda Click here to discover everything you need to know about AWS Summit Madrid, including sessions, experiences, and activities. 2.   Use the agenda to choose your own adventure Utilize the agenda to identify the best learning path for you. You have the opportunity to pick and choose the types of sessions and experiences you’d like to attend, based on what might be best for you on your cloud journey. We at CloudZone strongly encourage you to take advantage of learning opportunities outside of breakout sessions to truly make the most of this educational event. 3.    Take advantage of the chance to learn from the leaders in tech An in-person event means an in-person opportunity to learn from AWS experts and peers. As the pace of change in the world accelerates, leaders of all companies are seeking ways to innovate faster and fuel their business growth. At the Summit, you’ll be able to join informative sessions such as, “How to evolve your business and accelerate innovation”, and, “AWS for all industries”. This two-day tech extravaganza offers a highly interactive experience with AWS leaders as they walk through a problem and solution. 4.    Catch the latest stories from your peers accelerating their missions with the cloud You’ll learn about the latest innovative advancements happening across the public sector and hear key learnings on how to continue to push boundaries with the cloud. 5.    Tune in remotely with on-demand viewing If you’re unable to attend sessions in person, you can watch remotely with the on-demand streaming site. Whether you are looking for computing power, cloud optimization, content delivery, or other functionalities, AWS has the services to help you build sophisticated applications with increased flexibility, scalability, and reliability. The Summit is a key opportunity to learn more about AWS and the partners involved, and unlock how you can leverage their revolutionary offerings for the benefit of your business. We at CloudZone are proud to be a partner solution running on AWS, and can’t wait to help you learn how to accelerate the adoption of AWS cloud at the CloudZone booth!   #AWS #AWSSummit #AWS_Partner #lifeatcloudzone

Read More
CloudZone

Here are 5 reasons why you need to be at AWS Summit Madrid 2022!

Calling all business and technology leaders: Here are 5 reasons why you need to be at AWS Summit Madrid 2022! The AWS Summit Madrid 2022 is a golden opportunity to discover industry-leading solutions offered by AWS partners. From CEOs and DevOps engineers to data scientists and CFOs, this educational event is an absolute must to attend. Here’s why: 1.      It is the ultimate tech solutions-based event of the year, centered on business growth and innovation This free, informative event is specially curated for professionals from all industries and profiles who are eager to learn how to rapidly innovate and deliver flexible, reliable solutions at scale. Attendees will hear from AWS leaders, experts, partners, and customers. The AWS Summit is a phenomenal, not-to-be-missed opportunity to attend business growth and innovation sessions, technical sessions, demos, hands-on workshops, labs, and team challenges. Read more here.   2.      You’ll learn to leverage the power of AWS Cloud After 10 years of leading the Israeli market, CloudZone has launched an Iberia branch in 2022 to support customers from Spain and Portugal. The aim is to offer a 360° approach for customers using the AWS platform in these regions. Here’s what you can expect to gain from CloudZone’s informative session on the day…  How to optimize and accelerate the adoption of AWS Cloud How to simultaneously implement processes to control and monitor your resources Understand the efficiency in adopting the AWS well-architected framework Unpack cost optimization methodologies in growth.   3.      Be among the first to hear how Cloud optimization is shifting the Iberian market Spanish and Portuguese entrepreneurs can now enjoy access to professional resources and reliable solutions that will fuel business growth by maximizing AWS Cloud benefits. Learn more about AWS’s investment into Iberia here. Whilst a new concept to the Iberian market, working with a Cloud reselling partner such as CloudZone is a globally successful model that allows organizations and startups across verticals (fintech, cyber, etc. ) to address top-priority business needs with the leadership and support of an experienced, well-equipped team of professional consultants in a risk-free, no-cost business model.   4.     You’ll take one step closer to building the business of your dreams The first day of the AWS Summit is for business and technology leaders seeking inspiration, insight, and ideas to drive change and innovation and accelerate growth in their companies. Day two is aimed at technology industry professionals and covers some of the hottest topics in cloud computing, with a focus on the latest products and services from AWS.   5.      Stay relevant in the ever-evolving, revolutionary new world of Cloud solutions  Leveraging the power of the Cloud allows time for business and technology professionals to focus on their core business, as well as market and adopt new and flexible business models. You’ll be able to learn more about this at the CloudZone booth, and gain an in-depth understanding of the business benefits that come with working with a Cloud reselling partner. The AWS Summit aims to bring together business and technology professionals to connect, collaborate and learn about AWS. With so much in store, what are you looking forward to the most? Register for free here to secure your seat at the most innovation-filled event of the year, powered by the leaders in tech. Let us know in the comments if you’re planning to be there! We’d love to see you at the CloudZone booth.   #AWS #AWSSummit #AWS_Partner #lifeatcloudzone

Read More
CloudZone

3 Methods for Implementing Change Data Capture

If you are familiar with Change Data Capture AKA Change Data Tracking, you can just skip the introduction below and get straight to the implementation section. But, in case you’re not, let me introduce the concept first. American Writer Mark Twain once said: “Data is like garbage”. Today some people say: data is the new oil. But I would say: data is a blooming flower. Like a flower, data goes through different stages, and takes time to develop, or burst into bloom. Just as the time taken may differ from flower to flower, so different data sets develop at different rates. A single flower is less striking, but when it is part of a bouquet, it becomes really eye-catching. And so it is with data — that’s how companies like Google or Facebook are able to make a profit, even without charging for their services -they simply collect data ‘flowers’ and turn them into data ‘bouquets’. However, this article is not about flowers ? so, let’s move right on to our topic. As I explained previously, the state of data is continuously changing over time. Change Data Capture (CDC) is a set of technologies that enable you to identify and capture the previous states of the data so that later, you have a snapshot of past data that you can refer to when taking necessary action. See the example below:   With the increasing demand for big-data technologies, Microsoft introduced CDC with MsSQL Server 2008. Today, CDC is available in almost all popular database servers, including MsSQL, Oracle, CockroachDB, MongoDB, etc. But, manual implementation is just one way to get the job done. We can also automate the CDC using triggers and short procedures. In this article, I will discuss how to implement CDC both ways. Why Change Data Capture is important Yes, you guessed right, this technology is mostly used in the big-data domain to keep timely snapshots of streaming data in data warehouses. Here, we go through a process called ELT/ETL to insert our data into the data warehouse. This process is efficient with historic data, but when it comes to real-time data it causes too much latency to run complex queries. The easiest way to deal with real-time data is CDC, which enables us to keep our data warehouse up to date and make business decisions faster. Let’s Get our Hands Dirty with Some Practical Examples 1. Implementing CDC with MsSQL First, we need to create a new database. CREATE DATABASE cdcDB Next, I select the created database from the available databases dropdown, and create a few simple tables - just to demonstrate CDC implementation. CREATE TABLE Student ( StudentID int NOT NULL PRIMARY KEY, FirstName varchar(255) NOT NULL, LastName varchar(255) NOT NULL, Age int, ContactNo char(10) NOT NULL ) After creating tables, I enable CDC. EXEC sys.sp_cdc_enable_db After CDC is enabled for the database, I then enable it on each table. EXEC sys.sp_cdc_enable_table @source_schema = 'dbo', @source_name = 'Student', @role_name = NULL, @supports_net_changes = 1 Finally, I insert some values to my table by the following query. INSERT INTO Student(StudentID,FirstName,LastName,Age,ContactNo) VALUES (10638389, 'Indrajith', 'Ekanayake', 21, 0713101658), (10637382, 'Kamal', 'Suriyaarachchi', 22, 0765432210), (10622388, 'Kasun', 'Chamara', 28, 0708998123), (10638812, 'Chamara', 'Hettiarachchi', 20, 0772134446); To confirm whether CDC has been properly implemented, we can just check either at our hierarchy panel or Jobs tab, under the SQL Server Agent. To understand how and what data we are storing in the CDC tables, we can just update a few rows. UPDATE Student SET FirstName = 'Janaka', Age= '23' WHERE StudentID = 10638389; So, we are now looking at the CDC CT(Change Table) and we can identify that there are additional records, as seen below.     2. Implementing CDC with Oracle First, I need to mention that I’m running Oracle 11g Enterprise Edition using docker image and I’m writing queries using Oracle SQL Developer’s latest version on the host machine. The server and Oracle SQL developer are connected via port: 1521. To implement CDC, I begin by creating a tablespace called “ts_cdcindrajith” in my cdcAssignment folder, inside my F drive. create tablespace ts_cdcindrajith datafile 'F:\cdcAssignment' size 300m; Then, I create a new user called “cdcindrajith”, and grant all permissions to this user.   CREATE USER cdcindrajith IDENTIFIED by cdcindrajith DEFAULT TABLESPACE ts_cdcindrajith QUOTA UNLIMITED ON SYSTEM QUOTA UNLIMITED ON SYSAUX; GRANT ALL PRIVILEGES TO cdcindrajith; Next, I create a table called employees. CREATE TABLE cdcindrajith.employees ( EmpID int NOT NULL PRIMARY KEY, EmpName varchar(255) NOT NULL, Age int NOT NULL, ContactNo char(10) NOT NULL ) Then, I implement the CDC feature.   BEGIN DBMS_CAPTURE_ADM.PREPARE_TABLE_INSTANTIATION(TABLE_NAME => 'cdcindrajith.employees'); END; BEGIN DBMS_CDC_PUBLISH.CREATE_CHANGE_SET( change_set_name    => 'employees_set', description        => 'Change set for employees change info', change_source_name => 'SYNC_SOURCE'); END; BEGIN DBMS_CDC_PUBLISH.CREATE_CHANGE_TABLE( owner             => 'cdcindrajith', change_table_name => 'employees_ct', change_set_name   => 'employees_set', source_schema     => 'cdcindrajith', source_table      => 'employees', column_type_list  => 'EmpID int, EmpName varchar(255) , Age int, ContactNo char(10)', capture_values    => 'both', rs_id             => 'y', row_id            => 'n', user_id           => 'n', timestamp         => 'n', object_id         => 'n', source_colmap     => 'y', DDL_MARKERS =>       'n', target_colmap     => 'y', options_string    => 'TABLESPACE ts_cdcindrajith'); END; I create a subscription called “employees_sub”. BEGIN DBMS_CDC_SUBSCRIBE.CREATE_SUBSCRIPTION( change_set_name   => 'employees_set', description       => 'Change data for employees', subscription_name => 'employees_sub'); END; After that, I create a View called “employees_view” and then activated the above-created subscription.   BEGIN DBMS_CDC_SUBSCRIBE.SUBSCRIBE( subscription_name => 'employees_sub', source_schema     => 'cdcindrajith', source_table      => 'employees', column_list       => 'EmpID, EmpName, Age, ContactNo', subscriber_view   => 'employees_view'); END; BEGIN DBMS_CDC_SUBSCRIBE.ACTIVATE_SUBSCRIPTION( subscription_name => 'employees_sub'); END; BEGIN DBMS_CDC_SUBSCRIBE.EXTEND_WINDOW( subscription_name => 'employees_sub'); END; Finally, I insert data and also update some data, to check that the CDC has been correctly implemented. INSERT INTO cdcindrajith.employees(EmpID,EmpName,Age,ContactNo) VALUES (10638389, 'Indrajith', 21, 0713101658); INSERT INTO cdcindrajith.employees(EmpID,EmpName,Age,ContactNo) VALUES (10638390, 'Kumara', 27, 0711226661); UPDATE cdcindrajith.employees SET EmpName = 'Janaka' WHERE EmpID = 10638389; Towards the end, I check the results of my CDC table “employees_ct” to make sure that the CDC is correctly implemented. SELECT EmpID, EmpName FROM cdcindrajith.employees_ct;     3. Implementing CDC using Trigger (MsSQL) First, we need to create a new database. CREATE DATABASE empDB Then, I create two tables: one is to maintain employee salary records, the other is to update the salary log, which does the change data capturing. CREATE TABLE Salary ( ID int identity(1,1) primary key NOT NULL, SalDate datetime default GETDATE() NOT NULL, Task BIGINT NULL, PaidPerTask BIGINT NULL, EmpName NCHAR(100) NOT NULL ) CREATE TABLE SalaryLogs ( ID INT PRIMARY KEY IDENTITY(1,1) NOT NULL, SalDate DATETIME DEFAULT GETDATE() NOT NULL, Query NCHAR(6) NOT NULL, OldTask BIGINT NULL, NewTask BIGINT NULL, OldPaidPerTask BIGINT NULL, NewPaidPerTask BIGINT NULL, EmpName NCHAR(100) NOT NULL ) I implement a Trigger called “salary_change” to save the salary logs. GO CREATE TRIGGER salary_change ON Salary AFTER INSERT, UPDATE, DELETE AS BEGIN DECLARE @operation CHAR(6) SET @operation = CASE WHEN EXISTS(SELECT * FROM inserted) AND EXISTS(SELECT * FROM deleted) THEN 'Update' WHEN EXISTS(SELECT * FROM inserted) THEN 'Insert' WHEN EXISTS(SELECT * FROM deleted) THEN 'Delete' ELSE NULL END IF @operation = 'Delete' INSERT INTO SalaryLogs (Query, SalDate, OldTask, OldPaidPerTask, EmpName) SELECT @operation, GETDATE(), d.Task, d.PaidPerTask, USER_Name() FROM deleted d IF @operation = 'Insert' INSERT INTO SalaryLogs (Query, SalDate, NewTask, NewPaidPerTask, EmpName) SELECT @operation, GETDATE(), i.Task, i.PaidPerTask, USER_Name() FROM inserted i IF @operation = 'Update' INSERT INTO SalaryLogs (Query, SalDate, NewTask, OldTask, NewPaidPerTask,OldPaidPerTask, EmpName) SELECT @operation, GETDATE(), d.Task, i.Task, d.PaidPerTask, i.PaidPerTask, USER_Name() FROM deleted d, inserted i END GO Finally, I insert some data into the salary table and then try to update and delete queries as well. INSERT INTO Salary(SalDate,Task,PaidPerTask,EmpName) VALUES (2020-11-20, 4, 4000 , 'Indrajith'), (2020-10-20, 11, 10000 , 'Kusum'); UPDATE Salary SET EmpName = 'Janaka' WHERE EmpName = 'Indrajith'; DELETE FROM Salary WHERE EmpName = 'Kusum';   Towards the end, let’s check the salary logs table to understand whether the log files are updated or not.       We see here that the log files are up to date. Summary In short, CDC identifies and captures data that has changed in tables of a source database as a result of CRUD operations. This is useful to people who need to export their data into a data warehouse or a business intelligence application. Changed data is maintained in CDC tables in the source database. In this article, we briefly discussed what is Change Data Capture, why CDC is useful, and most importantly illustrated three methods for implementing CDC. I believe that the rapid evolution of big-data will have many more CDC implications in the future.

Read More
CloudZone

AWS Networking Best Practices

How to achieve Optimized AWS Network & Security? In this meetup, we presented our AWS best practices based on the recently introduced network components and how you can use new network resources and features, and capabilities to your advantage. All this and more will be illustrated through a selection of common scenarios: Network solutions for secure ingress and egress traffic routing VPC structure and CIDR management for tiered application or Kubernetes Transit Gateway integration with RAM, VPN, AWS Firewall AWS networking management with IaaC tools Case studies and lesson learned Presenting: Itay Mesika, DevOps Engineer @ CloudZone, with almost 10 years experience as Network & Security Engineer, AWS Certified Advanced Networking Specialist and Architect Haim Ben Hayim, Business Development Manager @CloudZone Target Audience:  VP R&D, CTO, DevOps, IT and Network Engineers  Hebrew speaking experts can watch the webinar here: [embed]https://www.youtube.com/watch?v=yhn2SV_0w2Q[/embed]   Does your network architecture suit the business and technical requirements of your organization? Contact us today!

Read More
CloudZone

Azure IoT Hub and How to Expose it for Enhanced Security

One of the most painful outcomes of using PaaS services is the fact that they expose their endpoints via FQDN that resolves to a dynamic IP List that the cloud provider might change. If you need to connect from on-prem to your PaaS service and whitelist that service using an IP address, you are in trouble! At least at Azure, you can get the IP list of Service Tags using REST, Powershell, or Azure CLI. But, let's say that you provide a solution for thousands of customers - do really want the headache of following up and updating them with IP list changes? And then waiting for them to implement the changes on their network appliances? I had to develop a workaround for a customer that provides an IoT solution to thousands of clients. Each client had my customer’s IoT devices on-prem and needed to send data through their own Network Appliances (like Firewall, Proxies, etc) to Azure IoT Hub, which as we all know exposes FQDN that resolves to dynamic IP address. My workaround involved creating the following Azure components: Azure Load-Balancer Standard SKU VMSS with HAProxy VMs (Spot) Shared Image Gallery Private link IoT Hub Google Cloud GKE - for POC and load testing the solution that has been created in Azure. I used Hashicorp Packer to create the HAProxy images and push them into the Azure shared image gallery. As VMSS VMs are stateless and used only for HAProxy, to reduce costs I used Spot VMs. Data flow explained IoT devices at the clients' sites send data to an Azure load-balancer that has a static PIP (Public-IP). Each client can whitelist the IoT hub connection, by configuring its network appliance to allow outbound traffic to that IP. From the load-balancer, traffic flows into VMSS with HAProxy installed, and HAProxy reroutes traffic to the Azure IoT Hub private link IP address (Private IP). We configure  the Azure NSG, to allow traffic from our client's IPs and on port 443 and MQTT (8883) and/or AMQP (5671). We then configure the IoT hub to admit traffic only from private links, thereby creating a much more secure environment.   Automation Explained Packer For the VMSS HAProxy, I used Hashicorp Packer ARM builder (HCL2) which creates the images and pushes them to the Azure shared image gallery. Be aware that the shared image gallery and image definition need to be manually created beforehand, using IaC on manually ! Packer code                     HAProxy.cfg  We can configure the Azure VMSS to do a rolling update whenever we push a new HAProxy image to the Azure shared image gallery. Load testing our configuration For load tests, I used Microsoft’s IoT Telemetry Simulator. The repo contains a helm chart that we can deploy and simulate thousands of devices that send data to our IoT Hub. For the purpose of resolving my IoT Hub FQDN to the load-balancer Public IP, I added it to the helm chart deployment.yaml (lines 30–33) and the corresponding values in values.yaml (lines 27–28). deployment.yaml values.yaml I deployed the helm chart into GKE. All this was performed with the following pulumi code  __main__.py Pulumi.dev.yaml Conclusion Although our solution is not fully supported by Microsoft, and there are a number of ‘moving’ parts involved, we did manage to solve our IoT Hub Dynamic Public IP address issue, and achieved a more secure IoT Hub flow. Just remember to POC the solution properly and load test it to resemble your production environment.

Read More
CloudZone

An Introduction to Google Cloud Composer

What Is Cloud Composer?  Google Cloud Composer is a fully managed version of the popular open-source tool, Apache Airflow, a workflow orchestration service. It is easy to get started with, and can be used for authoring, scheduling, monitoring, and troubleshooting distributed workflows. The integration with other Google Cloud services is another useful feature. It is free from vendor lock-in, easy to use, and brings great value for organizations that are willing to orchestrate their batch data workflows. Cloud Composer environments run on top of a Google Kubernetes Engine (GKE) cluster. The pricing model is customer friendly— you simply pay for what you use. Google's Cloud Composer allows you to build, schedule, and monitor workflows—be it automating infrastructure, launching data pipelines on other Google Cloud services as Dataflow, Dataproc, implementing CI/CD and many others. You can schedule workflows to run automatically, or run them manually. Once the workflows are in execution, you can monitor the execution of the tasks in real time. We’ll discuss workflows in greater detail later in this article. Features of Google Cloud Composer  The main features of Google Cloud Composer include: Simplicity: Cloud Composer provides easy access to the Airflow web user interface. With just one click you can create a new Airflow environment. Portability: Google Cloud Composer projects are portable to any other platform by adjusting the underlying infrastructure. Support for hybrid cloud operations: This feature combines the scalability of the cloud and the security of an on-premise data center. Support for Python: Python is a high-level, general-purpose, and interpreted programming language for big data and machine learning. Since Apache Airflow is built using Python, you can easily design, troubleshoot, and launch workflows. Seamless Integration: Google Cloud Composer provides support for seamless integration with other Google products, such as BigQuery, Cloud Datastore, Dataflow and Dataproc, AI Platform, Cloud Pub/Sub, and Cloud Storage via well-defined APIs. Resilience: Google Cloud Composer is built on top of Google infrastructure and is very fault-tolerant. As an added benefit, its dashboards allow you to view performance data.   Cloud Composer is based on the well-known Apache Airflow open source project, and it can be used to create cloud workflows in Python. In the next section, we’ll discuss the components of Apache Airflow. Components of Apache Airflow Apache Airflow is a workflow engine that allows developers to build data pipelines with Python scripts. It can be used to schedule, manage, and track running jobs and data pipelines, as well as recover from failures. The main components of Apache Airflow are: Web server: This is the user interface, i.e., the GUI of Apache Airflow. It is used to track the status of jobs. Scheduler: This component is responsible for orchestrating and scheduling jobs. Executor: This is a set of worker processes that are responsible for executing the tasks in the workflow. Metadata database: This is a database that comprises metadata related to DAGs, jobs, etc.   [caption id="attachment_6038" align="alignright" width="434"] Source: Astronomer.io[/caption]   Apache Airflow Use Cases Apache Airflow can be used with any data pipelines and is a great tool for orchestrating jobs that have complex dependencies. It has quickly become the defacto standard for workflow automation and is being used in many organizations worldwide including Adobe, Paypal, Twitter, Airbnb, Square, etc. Some of the popular use cases for Apache Airflow include the following: Pipeline scheduler: This is Airflow's support for notifications on failures, execution timeouts, triggering jobs, and retries. As a pipeline scheduler, Airflow can check the files and directories periodically and then execute bash jobs. Orchestrating jobs: Airflow can help to orchestrate jobs even when they have complex dependencies. Batch processing data pipelines: Apache Airflow helps you create and orchestrate your batch data pipelines by managing both computational workflows and data processing pipelines. Track disease outbreaks: Apache Airflow can also help you to track disease outbreaks.  Train models: Apache Airflow can help you to manage all tasks in one place, including complex ML training pipelines. What Problems Does Airflow Solve? Apache Airflow is a workflow scheduler that easily maintains data pipelines. It solves the shortcomings of cron and can be used to organize, execute, and monitor your complex workflows. Cron has long been in use for scheduling jobs, but Airflow provides many benefits cron can’t offer. One difference is that Airflow allows you to easily create relationships between tasks, as well as track and monitor workflows using the Airflow UI. These same tasks can present a challenge in cron because it requires external support to manage tasks. Because it provides excellent support for monitoring, Airflow is the best scheduler for data pipelines. While cron jobs cannot be reproduced, Apache Airflow maintains an audit trail of all tasks that have been executed.  Apache Airflow integrates nicely with the services that are present in the big data ecosystems—including Hadoop, Spark, etc.—and you can easily get started with Airflow as all code is written in Python. What Makes Apache Airflow the Right Choice for Orchestrating Your Data Pipelines? Apache Airflow offers a single platform for designing, implementing, monitoring and maintaining your pipelines. This section examines what makes Airflow the right scheduler for orchestrating your data pipelines. Monitoring Apache Airflow supports several types of monitoring. Most importantly, it sends out an email if a DAG has failed. You can see the logs as well as the status of the tasks from the Airflow UI. [caption id="attachment_6041" align="alignright" width="483"] Source: michal.karzynski.pl[/caption]   Lineage Airflow's lineage feature helps you track the origins of data and where the data moves over time. This feature provides better visibility while at the same time simplifying the process of tracing errors. It is beneficial when you have several data tasks that are reading and writing into storage. Sensors A sensor is a particular type of operator that waits for a trigger based on a predefined condition. Sensors can help a user trigger a task based on a specific pre-condition, but the sensor and the frequency to check for the condition should be specified. In addition, airflow provides support for the customization of operators, which can help you create your operators and sensors if the current ones don't meet your needs. Customization Using Airflow, you can create operators and sensors if the existing ones don't satisfy your requirements. In addition, airflow integrates nicely with all the services in big data ecosystems such as Hadoop, Spark, etc. What are Workflows, DAGs, and Tasks? Apache Airflow Directed Acyclic Graphs, also known as DAGs, are workflows created using Python scripts and are a collection of organized tasks to be scheduled and executed. DAGs are composed of several components, such as DAG definition, operators, and operator relationships. A task in a DAG is a function to be performed, or a defined unit of work. Such functions can include monitoring an API, sending an email, or executing a pipeline. A task instance is the individual run of a task. It can have state information, such as “running,” “success,” “failed,” “skipped,” etc.   Cloud Composer Architecture The main components of Cloud Composer architecture include Cloud Storage, Cloud SQL, App Engine, and Airflow DAGs. Cloud Storage is a bucket that stores the Airflow DAG plugin, data dependencies and relevant logs. This is where you can submit your DAGs and code. Cloud SQL stores Airflow metadata and is backed up on a daily basis. The app engine hosts the Airflow webserver, and allows you to manage access to it using the Cloud Composer IAM policy. And finally, Airflow DAGs, also known as workflows, are a collection of tasks.   [caption id="attachment_6043" align="alignright" width="360"] Source: DRVintelligence[/caption]   Benefits of Cloud Composer Here are the benefits of Google Cloud Composer at a glance: Simple configuration: If you already have a Google Cloud Account, configuring the Google Cloud Composer is just a couple of clicks away. While the Google Cloud Composer project is being loaded, you can select the Python libraries you want to use and easily configure the environment to your preferences.  Python integration and support: Google Cloud Composer integrates nicely with Python libraries and supports newer versions of Python, such as Python 3.6.  Seamless deployment: Google Cloud Composer projects are built using Directed Acyclic Graphs (DAGs) stored inside a dedicated folder as part of your Google Cloud Storage. To deploy, you can create a DAG using the available components in the dashboard. Then, just drag-and-drop the DAG to this folder. That's all you have to do, the service takes care of everything else. While a benefit of using a managed service like Google Cloud Composer is that you don't have to configure the infrastructure yourself, this means you have to pay more for a ready-made solution. Also, Cloud Composer has a relatively limited number of supported services and integrations . You'd need more in-depth knowledge of Google Cloud Platform to be able to troubleshoot DAG connectors. Getting Started In this section we’ll learn how to set up the Cloud Composer, orchestrate the pipelines, and trigger Dataflow jobs. Setting Up Cloud Composer First, enable the Cloud Composer API and create a new environment by clicking on "Create." Next, fill in all required details of the environment. These include name and location of the environment, node, machine type, disk size, version of Python, image version, etc. The setup process takes some time to complete, and completion will be indicated by a green check mark, as shown in Figure 4. [caption id="attachment_6046" align="alignright" width="496"] Source: Miro.medium[/caption]   Deployment of a DAG Cloud Composer stores the DAGs in a Cloud Storage bucket—this enables you to add, edit, and delete a DAG seamlessly. Note that a Cloud Storage bucket will be created when you create an environment. You can deploy Google Cloud Composer through manual deployment or automatic deployment. If you’re going to deploy DAGs manually, drag and drop the Python files (having a .py extension) to the DAGs folder in Cloud Storage. Alternatively, you can set up a continuous integration pipeline so that the DAG files are deployed automatically.   Orchestrating Google Cloud’s Data Pipelines with Cloud Composer Cloud Composer can orchestrate existing data pipelines implemented  by native Google Cloud services like Data Fusion or DataFlow.   Cloud Data Fusion is a fully managed data integration service from Google. If you have a Data Fusion instance and a deployed pipeline ready, you can trigger it from Cloud Composer using the CloudDataFusionStartPipelineOperator operator. Cloud Dataflow is a Unified stream and batch data processing that's serverless, fast, and cost-effective - based on Apache Beam. To trigger Dataflow jobs you can use operators such as DataflowCreateJavaJobOperator or DataflowCreatePythonJobOperator.   Summary Google Cloud Composer is based on the open-source workflow engine, Apache Airflow, which enables you to build, schedule, and monitor jobs easily. Not only can Cloud Composer help you operate and orchestrate your data pipelines; it integrates nicely with several other Google products via well-defined APIs. Simplicity, portability, easy deployment, and multi-cloud support are just a few of the benefits Google Cloud Composer offers.    

Read More
CloudZone

Kubeflow and ML Automation: Part 2

As ML models and algorithms are becoming a standard component of many enterprise applications, managing ML workflows as part of the CI/CD pipeline becomes an important prerequisite of an efficient AI/ML adoption strategy. Although many tools have been recently developed for fast prototyping, coding, and testing of ML models, the automation of ML components and pipelines is still a missing link for many companies.   In Part I of this Kubeflow series, we learned how Kubeflow enables end-to-end automation of Machine Learning pipelines through its advanced distributed training, metadata management, autoscaling features and more.   Here in Part 2, we offer up a Kubeflow tutorial, where we discuss how various components of Kubeflow enable the end-to-end training and deployment of ML models on Kubernetes. In particular, we’ll review Kubeflow tools for ML model training and optimization, model serving, metadata retrieval and processing, and creating composable and reusable ML pipelines.    We assume that you have managed to install Kubeflow on Kubernetes to follow the examples below. If not, you can follow these guides to learn how to run Kubeflow on AWS, GCP, or Azure.    Training ML Models with Kubeflow   Performing ML training in a distributed compute environment is a challenging task due to the need to configure interaction between training workers, provision compute and storage for training, and orchestrate the distributed training of ML models.   Kubeflow addresses these challenges by making it easy to run training jobs on Kubernetes using popular ML frameworks such as TensorFlow, PyTorch, XGBoost, and Apache MXNet. To enable ML training, Kubeflow offers various custom resources (CRDs) and controllers integrated with Kubernetes and leverages Kubernetes-native API resources and orchestration services.    The only thing you need to run ML training jobs using Kubeflow is your ML code, which can be containerized manually or by using the Kubeflow Fairing component. The way your code runs is managed by Kubeflow’s training job controller.   To get the feel of how it all works, let’s look at an example of a TFJob that can be used to train TensorFlow models with Kubeflow:  apiVersion: "kubeflow.org/v1" kind: "TFJob" metadata:   name: "mnist_training"   namespace: kubeflow-test spec:   cleanPodPolicy: None   tfReplicaSpecs:     Worker:       replicas: 2       restartPolicy: Never       template:         spec:           containers:             - name: tensorflow               image: gcr.io/kubeflow-ci/tf-mnist-model               command:                 - "python"                 - "/var/tf_mnist/tf-mnist-model.py"                 - "--log_dir=/train/logs"                 - "--learning_rate=0.04"                 - "--batch_size=256"               volumeMounts:                 - mountPath: "/train"                   name: "training"           volumes:             - name: "training"               persistentVolumeClaim:                 claimName: "tf-volume"   Along with the standard Kubernetes fields like pod restart policy and ML model parameters like batch size and learning rate, this TFJob defines a Worker field that configures the execution of a training job. You can make this job distributed by setting the worker count to 2 and creating a proper distribution strategy in your training model code. For example, this can be the tf.distribute.MirroredStrategy for synchronous allreduce-style training with multiple workers.    In addition to workers, TFJob provides other useful abstractions for implementing distributed training on Kubernetes, namely Chiefs, Parameter Servers, and Evaluators.    For example, you can define a Chief to orchestrate the model training and perform checkpointing of your models. Similarly, Parameter Servers can be used to implement asynchronous distributed training strategies such as the TensorFlow ParameterServerStrategy, in which the parameter server acts as a central worker responsible for aggregating model losses and updating workers with new weights. Finally, TFJob includes Evaluators that can compute evaluation metrics in the course of training.    TFJob is not the only way to train ML models with Kubeflow. There are similar training controllers for PyTorch training jobs, MXNet and other frameworks. Also, you can implement distributed training using the MPI Operator that implements the Message Passing Interface (MPI), a protocol for enabling cross-node communication using different network protocols and communication channels.    ML Model Optimization with Kubeflow   ML model optimization seeks to make model predictions more accurate and the ML model architecture more efficient. It often involves tuning hyperparameters such as the learning rate and selecting the most efficient ML architecture design—including the optimal number of neural network layers, number of neurons, modules, and more. Hyperparameter tuning and network architecture search (NAS) can be automated using AutoML, a set of algorithms designed to improve the performance of ML models without manual trial-and-error experiments.    The Kubeflow Katib tool provides various AutoML features for model optimization on Kubernetes. Instead of trying out different hyperparameter values manually, developers can formulate objective metrics such as model accuracy, define a search space (minimum and maximum hyperparameter value), and select a hyperparameter search algorithm.   Katib can then perform multiple runs of your model to find the optimal hyperparameter configuration. It can also adjust several parameters at a time, which would be difficult to achieve manually. The scope of the AutoML algorithm supported by Katib is quite impressive. You can use Bayesian optimization, Tree-structured Parzen estimators, random search, covariance matrix adaptation evolution strategy, Hyperband, Efficient Neural Architecture Search, Differentiable Architecture Search, and more. In addition, you can use Katib’s NAS feature to optimize model structure and node weights along with hyperparameters. Katib currently supports TensorFlow, Apache MXNet, PyTorch and XGBoost.   Katib hyperparameter optimization can be defined using the Experiment custom resource. This defines the hyperparameter space, optimization parameters and targets, and the search algorithm you want to use:  apiVersion: "kubeflow.org/v1beta1" kind: Experiment metadata:   namespace: kubeflow   name: tfjob-example spec:   parallelTrialCount: 3   maxTrialCount: 12   maxFailedTrialCount: 3   objective:     type: maximize     goal: 0.99     objectiveMetricName: accuracy_1   algorithm:     algorithmName: bayesianoptimization     algorithmSettings:       - name: "random_state"         value: "10"   metricsCollectorSpec:     source:       fileSystemPath:         path: /train         kind: Directory     collector:       kind: TensorFlowEvent   parameters:     - name: learning_rate       parameterType: double       feasibleSpace:         min: "0.01"         max: "0.05"     - name: batch_size       parameterType: int       feasibleSpace:         min: "100"         max: "200"   trialTemplate:     primaryContainerName: tensorflow     trialParameters:       - name: learningRate         description: Learning rate for the training model         reference: learning_rate       - name: batchSize         description: Batch Size         reference: batch_size     trialSpec:       apiVersion: "kubeflow.org/v1"       kind: TFJob       spec:         tfReplicaSpecs:           Worker:             replicas: 2             restartPolicy: OnFailure             template:               spec:                 containers:                   - name: tensorflow                     image: gcr.io/kubeflow-ci/tf-mnist-with-summaries:1.0                     imagePullPolicy: Always                     command:                       - "python"                       - "/var/tf_mnist/mnist_with_summaries.py"                       - "--log_dir=/train/metrics"                       - "--learning_rate=${trialParameters.learningRate}"                       - "--batch_size=${trialParameters.batchSize}"   For example, in this Katib experiment, you’re trying to maximize the accuracy of the MNIST model trained with TensorFlow by tuning the learning rate and batch size hyperparameters. The experiment is defined to run 12 experiment trials with the learning rate and batch size set to achieve 0.99 model accuracy. The spec defines a feasible space for the learning rate of between 0.01 and 0.05 and between 100 and 200 samples for the batch size. These hyperparameters will be adjusted by Katib in parallel. Also, the spec field named “algorithm” is used to set the AutoML algorithm for model optimization. In this example, I’ve used Bayesian optimization with a random state of 10.    Deploying ML Models to Production   Serving ML models is a challenging task that requires provisioning multiple servers, creating the model’s REST API, and enabling service discovery, load balancing, and automatic scaling based on inbound traffic. Providing this functionality for ML models is especially hard in a distributed compute environment with complex networking logic and a dynamic lifecycle of nodes and microservices running in the cluster.   Kubeflow provides many ML model serving tools that address these challenges, such as: TF Serving: a Kubernetes integration of the TF Serving package that makes it easy to use TFX library features with Kubeflow. TF Serving supports model versioning, cross-version traffic splitting, rollouts, automatic lifecycle management, and data source discovery out of the box. Seldon Core: a cloud-native tool for converting TF and PyTorch models into production REST/gRPC microservices. Seldon Core supports autoscaling, outlier detection, request logging, canary releases, A/B testing, and more.  BentoML: a platform that provides high-performance API servers and micro-batching support for the most popular ML frameworks including TensorFlow, Keras, PyTorch, XGBoost and scikit-learn.  KFServing: Kubeflow serving tool that uses the Istio service mesh for ingress/egress management and service discovery, along with the Knative platform for autoscaling served models.  In this article, we’ll focus on KFServing because it’s a part of the Kubeflow installation. As a serverless inference platform, it supports TensorFlow, PyTorch, scikit-learn, and other popular ML frameworks.    KFServing ships with a Custom Resource Definition and controller that supports autoscaling, traffic routing, serverless deployments, point-in-time model snapshotting, canary rollouts, and service discovery. To enable these tools, KFServing uses Istio and Knative under the hood.    Autoscaling is among the most-desired features provided by KFServing. It is hard to implement on Kubernetes from scratch due to the intricacy of multi-host networking and the need to build custom controllers integrated with the Kubernetes scheduler. KFServing enables model autoscaling by default using the Knative autoscaling functionality.    The Knative autoscaler scales ML models based on the average number of inbound requests per pod. You can customize this setting by including the autoscaling.knative.dev/target annotation, as in the example below.    Here, you will set the Knative concurrency target to 5, which means that the autoscaler will increase the number of replicas to 3 if the inference server gets 15 concurrent requests:  apiVersion: "serving.kubeflow.org/v1alpha2" kind: "InferenceService" metadata:   name: "model-test"   annotations:     autoscaling.knative.dev/target: "5" spec:   default:     predictor:       tensorflow:         storageUri: "gs://kfserving-samples/models/tensorflow/model"   Monitoring and Auditing with Kubeflow   When running a lot of ML experiments using different data sets and training frameworks, it’s easy to lose track of the ML model timeline. In this context, the automation of ML logging and metadata management becomes very important. Metadata history can provide ML practitioners a bird’s-eye view of the history of experiments, data sets used, and results obtained, as well as help set goals for future experiments.    The Kubeflow Metadata tool enables these features for your ML pipeline via the Kubeflow UI. It also ships with the Metadata SDK, which lets you specify the metadata to be generated in your ML code. The Metadata SDK supports four predefined types for capturing different kinds of metadata: Dataset type: Captures data set metadata both for component inputs and outputs. Execution type: Generates metadata for different runs of your ML workflow. Metrics type: Captures metadata for evaluating your model. Model type: Captures metadata of the model produced by your workflow.   Metadata can be exposed from your model code using the kubeflow-metadata Python package. You can install it using the pip package manager and import it into your model files.   pip install kubeflow-metadata from kubeflow.metadata import metadata   After configuring workspaces and experiments for the metadata, you can generate different metadata components from your code. For example, you can log metadata about your model using the Model metadata type: model_version = "model_version_" + str(uuid4()) model = exec.log_output(     metadata.Model(             name="MNIST",             description="MNIST digit recognition model",             owner="you@ml.org",             uri="gcs://your-bucket/mnist",             model_type="neural network",             training_framework={                 "name": "tensorflow",                 "version": "v1.0"             },             hyperparameters={                 "learning_rate": 0.5,                 "layers": [10, 3, 1],                 "early_stop": True             },             version=model_version,             labels={"mylabel": "l1"})) print(model) print("\nModel id is {0.id} and version is {0.version}".format(model))   This information can then be accessed for auditing and monitoring from the Metadata and Artifact stores in your Kubeflow dashboard.   Kubeflow Pipelines   Kubeflow leverages the Kubernetes declarative API to create complex multi-step ML pipelines linking multiple components. ML pipelines can be created using the Kubeflow Pipelines platform, which is a part of Kubeflow. Kubeflow Pipelines consists of the UI for managing ML experiments and jobs, an engine for managing multi-step ML workflows and an SDK for defining pipelines and their components.   These elements enable end-to-end orchestration, experimentation, and reusability of ML models. Pipelines can also be leveraged to create iterative and adaptive processes applying MLOps techniques. For example, using Kubeflow Pipelines, you can automatically retrain new models on new data to capture new patterns or set up CI/CD procedures for deploying new implementations of the model.   So what is a Kubeflow pipeline, and how does it work? In a nutshell, a Kubeflow pipeline is a declarative description of an ML workflow that includes its components and their relationships in the form of a graph. A pipeline step is packaged as a Docker container that performs a single step of the ML pipeline. For example, one component could be a data transformation job performed by the TensorFlow Transform module and another could be a training job that tells Kubeflow to train your model on a GPU deployed in a Kubernetes cluster. Similar to microservices, components are completely isolated: They have their own version, runtime, programming language, and libraries. This means they can be updated individually, without affecting other components.   In addition, pipelines let you define inputs of the model as well as outputs, including graphs, metrics, checkpoints, and other artifacts you want to generate from the model. This makes it easy to monitor different experiments and the outputs they produce. Depending on the result of the experiment, you can easily tune, change or add different components. When using TensorFlow, you can also transfer the outputs of components to the TensorBoard for visualization and deeper analysis using advanced ML features and statistical packages.   Kubeflow pipeline developers can assemble and rearrange multiple components using the Kubeflow Pipelines domain-specific language (DSL) based on Python. Below is an example of a simple Kubeflow pipeline written in the Pipelines DSL: @dsl.pipeline(   name='Github issue summarization',   description='Demonstrate Tensor2Tensor-based training and TF-Serving' ) def gh_summ(  #pylint: disable=unused-argument   train_steps: 'Integer' = 2019300,   project: str = 'YOUR_PROJECT_HERE',   github_token: str = 'YOUR_GITHUB_TOKEN_HERE',   working_dir: 'GCSPath' = 'gs://YOUR_GCS_DIR_HERE',   checkpoint_dir: 'GCSPath' = 'gs://aju-dev-demos-codelabs/kubecon/model_output_tbase.bak2019000/',   deploy_webapp: str = 'true',   data_dir: 'GCSPath' = 'gs://aju-dev-demos-codelabs/kubecon/t2t_data_gh_all/'   ):   copydata = copydata_op(     data_dir=data_dir,     checkpoint_dir=checkpoint_dir,     model_dir='%s/%s/model_output' % (working_dir, dsl.RUN_ID_PLACEHOLDER),     action=COPY_ACTION,     )   train = train_op(     data_dir=data_dir,     model_dir=copydata.outputs['copy_output_path'],     action=TRAIN_ACTION, train_steps=train_steps,     deploy_webapp=deploy_webapp     )   serve = dsl.ContainerOp(       name='serve',       image='gcr.io/google-samples/ml-pipeline-kubeflow-tfserve:v6',       arguments=["--model_name", 'ghsumm-%s' % (dsl.RUN_ID_PLACEHOLDER,),           "--model_path", train.outputs['train_output_path'], "--namespace", 'default'           ]       )   This spec defines three steps of the ML pipeline: data retrieval, training, and serving. Each component of this spec can be upgraded independently or added to another pipeline. This makes Kubeflow pipelines highly customizable and reusable for prototyping and testing different ML workflows.    Conclusion   In this article, we looked at some Kubeflow components and tools you can use to automate ML development and deployment on Kubernetes. One of the main advantages of Kubeflow is the ability to orchestrate distributed training jobs for TensorFlow and other popular frameworks. If your model’s code is compatible with distributed training, Kubeflow can automatically configure all workers, parameter servers, and cross-node communication logic for distributed training as well as use available GPUs in your cluster.    Kubeflow also brings the deployment of ML models to production to a qualitatively new level. With tools like KFServing, you no longer need to manually configure web servers and create APIs and microservices for your deployed models. Built-in inference services are already designed, like RESTified microservices with built-in load balancing, autoscaling, traffic splitting, and other useful features. Your models can be served efficiently while being highly available, scalable, and easily upgradable as they run.    Other good tools to look into are metadata management and hyperparameter optimization. We only scratched the surface in this article in terms of what you can do with Kubeflow. It is a highly pluggable environment and compatible with many other cloud-native components which run on Kubernetes.    All these features make Kubeflow a great tool for companies looking for a fast and efficient way to deploy ML models to production. The platform can dramatically reduce time to market for ML products and facilitate efficient CI/CD processes in line with MLOps methodology. Thus said, Kubeflow being a complex suite of stitched components, requires training and education. In addition, like any other opensource framework, you are also dependent on the community which develops it. Sometimes when you need to deliver an ML project into production with as little user friction as possible and with a low time to market, the best thing to do is to choose a commercial solution that already does an excellent job and also delivers simple interfaces and support. In the next part of the series we will cover Iguazio, an MLOPs platform that does exactly this. About Cloudzone CloudZone helps you leverage the power of the Cloud, so that you can focus on your core business strategies. As a multi-cloud service provider, we help customers to take advantage of the broad set of global compute, storage, data, analytics, application, and deployment services. Our goal is to help organizations move faster, lower their IT costs, and scale their applications.

Read More
CloudZone

Kubeflow and ML Automation: Part 1

With the growing maturity of the machine learning (ML) ecosystem and the deeper integration of ML algorithms into production software, managing the development, testing, and deployment of ML models has become a complex task.   Training deep neural-network models in a cloud environment requires a highly customized system that links together different components, such as compute, storage, and networking, allowing you to manage and orchestrate an ML pipeline in a consistent way. To create a functional ML pipeline, ML practitioners need to be able to set up an ML development environment, provision and scale compute power for training their models, create the models’ API, serve the models, and manage their lifecycle. But handling these tasks manually is an error-prone and time-consuming process. Moreover, not all ML practitioners have the DevOps expertise required to go from development to production and manage the AI/ML pipeline.   Automation can help address many of these challenges and is an integral part of the MLOps methodology, which aims to streamline ML workflows throughout the application lifecycle. In general, automation can provide the following benefits for the ML workflow in a distributed compute environment:   Lifecycle management of ML training jobs, including automatic scaling Composing, linking, and orchestrating different components of the ML pipeline Ensuring ML jobs have high availability and fault tolerance via automatic health checking and recovery Reproducibility of ML experiments and enabling iterative ML practices e.g. automatic retraining based on incoming data Automatic provisioning of compute resources MLOPS Pipeline (Image by Kaskada.com) This blog post is Part 1 of the “Kubeflow and ML Automation” series, which describes how Kubeflow helps automate Machine Learning on Kubernetes.   In this post, we introduce readers to Kubeflow, an open-source Kubernetes-based tool for automating your ML workflow. We show how the Kubeflow Pipelines platform and Kubeflow components allow you to automate and manage different stages of the ML workflow, including data preparation, model experimentation, training, and deployment. We also discuss how Kubeflow can be used as a part of the cloud-based managed K8s service. In Part 2, we’ll walk readers through some practical examples of using Kubeflow for model training, ML model optimization, serving, metadata retrieval and processing, and creating composable and reusable ML pipelines. Why ML Automation? The traditional process of ML research and development is based on multiple manual practices such as data pre-processing, model selection and testing, model optimization, and deployment. This process requires a lot of specialized knowledge in mathematics, statistics, and programming.   Although advanced ML practitioners are equipped with the knowledge necessary to develop ML models, the process of testing, deploying, and training ML models requires specialized expertise in compute and storage infrastructure, as well as networking, to serve and deploy the ML models. This complicates the process of deploying models to production and prevents many companies without specialized expertise in ML and DevOps from adopting AI/ML. Also, traditional ML processes lack reproducibility and repeatability and do not allow effective collaboration between different IT teams. Automation, which is ubiquitous in computer programming and IT, is the natural solution to these ML challenges. It provides many benefits for companies seeking to adopt ML algorithms in their applications, including: Faster TTM (time to market). ML automation allows you to streamline ML model training, testing, and deployment, which results in a faster transition from development to production. Enabling MLOps. Automation helps integrate various components of the ML workflow into a coherent pipeline that can be easily upgraded, tested, maintained, and deployed. Integrating automated testing, model builds, and deployments into the ML workflow aligns ML processes with existing CI/CD tools and approaches. Better collaboration. Reproducibility of automated ML experiments and automated metadata and artifact management leads to a clear understanding by different teams of the model development timeline. This ensures more efficient collaboration across teams and different projects. Reduction of human error. Subtle human errors can lead to a drastic deterioration in ML model performance, which is hard to debug due to the complexity of neural architecture and the “black-box” nature of model layers and parameters. Automation helps reduce human errors in ML models that are due to manual practices. Improved model accuracy and performance. AutoML algorithms can improve model accuracy and performance much faster than manual trial-and-error tuning, plus achieve better performance with real-world production data.   ML automation provides numerous benefits for ML researchers and practitioners as well. Thanks to automated MLOps processes and the AutoML algorithms, they can develop, train, and optimize their model faster by focusing on the research part of their work, such as experimentation, and not having to worry as much about provisioning compute resources, implementing distributed training, and configuring training environments. Why Kubeflow Is the Answer to the Challenge of Automation? Kubeflow is an open-source ML platform designed to train and serve ML models on Kubernetes. The main purpose of Kubeflow is to enable MLOps — a methodology for the end-to-end management of ML workflows that facilitates fast model development, training, and rollout/upgrade cycles. To achieve this, Kubeflow leverages Kubernetes API resources and provides a set of tools to automate various stages of the ML workflow, from development and testing to deployment. Kubeflow allows you to automate ML workflows in many different ways. Let’s discuss the most important of them. Automated Containerization of ML Code Training ML models in a distributed containerized environment like Kubernetes requires packaging ML code into containers configured with all the necessary executables, libraries, configuration files, and other data. Packaging containers whenever the model is updated takes time and may require a complex CI/CD pipeline. Kubeflow Fairing is a Kubeflow component that can automatically build container images from Jupyter Notebooks and Python files. Using Kubeflow Fairing, practitioners with less experience in Docker can easily run containers on Kubernetes. Automation of the Application Lifecycle in Kubernetes Distributed environments like Kubernetes clusters are highly volatile and dynamic, which makes it hard to ensure the uninterrupted operation of ML applications and training jobs. With hundreds of containers and pods running in one cluster, manual redeployment of failed applications and pods can be difficult, error-prone, and time-consuming. Kufeblow leverages Kubernetes Control Plane and its operators to manage the lifecycle of training jobs. Kubeflow controllers such as TFOperator or PyTorch Operator interact with Kubernetes controllers and schedulers to perform automated health checks to ensure that the ML model is running as expected. In its turn, Kubernetes automatically restarts pods on failure and maintains the desired number of replicas in Deployments, StatefulSets, and Kubeflow custom API resources. Autoscaling with Kubeflow Autoscaling ensures the high availability of served ML models. The failure to dynamically scale ML inference servers based on inbound user requests can lead to downtimes and poor ML user experience. Kubeflow provides several tools for autoscaling served models on Kubernetes. For example, autoscaling is supported for ML models deployed with the KFServing framework, which is a part of the Kubeflow default installation. Under the hood, KFServing uses Knative to autoscale deployments based on the average number of incoming requests per pod. If the concurrency target is set to three, for example, hundred concurrent requests will result in the spinning up of two new inference pods. The concurrency target can be easily set using the KFServing InferenceService custom resource. Similarly, flexible autoscaling is supported by Seldon Core, which is not part of Kubeflow but integrates well with it. Automated Distributed Training Distributed training is required for fast and scalable training of large ML models. It’s a natural solution in a distributed environment like Kubernetes where multiple nodes and CPUs/GPUs are available on-demand. However, it may be hard to manually configure the interaction and coordination between ML training jobs and workers, including the exchange and update of weights, computation of aggregate losses, etc.   Kubeflow ships with several tools that allow you to automate the distributed training of ML models on Kubernetes. For example, TFJob can be used to configure distributed training for TensorFlow models. The TFOperator that manages these training jobs provides three abstractions that represent different agents in the distributed training: Chiefs are responsible for the training orchestration and model checkpointing, Parameter Servers perform weight updates and model loss calculations, and Workers run the training code. These abstractions can be used to implement both synchronous and asynchronous distributed training patterns supported by the TF distributed training modules. To enable distributed training in your Kubeflow cluster, you can also use MPI Operator, which allows for allreduce-style distributed training of your ML models on Kubernetes. MPI Operator is the Kubeflow implementation of the Message Passing Interface (MPI), a multi-network protocol for efficient communication and coordination of nodes in compute clusters. Automation of Model Optimization ML model optimization is an important component of the ML workflow and aims to improve the performance and accuracy of trained ML models. Methods such as hyperparameter optimization and model architecture search have traditionally relied on repetitive trial and error experiments that take much time and are hard to test and reproduce. AutoML algorithms were developed to enable faster optimization of ML models for better accuracy and performance. The Kubeflow Katib component provides AutoML tools for hyperparameter optimization and neural architecture search (NAS). Instead of testing hyperparameters manually, ML developers can use Katib to define the hyperparameter search space and let Katib perform the search using a specified AutoML algorithm. Katib supports algorithms such as Bayesian optimization, Tree of Parzen Estimators, and Random Search, among others. This optimization can be performed on several hyperparameters in parallel. For example, you can simultaneously optimize the learning rate and regularization parameter. Also, Katib supports early-stopping algorithms to prevent model overfitting and NAS to select the optimal combination of a neural network’s layers and modules. Automation of ML Metadata and Log Management The conventional metadata and log management process used by ML practitioners typically involves the following steps: Generating artifacts (graphs, tables), logs, and metrics Watching them while the training job is running Recording the most important metrics for model performance analysis   If used repeatedly over a prolonged period of time, this manual process can lead to losing track of past ML experiments. It’s difficult to monitor the history of the model and collect insights from the disparate and unmanaged logs and metadata generated by different experiments. Kubeflow Metadata is a tool that helps you automate ML metadata management and address the above challenges. It ships with the Python SDK that lets ML practitioners record metadata directly from the ML model scripts. The SDK provides a number of useful functions to retrieve and organize the metadata on model training, datasets, metrics, and experiment runs and ship this data to Kubeflow Artifact Store for use by other components. Automatic retrieval of the metadata via Kubeflow enables better observability of ML experiments and lets you audit past experiments, performance metrics, datasets, and frameworks. A better understanding of past experiments enabled by Metadata can result in faster ML development cycles and better coordination across ML teams. Automating ML Workflow with Kubeflow Pipelines The Kubeflow automation tools we’ve discussed until now help automate specific parts of the ML workflow, such as training or hyperparameter optimization. The goal of Kubeflow Pipelines is to automate the entire ML workflow and transform it into a composable ML Pipeline. Kubeflow Pipelines consist of multiple components that represent various stages of the ML process in the form of a graph. For example, the pipeline can start with the data pre-processing job that consumes data from cloud storage and passes it to the training job. In turn, a training job component can be connected to the serving module that saves the trained model and launches the inference service to expose it to the Internet. This pipeline can be created using Pipeline DSL, saved as a separate file, and viewed as a graph in the Kubeflow dashboard. Organizing the ML pipeline as a set of independent and connected components provides enormous benefits for AI/ML teams enabling the ML process in line with the MLOps methodology. Such an approach allows for modularity of the ML pipeline, similar to a microservices architecture. Each component of the pipeline can be developed, tested, and upgraded independently by different teams. This modularity leads to better reusability of ML components, as now, each of them can be used as components of other ML pipelines. Since components are abstracted and isolated from the underlying environment, they can be used in any pipeline that follows the same approach. Also, Kubeflow pipelines enable easy repeatability and reproducibility of ML experiments. ML practitioners can run Kubeflow Pipelines knowing the execution order of different scripts and components, leading to improved coordination across teams and a better understanding of the ML workflow. Advantages of Using Kubeflow in the Cloud Running Kubeflow in the cloud provides additional benefits for companies seeking to automate their ML workflow and make it more efficient. Cloud providers like Google Cloud offer managed Kubernetes services and cloud-based ML platforms that can be integrated with the Kubeflow installation. Most importantly, when running Kubeflow in the cloud, you get access to highly performant on-demand CPUs/GPUs and storage. Companies running Kubeflow in the cloud can take advantages of mature ecosystems of cloud tools including Big Data tools and databases, block storage, serverless cloud functions, monitoring, logging, tracing, auditing, security and add-on ML services that can be integrated into your own ML process as helpers or part of the pipeline. For example, when running Kubeflow in Google Cloud, you can have access to Google Tensor Processing Units (TPUs), specialized hardware optimized for parameter computations and weights — updates typically made by the neural networks. Conclusion Kubeflow is one of the first tools to bring full automation of AI/ML pipelines in containerized and distributed environments like Kubernetes. It leverages Kubernetes API resources and orchestration services to ensure high availability and fault tolerance of containerized ML applications and provides its own set of tools to automate various parts of the ML workflow. Kubeflow’s feature set enables automation of ML model training, hyperparameter optimization, feature engineering, data pre-processing, model serving, and ML model containerization. In addition to that, Kubeflow Pipelines help create composable ML workflows in line with the MLOps methodology. Pipelines makes ML workflows composable, reproducible, and extendable, dramatically improving the quality of ML collaboration across teams and enabling faster experimentation and better observability of the model training. Built-in automation offered by Kubeflow makes it a great tool for companies looking for a fast and efficient way to deploy ML models to production. The platform can dramatically reduce time to market for ML products and facilitate efficient CI/CD processes in line with MLOps methodology. If you want to learn more about using Kubeflow for the automation of ML on Kubernetes, you can read Part 2 of our series, which provides many practical examples of leveraging Kubeflow components to create efficient ML workflows.

Read More
CloudZone

ETL Workflow Guide using Glue Studio with S3 and Athena

Create, Run, and Monitor ETL with AWS   The ‘dark ages,’ when paper forms and filing cabinets ruled, have passed. Today, it’s the ‘golden age’  in which databases are everywhere, and the technology of tomorrow won’t stop there — it will be the era of decision-making based on data analytics. You’ve probably heard how:   Tesco increased beer sales by placing them next to diapers. Abraham Wald — a Hungarian-born mathematician — used data-driven insights in WW2 to protect planes from enemy fire. Netflix used big data to enhance user experience and increased its customer base. To use data for such decision-making, we can’t use traditional OLTP (Online Transaction Processing) systems - we need to pump our data from our databases to the data warehouse. Here, data ETL (Extraction, Transformation, and Loading) comes in handy to manage the process. In this article, we’ll discuss how to perform ETL with AWS, using event-driven, serverless computing platform AWS Glue.     Getting Started with AWS First, to sign in to the console, we need an AWS account. You’ll have to input details of a valid credit card, debit card, or another payment method, even when you create an account under the free tier. Don’t worry- they won’t charge a penny without letting you know. After creating an account, sign in to the console as a root user.   Step 1: Create a bucket Source: aws.amazon.com/s3   In AWS Management Console, we can search for S3 and create a new bucket to store our data. We are building a database in the S3 object storage capable of holding substantial objects up to 5 TB in size.   (Create S3 bucket) So, here I name my new bucket medium-bkt, selecting the region US East (N. Virginia) us-east-1 and keeping the default options for the rest.   (employee.csv file) I create a simple CSV file with some dummy data and upload the CSV to the bucket I made earlier.   Step 2: Define the Crawler using AWS Glue source: aws.amazon.com/glue In 2017, AWS introduced Glue — a serverless, fully-managed, and cloud-optimized ETL service. To use this ETL tool, search for Glue in your AWS Management Console. There are multiple ways to connect to our data store, but for this tutorial, I’m going to use Crawler, which is the most popular method among ETL engineers. This Crawler will crawl the data from my S3, and based on available data, it will create a table schema.   (Add Crawler) To add Crawler to my S3: 1.      I give Crawler the name medium-crawler, and click next. 2.      Keeping the Crawler source type on the default settings, I click next again. 3.      I select S3 as the datastore and specify the path of medium-bkt, and click next. (Note: here, if you want to add a connection, you have to complete the S3 VPC endpoint set up) 4.      I select an existing IAM (Identity and Access Management) role radio button. Then, to create an IAM role, I go to the IAM Console, which will direct me to the IAM Management Console. ●       Click create a role. ●       Select Glue under the use cases, and click next. ●       Tick administrator access under the permission policies, and click next. ●       Adding IAM tags is optional, so for this tutorial, let’s continue without adding tags. ●       Give a preferred role name, and click the create-role button.     (Create an IAM role) 5.      Now, let’s come back to the Crawler creation. I select the created IAM role from the dropdown and click next. (Crawler creation steps)   6.      I set the frequency as run on demand and click next. (If needed, you can schedule your Crawler hourly, daily, weekly, monthly, etc.) 7.     To store the Crawler output, I create a database called employee-database, select the created database from the dropdown, and click next. 8.      Finally, I review all the settings that have been configured, and click finish to create the Crawler. Now that the Crawler has been created, I click medium-crawler and run it. If the Crawler job status changes from starting-status to stopping-status to ready-status, the Crawler job has been successful. (Crawler job status changes to the Ready stage)   The Crawler job will automatically create the tables in our database. It will also automatically detect the number of columns on our CSV file and their data types. If the Crawler job ends up with an endpoint error: Check that you have an Amazon S3 VPC endpoint set up, which is required with AWS Glue. If you haven’t set up VPC previously, here’s how: Go to the Amazon VPC Console and select endpoints under the virtual private cloud. Click create and endpoint, select com.amazonaws.eu-west-1.acm-pca under the service names and take the default options for the rest. (Create VPC endpoint)   Step 3: Define the Glue job Finally, we are done with the environment, and now I define a Glue job to perform the data ETL part in AWS. Then I go back to the AWS Management Console, search for the Glue, and select AWS glue studio and click jobs. (AWS Glue Studio) As above, I select Source and target added to the graph and it will direct us to a canvas where we can define source to target mapping. Here remember to give a name (in my case employee job) for the Glue job, otherwise it will return an error. (Source to target mapping)   To define source to target mapping: ●       I click data source and select the source database and the table (Select the source database and the table) ●       Then, I click transform and give the transform logic as select fields and select the id and name fields from the transform tab. (Define the transform logic) ●       Finally, I click data target and specify the target path. (I created a new S3 bucket called target-medium-bkt .) (Select the target location) ●       I click job details and select the IAM role which we created in Step 2. ●       Now we can save the job and run. (Job-status succeeded) Step 4: Query the data with Athena (Source: aws.amazon.com/athena) AWS Athena is the query service that AWS offers to analyze data in S3 using standard SQL. In this tutorial, I use Athena to query the ETL data and perform some SQL query operations. In AWS Management Console, we can search for Athena, and there you can see the medium-bkt table which is automatically created while we perform the ETL to employee-database. (medium_bkt table) But before running my first query, I need to set up a new bucket in S3 to store the query output. So, I go back to the S3 dashboard and create a new folder called query-output inside my medium-bkt. I then come back to Athena and specify the path of the query result location as shown below. (Select the query result location) Finally, now I can either query my source and target table and see the results, or analyze the data using SQL queries. (Query the data) Summary Performing an ETL is a significant aspect of a typical data engineer’s work. There are many cloud-based ETL tools out there, such as AWS Glue, Azure Data Factory, Google Cloud Air Fusion, etc. Regardless of which you choose, all of them will help reduce the development effort by providing a base from which to start, and providing the accessible manageable serverless infrastructure. In this tutorial, we have discussed how to perform Extract Transformation Load using AWS Glue. I hope this will help with your projects - if you find any points worth mentioning that have been missed, please put them in the comments below. Finally, I should point out that these services are not free, but the best thing about using AWS is you can pay as you go.

Read More
CloudZone

Is BigQuery Omni the next revolution in Data Warehousing?

IDC predicts that global dataspace will grow up to 175 zettabytes (10 to power 21) by 2025. Even my driving license is connected to the internet using RFID, and therefore continuously generates data.   According to a cloud adoption survey by Gartner, 81% of companies that are using public clouds are using more than one cloud provider. In simple terms, multi-cloud management is becoming more important than ever. However, the separated data needs to be implemented in a centralized data warehouse, because it’s impractical to have multiple data warehouses inside a single company. To address this, last September in GoogleCloudNext 2020, Emily Rapp, product manager of Google BigQuery, announced the next state-of-the-art data warehousing solution “BigQuery Omni”, especially for people who are using multi-cloud vendors.   BigQuery is not a new term for us. Google introduced BigQuery in late 2011 to handle massive amounts of data, such as log data of thousands of retail systems, or IoT data from millions of IoT devices across the globe. It’s a fully-managed and serverless data warehouse which shifts focus to analytics instead of managing infrastructure.   Breaking the Silos   BigQuery is designed to manage data silo problems that happen when a company has individual teams, each with their own independent data marts. By integrating BigQuery with the Google Cloud Platform, a company can easily handle the data version control problems mentioned above. But, with increasing demand for multiple cloud vendors to be used inside a single company, BigQuery Omni came into the picture. This became reality because of ‘Anthos’, another new technology introduced by Google which enables users to run applications not just using Google Cloud, but also with other cloud vendors, such as Amazon Web Services (AWS) and Microsoft Azure.    Source: Google Cloud blog   As for the data silo question, the main challenge was that there was no method to compute data held on another cloud platform. But with BigQuery Omni, we can run our compute clusters (known as Dremel) on Anthos clusters in AWS or Azure. It has a secure connection because the control plane and the metadata can remain on Google Cloud and only the query results pass through the BigQuery routers. That connection can also be used when users choose to bring the results back. Users can decide either to bring them back, or to do everything within AWS.   The competitive landscape   So far, BigQuery has two major competitors: AWS Redshift and Snowflake. As of 18th May 2020, the BigQuery market share is less than AWS Redshift, but its growth rate is quite impressive.   But, with this new release of BigQuery Omni, the serverless data warehousing technique is going to blow up the current market. Currently, BigQuery Omni has no competition, and neither Redshift nor Snowflake supports multi-cloud vendor integration so far. So, this really is going to be a wake-up call for BigQuery competitors.   Sources for their individual adoption: RedShift, BigQuery, Snowflake   Practical application   So, what does BigQuery Omni ‘looks like’ in action? Here’s one example - have you ever had the experience where you buy something, and you still see the ad repeatedly? You have already bought it, right? So, there’s no point in wasting ads on the existing customer. Using BigQuery Omni, we can solve the issue, because we can tie that commerce data to the ad platform safely and securely to ensure that once a purchase has been made, the ad no longer appears.   Pros and cons   As with everything, there are advantages of using BigQuery/BigQuery Omni. On the plus side you get: Low-level access to BigQuery Omni users; Simplicity - because of its truly serverless architecture, there is very little that you have to do to manage your BigQuery setup. (You basically just run your queries and pay according to what you scan); Scalability - you can scale up to 100TB queries very easily without scaling any infrastructure or anything else; Breaking down of silos and gain insights into data; A consistent data experience across the clouds - it doesn’t matter where your data sets are, you should be able to use standard SQL to write your queries in the BigQuery interface; and Portability, powered by Anthos. On the minus side, there’s: A relatively high pricing structure – to use BigQuery Omni, you have to use Anthos at the same time, so you pay for both services; and Google BigQuery requires knowledge of SQL coding to leverage its data analysis capabilities. Summary Companies using public clouds from more than one cloud provider need a centralized data warehouse to hold their data. BigQuery Omni is making a splash in the market by providing secure, serverless data warehousing, along with a host of other benefits.   Happy coding!        

Read More
CloudZone

Implementing WAF and mutual TLS on Kubernetes (AKS) with Nginx ModSecurity

Hey there, In a recent project that included deploying microservices into AKS, our client had a number of specific requirements: 1. Use Azure Kubernetes Service (AKS) as the platform for the application microservices. 2. Integrate mTLS capabilities to authenticate clients approaching our client’s APIs. 3. Use the client certificate to validate the client’s origin (in our case, a hospital). 4. Protect the public-facing microservices with a web application firewall (WAF). Challenge Azure does provide WAF services, like Application Gateway and Front Door, but neither of them has mTLS capabilities.   Solution   To meet our client’s requirements, we had to search for a third-party solution that provides it all. We came up with the idea of using the tried-and-tested Kubernetes Ingress-NGINX Controller for the following reasons: as well as being an Ingress controller with all the advantages of the NGINX engine, it also supports mTLS (client requirement 3); with its opensource WAF ModSecurity add-on (client requirement 2), it provides OWASP CRS support; and we can add more rules if we want to. For the validation requirement, we configured the NGINX to transfer the client certificate fingerprint to the backend app.   Solution Demo:     If you want to follow this demo, you will need the following: 1. Azure account (https://azure.microsoft.com/en-us/free/). 2. Your own domain. 3. DNS to manage your DNS records (I manage mine with Azure’s DNS service).   Let’s start by installing AKS (client requirement 1) with Pulumi, a rising star in the IaC world which uses familiar language code, like Python, Typescript, GO, and more. • Install Pulumi (in my case MacOS) • Install Python 3.6 or above and verify PIP is installed • Next, we will create a new Pulumi project The command will launch a short configuration section for a new Pulumi project. • Now we have three main files 1. Pulumi.yaml defines the project 2. Pulumi.dev.yaml contains configuration values for the stack we initialized. 3. __main__.py is the Pulumi program that defines our stack resources       Next, we will deploy AKS The next step is to connect to our AKS Now, we create two namespaces - one for the application, and one for the Ingress-NGINX Next, we have to create self-signed certificates for the client verification -mTLS (client requirement 3). (See this blog for more information about how to do this) For the server authentication, I created a Let’s Encrypt certificate with Certbot. (See this blog for more information about how to do this)     The result of this command is two pem files privkey.pem and fullchain.pem.     Now, after completing all the certificate creation steps, we can deploy secrets into the AKS app namespace, for the Ingress deployment. Now for the Ingress-NGINX deployment. I use Helm 3 to deploy Ingress-NGINX into the cluster, with the following value file: (See here for an explanation of the different ModSecurity configuration options) Now that we have the Ingress-NGINX Controller up and running, let’s deploy our app into AKS. The app will just echo back to us with HTTP request properties. We also deploy the service and Ingress in the same yaml stack. Each of the ModSecurity and configuration annotation snippets will demonstrate one of the capabilities that our use case needs.     ***     Now we can check if our Ingress configuration answers the client’s requirements. Client requirement 1: We are using AKS as our application platform. Client requirements 2 and 3: Enforcing mTLS and forwarding the client fingerprint to the client microservice for another validation phase. Let’s try to curl the website without client certificate and key certificate - we get an error message: “400 Bad Request”.       And if we try with client and key certificate we get “200”.       We can also see that we have forwarded the client certificate fingerprint.     Now, let’s turn to client requirement 4: ModSecurity as WAF.     We have created two rules and SecRuleEngine is ‘On’. This means that ModSecurity will be in prevention mode. Let's check the IP rule :       I get “ 403 Forbidden” curling from IP “34.242.209.15” Let's check the logs to see the error: Now, let’s check the request header rule: as user: admin I get blocked; changing to user: user, I pass.   Conclusion :   Using ModSecurity and Ingress-NGINX, we have managed to resolve all our client’s demands that couldn’t be met by the Azure service alone. Ingress-NGINX and ModSecurity are two powerful tools that give us the agility and freedom to control Ingress traffic and protect our environment, and we have the extra benefit of minimizing our vendor-lock.  

Read More
CloudZone

What is AutoML and Why Your Business Should Consider It

From 2010 to 2020, machine learning (ML) has shown its value by providing a number of breakthroughs in a diverse range of fields. Machine learning has gone beyond research groups and made its way into the enterprise. According to a LinkedIn report, the hiring rate for ML specialists grew to 74% annually from 2016 to 2020. While demand for intelligent systems is growing, many businesses do not have enough human resources or experts to keep up with the high demand for intelligent systems.     Given the scarcity of ML experts, automated machine learning (AutoML) is a source of relief for many organizations. AutoML is rapidly democratizing machine learning tools and boosting productivity, as it enables machine learning engineers, data scientists, data analysts, and even non-technical users to automate repetitive and manual machine learning tasks.     The traditional ML process is tedious, human-dependent, and repetitive. While data scientists are most sought after, the job is not as alluring as it may seem. In reality, data scientists and analysts spend 60–80% of their time cleaning, sourcing, and preparing data for the actual work- model building. For example, say Company A wants to use ML algorithms for time-series predictions of sales prices using data from the past few years. With traditional ML methods, data scientists at Company A need to understand the data, clean it up, engineer features, try out features and model testing, and spend a considerable amount of time squeezing out a few percentage points of accuracy. This is a monotonous and time-consuming process. AutoML, however, allows data scientists at Company A to quickly outsource the tasks to machines and get a working model on time.     Steps in machine learning projects   Advantages of AutoML Technology is to enable the business and not the other way around. If you’re a data scientist or analyst, your time is best invested in focusing on business problems rather than getting lost in the workflow and process. AutoML is changing the way businesses approach machine learning problems due to its many benefits.   It Saves You Time No one is born with the instinct to predict the best algorithm and hyperparameters for solving a problem. Instead, we manually test models, tune hyperparameters, and evaluate models to arrive at the best model for a particular problem. AutoML abstracts this manual work away from you. AutoML helps you transfer your data to the training algorithm and automatically search for the best neutral network architecture for your problem, thus saving you time. With AutoML, you can get results in as little as 15 minutes as opposed to hours.   It Bridges Skill Gaps Businesses are well aware of the need for intelligent systems in order to compete on a global scale. But companies are faced with many challenges, among them, sourcing talent. There is an increasing demand across a wide range of applications for ML engineers, data scientists with skills that businesses often find difficult to fill. AutoML addresses this skill gap. It makes building and serving ML models easy by automating some of the time-consuming steps in an ML pipeline regardless of your skills.   Improved Scalability Some emerging ML models are capable of mimicking specific human learning processes, and AutoML allows you to apply this at scale. This enables you to devote more time to business problems rather than iterative modeling tasks. AutoML offerings like AutoML Tables allows you to deploy state-of-the-art ML models at increased speed and scale.   Increased Productivity AutoML simplifies the process of applying ML to real-world problems. It streamlines all the steps required to solve business challenges by reducing the complexity of developing, testing, and deploying machine learning frameworks, thus boosting productivity. It provides a UI for non-technical users as well as a complete set of APIs that can be used in automation.   Reduced Errors in Applying ML Algorithms As businesses grow, the industry trends evolve and the amount of data expands. AutoML leads to better models by reducing the possibility of inaccuracies that might arise due to bias or human error. With this advantage, businesses can innovate with confidence, achieve a higher degree of accuracy, generate business benefits, and achieve higher ROI on ML projects. Considering these benefits, the next question would be where AutoML should be applied.   AutoML Use Cases Following are some typical business problems AutoML can be applied to.   Time-Series Forecasting Machine learning engineers and data scientists use time-series forecasting to predict future events by analyzing data and a series of observed values ordered through time. Time-series analysis can be a laborious and complicated process due to the challenge of finding the most influential signal and the impacts of many historical events on current or future predictions. These models need to be manually rebuilt and updated as the environment changes. But AutoML is able to automate the entire forecasting process, including feature engineering for discovering predictive signals, hyperparameter tuning, model selection, and more. AutoML can automatically detect noise, seasonality, stationarity, and trends. It transforms the dependent variable and implements backtesting to improve ML model performance and accuracy. Automated time-series forecasting use cases range from staffing and network quality analysis to demand at stock-keeping unit (SKU) level, inventory, log analysis for data center operations, and business operations for sales.   Classification Problems A classification problem is a type of supervised learning that assigns a class (label) to a sample. Classification models predict a label from a fixed, distinct number of possible labels. Common classification examples include object detection, handwriting recognition, and fraud detection. Google AutoML Vision enables you to automatically build and deploy advanced classification ML models to derive insight from images.   Regression Problems Similar to classification, regression problems are typical examples of supervised learning. Unlike classification models, a regression model predicts numeric values. Common regression examples include sales price prediction and house price prediction. Supervised learning services like AutoML Tables allow you to train a machine learning model on tabular data to make predictions on new data.   Feature Selection Features are also known as predictors, and they’re essential to an ML model. Features often depend on ML algorithm choice, and if not correctly selected, they could affect scoring and model build time. The more the features increase, the higher the chances of slowing down the overall modeling process. AutoML can perform feature selection effectively by using an automated evaluation process to access the combination of strong and stable predictors that work best for an ML model.   Algorithm Selection For an ML task, the process of finding an optimal algorithm can be daunting. However, you may infer the right algorithm by exploring a dataset. For instance, a yes/no classification problem might use any of the following algorithms: gradient boosted trees, decision tree, support vector machine (SVM), logistic regression, etc. Yet selecting the best modeling algorithm that gives the most accurate prediction can be an intensive process that involves significant tweaking and evaluation. AutoML-Zero uses an automation process to identify the models or algorithms most suitable for a given problem.   Model Tuning Every ML algorithm has its own set of hyperparameters that produces the most accurate model. You can think of hyperparameters as the “knobs” of ML models. Hyperparameters are set manually, as they cannot be learned through model training. When you tune a model, you modify the hyperparameters through a trial-and-error process, which could be time-consuming. Arriving at the best hyperparameters for a given problem is a critical but lengthy process that typically requires manual evaluation and repetition. Despite the endless number of hyperparameter combinations, AutoML can automatically find the best set for a given algorithm or model.   Natural Language Processing Civilization wouldn’t have been possible without language. Language is the cornerstone of our existence. We communicate and share ideas through languages. Everything we express verbally or in written form contains a great deal of information. The tone, word choice, and pauses all contribute to the depth and importance of the language. Advances in ML have led to machines that are able to read, understand, and derive meaning from languages and communicate back to you like humans. AutoML NLP gives you the power to build and deploy custom ML models that are capable of analyzing text documents, categorizing them, finding important information, or analyzing their sentiments.   Model Evaluation Model evaluation is a technique used to validate an ML model’s performance. It’s not enough to train a model; you also need to know how the model generalizes on data. Can the model be trusted to make accurate predictions on data it was not trained with? Is there a chance of overfitting where a model fits perfectly with training data that is unable to generalize on test or unseen data? One way to determine whether a model is not overfitting or underfitting is through model evaluation. AutoML can automatically access and evaluate an ML model’s efficiency against a given set of evaluation metrics.   AutoML for the Enterprise From computer vision to automatically building models on any structured data, Google has been growing its enterprise AutoML offerings since Google made its first AutoML announcement in 2017. One such offering is in the computer vision field. Computer vision generally deals with making computers understand images and videos and then drawing useful information from them. The ability to teach computers to have a human understanding of objects, pictures, and videos make technologies like autonomous cars a reality. Google’s AutoML Vision and AutoML Video allow enterprises to derive insights from images at scale. Enterprises accumulate data at a fast pace, according to some sources as much as 2.5 quintillion bytes of data each day per person. Handling massive amounts of data generated by the enterprise can be challenging in and of itself let alone having to build an intelligent system on the data. AutoML Tables allows enterprise customers with huge amounts of structured data to build fast ML models at scale. The struggle to implement end-to-end ML workflows is common in the enterprise because of the time and the knowledge required. But AutoML enterprise can derive more value from data without having a deep ML expertise and do so cheaply.     Conclusion For organizations with a data science strategy, AutoML is an effective tool for enhancing data science workflows — particularly for teams that are lacking expert ML headcount. While it can improve models by automating repetitive ML tasks, AutoML is not a replacement for data science. A tool cannot compensate for lack of strategy. If your organization needs to derive insight from your data but has trouble finding the right ML experts to fill in the gaps, AutoML can bridge this gap. AutoML can exponentially reduce the time and effort required to build time-series models for any organization. CloudZone's helps businesses grow by adopting state-of-the-art cloud technologies at minimal cost, while providing high quality Cloud solutions and services. Build predictive models effortlessly regardless of your cloud provider or technical expertise. Get started with CloudZone today.

Read More
CloudZone

Cloud Computing: 2021 Top Trends

As in years gone by, 2020 was slated to be the ‘year of enterprise migration’. But this year, it actually happened! Cloud adoption by businesses has been continually rising, and while this change may have been prompted by Covid-related restrictions, its benefits extend far beyond enabling remote working. So, now that so many businesses are on board, here’s our review of some of the mega trends we’ll be seeing more of into 2021.   Multi-Cloud Strategies  According to a cloud adoption survey by Gartner, 81% of companies using public cloud platforms are using more than one cloud provider. The reason is clear. No two businesses are exactly the same, and neither are their cloud requirements. By adopting a multi-cloud strategy, a company can select different cloud services from different providers to create the ideal blend to suit their workloads.  Cloud providers themselves are facilitating this trend by providing relevant tools that enable users to handle data from multiple public cloud platforms. Google’s Big Query Omni is one such example.    Hybrid Cloud For many highly-regulated organizations, strict latency and data security policies restrict the use of the public cloud.  A hybrid cloud offers seamless integration between a company’s data center and the public cloud. It provides all the advantages of the public cloud, without losing the usable, working hardware in the existing IT system or data center, addressing low latency issues while enabling data and apps to move securely between the two.  In 2020, one of the most prominent trends in the hybrid cloud was the private cloud. Facilitating accelerated cloud migration, storage, disaster recovery, infrastructure as a service and back up, it enables assets or servers to be kept local and securely backed in the public cloud. The ‘Inner Cloud’ from CloudZone by Matrix is one such private cloud solution.    Artificial Intelligence and Machine Learning Machine learning (ML) and artificial intelligence (AI) technologies are used by enterprises in diverse fields - from retail to agriculture, manufacturing to finance – to solve complex business problems, increase the value of their products, prevent fraud and more. In the cloud too, ML and AI are having an impact.  Public cloud platforms, together with open source tools, are helping enterprises build and implement vertical-specific machine learning capabilities and solutions, based on algorithms that create valuable insights, enabling the classification of data, predictions, and more. When it comes to productionizing an existing ML/AI workload too, MLOps tools such as MLflow and KubeFlow can be implemented into popular frameworks such as TensorFlow, PyTorch, to provide scalability, monitoring, concept drift detection, and more.    Cost Control and FinOps Culture Once an enterprise has implemented the cloud, unless a conscious effort is made to optimize spend, it can quickly spiral out of control. The key to running a cost-effective cloud environment is to understand the value of each service, and make an informed decision as to which are required at any given time.   The first step in achieving such a FinOps cloud culture is to achieve cost visibility, namely understanding what cloud elements are part of a package, and at what cost. This visibility supports governance and monitoring, enabling enterprises to put in place the correct policies, ideally even implementing monitoring tools to keep on track. When unnecessary spending, or a more cost-efficient alternative, is identified, the appropriate action can be taken so that ultimately, the enterprise is only paying for – and is fully utilizing – those elements that best serve its infrastructure and business needs.    Edge Computing  Our final megatrend is edge computing. This is a new and exciting area of technology whereby masses of data are physically transported to and from the cloud, from non-data center environments and even in locations where network connectivity is unreliable.  Whereas physical distance from a cloud data center can often cause latency and slowness, with edge, localized data centers bring data processing and analysis closer to where the data is actually created - at the edge of the cloud, or beyond the edge of the network. This enables the delivery of intelligent, real-time responsiveness, and streamlining of the data transferred.  With these five megatrends set to transform use of the cloud, enterprises have everything to gain by migrating their operations. And, as ever, Matrix and our subsidiary CloudZone, have all the expertise you need to get it right, first time. 

Read More
CloudZone

The Great Data Warehousing Debate

Photo by comfreak on Pixabay   Pioneers Bill Inmon, known as the ‘father of data warehousing’ and Ralph Kimball, a thought leader in dimensional data warehousing, have an ongoing debate. According to Kimball: “The data warehouse is nothing more than the union of all data marts”, to which Inmon responds: “You can catch all the minnows in the ocean and stack them together - they still do not make a whale”. Here’s what they’re arguing about: In a typical data warehouse, we begin with a set of OLTP data sources. These could be XL sheets, ERP Systems, Files or basically any other source of data. After the data arrives into the staging environment, ETL tools are used to process and transform the data and then feed it into the data warehouse. According to Inmon, data should be fed directly into the data warehouse straight after the ETL process. Kimball, however, maintains that after the ETL process, data should be loaded into data marts, with the union of all these data marts creating a conceptual (not actual) data warehouse.     Inmon and Kimball approaches to data warehousing The Inmon approach is referred to as the top-down or data-driven approach, whereby we start from the data warehouse and break it down into data marts, specialized as needed to meet the needs of different departments within the organization, such as finance, accounting, HR etc. The Kimball approach is referred to as bottom-up or user driven, because we start from the user-specific data marts, and these form the very building blocks of our conceptual data warehouse. It’s important to know from the outset which model best suits your needs, so that it can be built into the data warehouse schema.   [caption id="attachment_4879" align="alignleft" width="611"] The Inmon approach (diagram by the author)[/caption] [caption id="attachment_4880" align="alignleft" width="640"] The Kimball approach (diagram by the author)[/caption] To illustrate, we can consider a data warehouse to be like a filing cabinet, and the data marts its drawers. For Inmon, we transfer all the data into our filing cabinet (aka data warehouse) and we then decide which subject-specific drawer of the cabinet (aka data mart) to put the different files into. Conversely, for Kimball, we begin with a number of subject-specific drawers (data marts) that reflect who needs to use what data, and we can stack them into a cabinet formation (the data warehouse) if we want to, but at the end of the day, they're just a load of drawers, whether we bring them together into a cabinet or not.   It is the business needs of a certain entity that determine the correct approach for them. Here are some Examples to illustrate: Insurance: In order to manage risk based on future predictions, we need to form a broad picture across all policyholders, made up of a range of data such as profitability, history, demography, etc. All these aspects are interrelated, so the Inmon approach of starting with all the data in the warehouse and filtering it according to need is the most suitable of the two. Manufacturing: In the manufacturing process, a wide range of interrelated functions need to be taken into account for the smooth running of the business, such as inventory, store capacity, production capacity, man hours etc. Again, therefore, the Inmon approach is ideal, making all available information accessible for use as needed. Marketing: This is a specialized field, and we don’t need to look at every aspect of marketing for the purposes of analysis. So, we do not need an enterprise warehouse - a few data marts is enough - aka the Kimball approach. Conclusion In 2017, Gartner estimated that 60% of data warehouse implementations would have only limited acceptance or fail entirely. To enhance acceptance and success, it is important to set up your data warehouse correctly for your needs, from the very beginning. The implications of taking the wrong approach are costly and time consuming. When considering which approach to take - the Inmon or the Kimball - consider factors such as your budget, data volume, data velocity, data variety and data veracity. Then watch out for pitfalls, such as inappropriate software, poor communication between the business and the team, poor cost estimation etc. This is where experience really counts. What you might think is the right approach may not be the one that I think is right, and without a proper understanding of all the implications, mistakes can be made. With the right experience, you can find a cost-effective method to build a time-efficient solution.

Read More
CloudZone

Amazon CloudFront real-time logs. Import to AWS ElasticSearch Service.

Not long ago, AWS announced that its CloudFront CDN would support real-time logs. Until then, we could only use the S3 log feature, which created a delay before data could actually be analysed. This was not sufficient for certain scenarios.   Fortunately, AWS is constantly thinking about us ?. So, they unveiled a solution to make our life a bit easier and more real-time (or something near real-time — see details below). The task was to provide a quick and easy way to process CloudFront log data, ideally by having the possibility of building dashboards and performing some analytics. We decided to export the logs into AWS Elastic search Service. High-level solution diagram: The first step is to prepare the Kinesis Data Stream.     There is nothing special in the configuration here — it is pretty much a case of ‘next-next-next’ clicks. You should pay attention to scaling; in our case, one shard was enough. One important note: as CloudFront is a global service, your Kinesis and Elasticsearch infrastructure should run in the US-East-1 region. It probably is possible to send the data to another region, but in our case we wanted to follow the KISS approach. Once you have the Kinesis Data Stream, it’s time to configure your Kinesis Firehose. Some deeper explanation is needed on this step. Kinesis transfers the log data from CloudFront as a log entry string. There is no built-in mechanism to transform data from the string to JSON (the format suitable for Elasticsearch). So, if you try to export the data without any transformation, you will get the mapper_parsing_exception error. The transformation is made by Lambda (hello to AWS, which has no native way to achieve the goal ? ) As you can see from the code below, we’ve used only some of the log fields from our CloudFront to illustrate this. You can find the full list of available fields in our AWS Documentation.   The function extracts the fields from log entries and forms a JSON object. Make sure your fields are in the right order. The output should be Base64-encoded, otherwise Kinesis will throw the error. Now, let’s talk about buffering. Kinesis Firehose can buffer the data based either on time or volume. In our case, we chose to run on the minimal possible values: 60s or 1MiB. Your settings may vary, depending on your needs.       The last thing here is S3 backup. If the record cannot be processed by Lambda, or put down to Elasticsearch, it will be recorded to S3, for future manual processing. The output configuration is pretty straightforward. You should create the Elasticsearch domain in US-East-1. It is alsouseful to set up an indices rotation. In our case, we chose daily rotation. There are several settings for Elasticsearch that you need to select in order to enable it to work with Kinesis: Create the role in Elasticsearch (for example firehose-role):   Create the role mapping for your Firehose IAM role:       After carrying out these steps, you should see the logs in your Elasticsearch cluster. As I mentioned before, this solution will not give you truly real-time log ingestion to Elasticsearch. Kinesis still works with batches, and you may achieve near real-time ingestion, which should be enough for most needs.    

Read More
CloudZone

AWS Savings Plans: Are AWS Reserved Instances Dead?

In the past 3 years, AWS Reserved Instances have gone through many iterations. Several developments and adjustments (Regional Reserved Instances, AZ flexibility, Convertible Reserved Instances) have helped many customers make a long-term commitment (1 or 3 years) and reduce their On-Demand EC2 costs significantly. Reserved Instances users understand now that when they purchase Reserved Instance, the commitment is not on a specific instance name or Id, but is actually a virtual credit that floats above the relevant instances in the account, and provides an hourly discount according to the use of these relevant instances. Following the release of Convertible Reserved Instances, customers received the flexibility to change instance family type, operating System (OS) and size within a specific region as long as they maintained their total commitment value in Dollars. In short, convertible Reserved Instances amounted to greater flexibility but to lower discount rates. The new Savings Plans are a “great leap forward” for AWS customers. The goal is clear: AWS encourages customers to make a long-term commitment by providing an advanced yet easy-to-understand tool. AWS will now help customers save on their compute costs up to an average of 50–60% of their monthly spend, in return for a long-term commitment. What are AWS Savings Plans? Savings plans are measured based on an hourly cost commitment for 1 or 3 years. If a customer takes a $X/hour baseline commitment, they will receive a discounted rate for On-Demand EC2 costs, in accordance with the commitment baseline. Any On-Demand hours above the baseline value are charged the regular On-Demand rate. Example: · The customer makes a $5/hour commitment for 1 year. The total value of the commitment is 5 X 24 X 365 = $43,800. · The terms of the Savings Plan provide a 50% discount, which covers total yearly spending of $87,600 of EC2 usage. Any On-Demand hours above the baseline are charged according to the price list. · As to Reserved Instances, the $5 sum is measured on an hourly basis. For each hour, AWS calculates the On-Demand EC2 costs that are covered under the plan, and those charges are reduced. Unused hourly saving is not passed on to the next hour, day, or week in that account. So, what are the options? EC2 Savings Plans — These plans are regional and cover all EC2 instances within a given EC2 family, regardless of OS or tenancy. This plan expands the Linux Reserved Instances Flexibility feature to all OS of the same EC2 family type (m4, r5, t3a, etc.) Compute Savings Plans — These plans are the big news and perhaps the true revolution in savings management. The plan covers all regions, OS, families, size, as well as Fargate services that are part of the customer account. What are the discount levels? AWS announced that the discounts are similar to the Reserved Instances savings. They vary according to the plan length (1 or 3 years) and payment type (Full upfront/Partial upfront/No upfront). I decided to check the most important question with AWS. My question was: How is it possible that the discounts are exactly the same, in case of the Compute Savings Plans? If Reserved Instances discounts rates are different for each OS (the Linux discount is much higher than the Windows discount) and for each family type (C4, R5, M5d, etc.) In addition, the pricing of each VM type is different in each region. Therefore, in which order will AWS apply the hourly $ commitment to my On-Demand worldwide usage for each hour? AWS answered that the discount will be applied for EC2 instances running On-Demand according to the discount rate, from the highest EC2 discount rate to the lowest. These are GREAT NEWS. For each hour, AWS will sum up all the On-Demand charges within that hour in the account. The discount will first be applied to the EC2 with the highest discount level, then to the next rate levels, until all the commitment has been completely applied. AWS actually promises that customers will get maximum savings, regardless of their portfolio family type or OS. This means that if you are running Linux and Windows together at the same time, your savings will be applied first to the Linux VM, which will result in higher monthly savings. A deeper look at the discount rates reveals the following: · EC2 Savings Plans rates = Standard Reserved Instances rates · Compute Savings Plans rates = Convertible Reserved Instances rates Summary of Plans     Savings Plans or Reserved Instances? The attraction and simplicity of the savings plans are clear. Is it a revolution? I’m not sure. It’s still a financial commitment to use AWS services. Instead of measuring the commitment based on the number of instances or normalized CPU cores, AWS translated the commitment into Dollars. From my past experience with hundreds of startups and different types of organizations, I can say that a 3-year commitment is a big decision, which most technical teams would hesitate to make. Following the release of Convertible Reserved Instances, we advise our customers to purchase a 3-year, no upfront Convertible Reserved Instances, which provide a 50% discount. We were surprised to see that some of our customers were not keen to take the commitment although we offered to monitor their Reserved Instance utilization with CloudHealth and help them convert it, to reach 99%-100% Reserved Instances utilization. Reserved Instances still have some advantages over the Savings Plans: 1. You can purchase short-term Reserved Instances in the AWS marketplace, often with higher discount rates. 2. Standard Reserved Instances can be sold on the market; in case the company experiences a decrease in Compute resources need (or moves to another public cloud). 3. A 1-year compute Savings Plan will generate 9–10% less discount on a Linux OS VM, than a Standard Reserved Instances. This gap is not insignificant in a large environment.   What plan should you use?   1-year EC2 Savings Plan Recommended for customers familiar with Standard Reserved Instances usage, who can commit to EC2 family types for a full year. They can achieve the same discount rate they had with Reserved Instances, using a simpler tool. Bear in mind, that you won’t be able to sell the plan when you need to reduce your EC2 usage.   3-year EC2 Savings Plan This is a long-term commitment for a specific family type. I believe that making such commitment in a dynamic and constantly evolving cloud environment is not a recommended move. However, it may fit some customers with long term steady environments.   1-year Compute Plan Recommended for customers who run environments in several regions, and use several OS types or Windows VM. If your EC2 portfolio is anything else, I recommend taking a timeout and seeking the advice of an expert. 9–10% of additional savings are quite likely to worth the effort.   3-year Compute Plan This is the most cost-effective plan. If you are able to take a 3-year commitment, and your focus is 100% on reducing the costs of your AWS compute, this is your plan. You will gain simplicity and flexibility in a single package.   Summary AWS is definitely innovating to makes everyone’s life easier. This allows the customers to save costs if they are willing to make a long-term commitment. Still, this is yet another cost optimization tool. To succeed in optimizing costs, we must remember to think about all other aspects of optimization including scheduling, rightsizing, auto-scaling, spot instances and containers, which we encourage our customers to use on a daily basis. The cost optimization world is developing advanced ways to save costs. Achieving cost efficiency requires the customers to use advanced knowledge and the best tools, or engage experts familiar with such tools and the advantages of each service provided by the Cloud Vendors. If you can use an expert, I recommend doing it.

Read More
CloudZone

Istio Service Mesh – Deep Dive

New production-ready release of ISTIO 1.0. Learn about ISTIO’s architecture and features for microservices such as: Traffic management Resiliency Running secured microservices Distributed Tracing & Monitoring And more… Live demos included. (Microservices used are written in SpringBoot 2.0) by Iftach Schonbaum, Head Senior Solutions Architect @ CloudZone   See the Meetup that took place at Google offices in Tel-Aviv in October,2018   [embed]https://youtu.be/EeAeH3muC04[/embed]

Read More
CloudZone

Google Kubernetes Networking options explained & demonstrated

This blog post explores the different network modes available in Google Kubernetes Engine (GKE), including the differences between them and the advantages of each when creating a new GKE cluster. It will help guide you in choosing the most appropriate network mode, or if using an older network mode, decide whether it’s worth the trouble of switching. Additionally, you’ll learn how enabling network policies affects networking. Network Modes Explained GKE currently supports two network modes: routes-based and VPC-native. The network mode defines how traffic is routed between Kubernetes pods within the same node, between nodes of the same cluster, and other network-enabled resources on the same VPC, such as virtual machines (VMs). It is extremely important to note that the network mode must be selected when creating the cluster and cannot be changed for existing clusters. Though GKE Clusters may be created using a different network mode at any point in time, workloads need to be migrated, which can be a big undertaking. Routes-Based Network Mode The routes-based mode is the original GKE network mode. The name “routes-based” comes from the fact that it uses Google Cloud Routes to route traffic between nodes. Outside of GKE, Google Cloud Routes are also used, for example, to route traffic to different subnets, to the public internet, and for peering between networks. While each Kubernetes node has a single IP address from the subnet it is launched on, each pod will also get an IP. This IP, however, is not registered in the VPC itself. So how does it work? First, each Node reserves a /24 IP address range that is unique within the VPC and not in use by any subnet. GKE then automatically creates a new route, using the node assigned /24 as the destination IP range and the node instance as the next hop. Figure 1: Nodes, instances, and custom static routes of GKE Cluster Figure 1 shows a cluster with five nodes, which, in turn, creates five Compute Engine instances, each with an internal IP in the VPC. The appropriate custom static routes have also been generated automatically. Any pod created will have an IP in the /24 range of the node it’s scheduled on. Note that even though the /24 range has 254 available IP addresses, each GKE Node can only have a maximum of 110 Pods running. Figure 2: Networking between GKE Nodes and the underlying VPC How each pod connects to the underlying network of a node is determined by the Container Network Interface (CNI) being used in the Kubernetes cluster. In GKE, when network policies are disabled, there is no CNI plugin in use, and instead, Kubernetes’ default kubenet is used. Figure 3: Networking inside a single GKE Node Figure 3 illustrates that each pod has a fully isolated network from the node it runs on, using Linux network namespaces. A pod sees only its own network interface: eth0. The node connects to each of these eth0 interfaces on the pods using a virtual Ethernet (veth) device, which is always created as a pair between two network namespaces (the pod and the node’s). All veth interfaces on the node are connected together using a Layer 2 software-defined bridge cbr0. Linux kernel routing is set up so that any traffic going to another pod on the same node goes through the cbr0 bridge, while traffic going to another node is routed to the node’s eth0 interface. The router makes this decision based on whether the destination IP belongs to the /24 reserved for pods on the same node or not. VPC-Native Network Mode The VPC-native network mode is newer and is recommended by Google Cloud for any new clusters. It is currently the default when using the Google Cloud Console, but not when using the REST API or most versions of the gcloud CLI. It is therefore important to check the selected mode carefully when creating a new cluster (or even better, make it explicit!). This network mode uses a nifty feature called alias IP ranges. Traditionally, a VM has had a single primary network interface with its own internal address inside the VPC, determined by the subnet range it lives on. However, today, in addition to that, it is possible to have an IP range assigned to the same network interface. These supplementary addresses can then be assigned to applications or containers running inside the VM without requiring additional network interfaces. To keep a network organized and easy to comprehend, it is possible to define that alias IP ranges not be taken from the primary CIDR range of the subnet. Presently, it is possible to add one or more secondary CIDR ranges to a subnet and use subsets of them as alias IP ranges. GKE takes advantage of this feature and uses separate secondary address ranges for pods and Kubernetes services. Figure 4: VPC-native networking between GKE Nodes and a VPC subnet, using Alias IP ranges and a secondary CIDR range Each Node still reserves a more extensive than necessary IP range for pods, but it is also possible to adjust based on the maximum number of pods per node. For the absolute maximum of 110 pods per node, a /24 is still required, but, for example, for eight pods per Node, a /28 is sufficient. Other than the fact that a smaller than /24 can be allocated to the node for pods, there is no difference between this and IP allocation inside of a node. The same goes for networking inside of a node — it is precisely the same as for clusters using the routes-based network mode (i.e. kubenet is used). But because each VM now has the alias IP range defined on its network interface, there is no need to use the custom static routes created for each GKE Node, which are subject to GCP quotas. While this seems like a small difference between the two modes, it is highly advantageous. Benefits of VPC-Native Clusters There are absolutely no drawbacks to choosing a VPC-native cluster, but several benefits, with an important one being security. Because pod addresses are now native to the VPC, firewall rules can be applied to individual pods, while for routes-based clusters, the finest granularity level would have been an entire node. In this mode, the VPC network is also able to perform anti-spoofing checks. There are other advantages as well, listed in the GKE documentation section on the benefits of creating a VPC-native cluster. Last, container-native load balancing is only available for VPC-native clusters. Network Policies By default, in Kubernetes, pods accept traffic from any source inside the same network. And even if you’re using a VPC-native cluster, and can use VPC firewall rules, it’s typically not practical enough to be a security solution at scale. With network policies, however, you can apply ingress and egress rules to pods based on selectors at the pod or Kubernetes namespace level. Generally speaking, you can think of network policies as a Kubernetes-native firewall. In GKE, when you enable network policies, you get a world-class networking security solution powered by Project Calico, without having to set it up or manage its components on your own. Not only does Calico implement all of Kubernetes network policy features, but it also extends them with their own Calico network policies, which provide even more advanced network security features. To enforce these policies, Calico replaces kubenet with its own CNI plugin. As previously mentioned, the CNI plugin in use affects how traffic is connected between a pod and the underlying node it runs on. So regardless of which network mode you have selected, enabling network policies in GKE will change the networking inside of the node. Figure 5: Calico does not use a bridge, and instead uses L3 routing between pods. With Calico, there is no L2 network bridge in the node, and instead, L3 routing is used for all traffic between pods, so that it can be secured using iptables and the Linux routing table. A Calico daemon runs on each node, which automatically configures routing and iptables rules based on the network policies and pods. While the veth pairs still exist between the pod and the node’s network namespace, if you were to inspect them directly on a node, you’d notice that their names start with cali instead of veth. Conclusion Understanding how different network modes operate in GKE and how enabling network policies affects the networking inside a node will help you make better decisions and help you troubleshoot Kubernetes/GKE networking problems. If you’re launching a new GKE Cluster today, it makes sense to use the VPC-native network mode. If you have an existing cluster in routes-based network mode and would benefit from the advantages provided by VPC-native clusters, it might be time to plan a migration. Need help handling your cloud environment so you can focus on your core business? Contact CloudZone today.

Read More
CloudZone

AWS ALB-Ingress-Controller Guide

Hey everyone! It’s me again, always finding ways to save money and time and this time it is the latter! This is a guide to provision an AWS ALB Ingress Controller on your EKS cluster with steps to configure HTTP > HTTPS redirection. After collecting a huge amount of solutions and dealing with many tickets, I’ve decided to build this guide to help you provision this wonderful ALB, clarify the AWS official documentation and automate 99% of everything. You may change anything you want according to your needs but it is important to follow the roles and policies a 100%. Just make sure that if you do change the namespace for example, change it in every single file or you will get a huge “OOPS!” and even a larger headache. Make sure the following tags are correct on your EKS subnets All subnets in your VPC should be tagged accordingly so that Kubernetes can discover them: Key: kubernetes.io/cluster/<cluster-name> Value: shared Public subnets in your VPC should be tagged accordingly so that Kubernetes knows to use only those subnets for external load balancers: Key: kubernetes.io/role/elb Value: 1 Private subnets must be tagged in the following way so that Kubernetes knows it can use the subnets for internal load balancers: Key: kubernetes.io/role/internal-elb Value: 1 Install eksctl https://docs.aws.amazon.com/eks/latest/userguide/getting-started-eksctl.html Create IAM OIDC provider (can create manually in IAM > Identity Providers eksctl utils associate-iam-oidc-provider \ --region <region> \ --cluster <eks cluster name> \ --approve Create an IAM policy called ALBIngressControllerIAMPolicy and attach the iam-policy.yaml curl -o iam-policy.json https://raw.githubusercontent.com/kubernetes-sigs/aws-alb-ingress-controller/v1.1.8/docs/examples/iam-policy.jsonaws iam create-policy \ --policy-name ALBIngressControllerIAMPolicy \ --policy-document file://iam-policy.json Create a Kubernetes service account named alb-ingress-controller in the kube-system namespace, a cluster role, and a cluster role binding for the ALB Ingress Controller to use with the following command curl -o rbac-role-alb-ingress-controller.yaml https://raw.githubusercontent.com/kubernetes-sigs/aws-alb-ingress-controller/v1.1.8/docs/examples/rbac-role.yamlkubectl apply -f rbac-role-alb-ingress-controller.yaml Create role, add trust relationship and annotate A. Create a document trust.json and add: Replace Federated with the OIDC ARN and StringEquals with OIDC URL Those can be found in IAM > Identity Provider { "Version":"2012-10-17", "Statement":[ { "Effect":"Allow", "Principal":{ "Federated":"arn:aws:iam::<AWS account ID>:oidc-provider/<OIDC url>" }, "Action":"sts:AssumeRoleWithWebIdentity", "Condition":{ "StringEquals":{ "<OIDC url>:sub":"system:serviceaccount:kube-system:alb-ingress-controller" } } } ] } B. Create IAM role and attach the trust relationship: aws iam create-role --role-name eks-alb-ingress-controller --assume-role-policy-document file://trust.json C. Attach the ALBIngressControllerIAMPolicy to the alb role aws iam attach-role-policy --role-name eks-alb-ingress-controller --policy-arn=<ARN of the created policy> D. Annotate the controller pod to use the role: kubectl annotate serviceaccount -n kube-system alb-ingress-controller \ eks.amazonaws.com/role-arn=arn:aws:iam::535518648590:role/eks-alb-ingress-controller E. Add the following policies to the alb role: aws iam attach-role-policy --role-name eks-alb-ingress-controller --policy-arn arn:aws:iam::aws:policy/AmazonEKSWorkerNodePolicyaws iam attach-role-policy --role-name eks-alb-ingress-controller --policy-arn arn:aws:iam::aws:policy/AmazonEKS_CNI_Policy Deploy alb-ingress-controller A. Download the alb controller yaml locally curl -o alb-ingress-controller.yaml https://raw.githubusercontent.com/kubernetes-sigs/aws-alb-ingress-controller/v1.1.8/docs/examples/alb-ingress-controller.yaml https://raw.githubusercontent.com/kubernetes-sigs/aws-alb-ingress-controller/v1.1.8/docs/examples/alb-ingress-controller.yaml Edit alb-ingress-controller and add values A. Edit the alb-ingress-controller.yaml and add the following if not in: spec: containers: - args: - --ingress-class=alb - --cluster-name=<name of eks cluster> B. If you are using Fargate: spec: containers: - args: - --ingress-class=alb - --cluster-name=<name of eks cluster> - --aws-vpc-id=<vpcID> - --aws-region=<region-code> D. Apply the yaml: kubectl apply -f alb-ingress-controller.yaml Check that the ALB is up kubectl get pods -n kube-system Deploy sample app with ingress A. To use the public files: kubectl apply -f https://raw.githubusercontent.com/kubernetes-sigs/aws-alb-ingress-controller/v1.1.8/docs/examples/2048/2048-namespace.yamlkubectl apply -f https://raw.githubusercontent.com/kubernetes-sigs/aws-alb-ingress-controller/v1.1.8/docs/examples/2048/2048-deployment.yamlkubectl apply -f https://raw.githubusercontent.com/kubernetes-sigs/aws-alb-ingress-controller/v1.1.8/docs/examples/2048/2048-service.yamlkubectl apply -f https://raw.githubusercontent.com/kubernetes-sigs/aws-alb-ingress-controller/v1.1.8/docs/examples/2048/2048-ingress.yaml This will deploy an ingress object that will be picked up by the alb-ingress-controller and an ALB will be deployed B. Store the files locally for customisation: (recommended) curl -o <fileName.yaml> <URL from the previous steps>kubectl apply -f <fileName>.yaml Verify ingress kubectl get ingress/2048-ingress -n 2048-game Troubleshoot alb-ingress-controller Check Logs: kubectl logs -n kube-system deployment.apps/alb-ingress-controller Check the app Open a browser and navigate to the ADDRESS URL from the previous command output to see the sample application. If there is no address, check the logs of the controller with the command above and troubleshoot (should not happen) HTTP to HTTPS Redirect A. Add the following annotations to your ingress object and insert the arn of your certificate from AWS ACM: alb.ingress.kubernetes.io/actions.ssl-redirect: '{"Type": "redirect", "RedirectConfig": { "Protocol": "HTTPS", "Port": "443", "StatusCode": "HTTP_301"}}' alb.ingress.kubernetes.io/certificate-arn: <certificate arn from ACM> alb.ingress.kubernetes.io/listen-ports: '[{"HTTP": 80}, {"HTTPS":443}]' B. Add the following spec: Replace your serviceName and Port accordingly: spec: rules: - http: paths: - path: /* backend: serviceName: ssl-redirect servicePort: use-annotation - path: /* backend: serviceName: <"serviceName"> servicePort: <servicePort> Best way is to recreate the ingress Check the redirection Open a browser and navigate to the ADDRESS URL of the Load Balancer Good Luck! Contact me for more questions :) evgenibi@cloudzone.io

Read More
CloudZone

Google Cloud’s Traffic Director — What is it and how is it related to the Istio service-mesh?

For some of you that followed Google Cloud’s roadmap lately, you might have heard of Traffic Director. For the ones who know Istio, this might sound overlapping and confusing (Especially if you used the latest GKE’s Istio Add-on). In this post I’ll go over what Traffic Director is, how it is related to the Istio service-mesh and what does it mean for the ones who already run a production Istio mesh on GKE. In this post, I will not cover what Istio or a service mesh is. What is Traffic Director? Traffic Director is: “Enterprise-ready traffic management for open service mesh”… It is a fully managed control plane for a service mesh that enables to control traffic globally, across Kubernetes clusters (managed or not) and virtual machines, with smart traffic control policies. As any service mesh control plane, it controls the configuration of service proxies inside a mesh. Traffic Director has a 99.99% SLA (when reaching GA, currently in beta), which means you can manage your mesh configurations without worrying about the control plane’s health and maintenance. Traffic director also scales in the background to fit the size of your mesh, so you don’t have to worry about that neither. What Can be Done with Traffic Director? At a high-level you can do the following with Traffic Director: Sophisticated Traffic Management Traffic manipulation such as splitting, mirroring & fault-injection Smart deployment strategies such as A/B and canary in an easy way Request manipulation like URL rewrites Content based routing by headers, cookies and more Build Resilient Services Global cross-region aware load-balancing with single IP together with service proxies enables low latency, closest endpoint access with failing over to another in case of an issue, including applicative one. Closest endpoint can be another cluster in the same zone, different zone or different region. Additionally, configure resiliency features between services like circuit breaking outlier detections, off-loading that work from developers. Health Checks at Scale Offload proxies’ health-checking inside the mesh with GCP managed health checks reducing mesh-sized health checks. Modernise Non-cloud Native Services Since it works with VMs as well, it allows you to introduce advanced capabilities to legacy applications as well. Traffic Director in a global load balancing deployment (cloud.google.com) The Istio admins among us, might jump and say “well this is a managed Istio control plane”. That’s because Istio supports lots of the features above. (More precisely the Envoy proxy used in Istio does). So yes, with Istio you can achieve lots of the above — but it will include a lot of admin work (especially when extending to more than one Kubernetes cluster and to VMs). Also, the maintenance of the control plane and the entire mesh can have their toll. So is it indeed some kind of a managed Istio Control plane? Well, not exactly… Overlapping in some way — maybe. Let me simplify it... Istio and Google Cloud’s Traffic Director Differences SLA & Management Istio is an open-source project having some production grade support when included in products such as Openshift or IBM Cloud Private, you currently don’t have a public cloud fully managed Istio service. Most of the public cloud deployments of Istio are plain open-source, non-managed, non-SLA deployments — usually installed with the official Istio helm chart. In the contrary, Traffic Director has 99.99% SLA and is a fully managed service. Control plane Istio has three core components: Pilot for Traffic Management, Mixer for Observability and Citadel for Service-to-Service Security. Traffic Director delivers a GCP-managed Pilot along with additional capabilities mentioned such as global load balancing and centralised health checking. Scaling the Control Plane In Istio, the control plane components such as citadel, mixer & pilot are delivered with HPAs (HorizontalPodAutoscalers) — a Kubernetes resource that is in charge of autoscaling of deployments — with default settings. You need to tweak these settings to fit you Mesh in case there is need. You also need to specify PodAntiAffinity rules to ensure the control plane spans multiple Kubernetes nodes. With Traffic Director the control plane scales with the mesh and you don’t need to worry about it. API As for the Beta release, Traffic Director cannot be configured using Istio APIs. You can use GCP APIs for configuration. Both Traffic Director and Pilot use open standard APIs (xDS v2) to communicate with service proxies. Configuring Traffic Director with Istio APIs is in Traffic Director’s Roadmap. Data plane proxy Traffic Director uses the open xDSv2 APIs to communicate with the service proxies in the data plane, which ensures that you are not locked into a proprietary interface. This means Traffic Director can work with xDSv2-compliant open service proxies like Envoy. It is important to mention that Traffic Director is tested only with the Envoy proxy, and in the current beta release supports only Envoy versions 1.9.1 or later. Istio on the other hand, currently ships with Envoy alone, though there are projects like nginMesh which ship an Istio control plane with nginx as the sidecar proxy, but that’s a separate project. Its worth mentioning the Envoy has a reputation of a leading mesh proxy, designed for service meshes, with high performance and low memory foot print. Sidecar Injection & Deployment In both Istio and Traffic Director the proxy can be both on Kubernetes deployments (PODs eventually) and VMs. in both cases for deployment on VMs you are provided with several scripts and files to install the proxy and configure it with the control. As for Kubernetes workloads, Istio ships out of the box with automatic injection mechanisms (Works with the MutatingAdmissionController) which automatically injects the sidecar proxy to the POD when being created in a namespace labeled for automatic injection or with a dedicate POD annotation. With Traffic Director you currently need to manually injects the sidecar. and also create from the service a NEG (see GCP Network Endpoint Groups) using annotations so it can be added as a service in Traffic Director. As creating a MutatingAdmissionWebhook and an injecting service are relatively easy, I am sure automatic injection will come sooner or later to Traffic Director… Multi-cluster Mesh In Istio in order to span the mesh over more than one Kubernetes cluster, Istio provides a dedicated chart, named istio-remote, for expanding the mesh. I will not go through that here. Since Traffic Director is a control plane that lives outside the Kubernetes clusters and adding Kubernetes workloads to it occurs regardless from which cluster, there is no specific walkthrough for spanning the mesh over multiple cluster. Mesh Observability Today, Istio ships Kiali — a great mesh observability that helped our customers greatly for debugging applicative issues within a microservices applications. Kiali is evolving all the time, releasing new versions rapidly. Traffic Director is featured to be able to be observed with more than one tool, including Apache Skywalking. $ Pricing $ Istio is an open source and free. Traffic Director is currently offered without charge for the Beta release. “What if I already operate a production mesh with Istio on GKE?” As mentioned, Traffic Director is a managed Pilot (with extra capabilities) which will support Istio APIs for management. Thus, it should enable an easy opt-in replacement in case you want to replace your on-cluster, unmanaged pilot, with a fully managed one with high SLA. As far as i was told, there will be proper instructions of opting-in. Traffic Director is a recent announcement by Google Cloud. As it is based on the core patterns of Istio, which Google is amongst its main contributors, I forecast a great future for it. It is in the time when all public cloud providers are announcing their own Mesh solution. The Roadmap For Traffic Director Currently Includes: Support Istio’s Security Features such as mTLS, RBAC (Istio RBAC) Observability Integration Hybrid and Multi Cloud Support Management with Istio APIs Anthos Integration (See my post on Anthos) Federation with other service-mesh control planes I hope that this post solves any confusion or questions, and if not contact me! Iftach Schonbaum (Linkedin).

Read More
CloudZone

Autoscaling Kubernetes Workloads with Envoy & Istio Metrics inside an Istio Mesh

One of the most desirable benefits of the Istio service mesh is its incredible out-of-effort visibility it delivers in means of traffic flow & behaviour. In many cases, it’s the reason alone to adopt Istio for customers. A short recap on Istio: Istio is an open source service mesh solution that uses envoy as the side-car proxy in the data plane. Its main features are traffic management, security, observability and being platform independent. It natively supports Kubernetes. ISTIO provides in high level the following pillars: Load balancing for HTTP, gRPC, WebSocket and TCP traffic. Fine-grained control of traffic behaviour and flow. Pluggable policy layer supporting API for access control, rate limits and quotas. Automatic visibility with aggregated metrics & traces from all the side-car proxies in the mesh. Secure service-to-service communication in a cluster with strong identity-based authentication and authorization. In this post you can learn how to use metrics Istio provides (And the proxies in it) to autoscale Kubernetes workloads inside the mesh. Mixer, which is a part of Istio’s control plane contains the istio-telemetry which is in charge of ingesting time series metrics from all the side-car proxies in the mesh. It ingests raw Envoy metrics, enrich or aggregates some, and expose them as new metrics — e.g. as Prometheus. For example, one of the core metrics is the istio_requests_total metric, which contains information on traffic such as source/destination, status codes, latency, traffic volume and more. For example, looking at the Prometheus configuration delivered with Istio, we can observe the scrape configuration for the Istio mesh job: scrape_configs: - job_name: istio-mesh scrape_interval: 5s metrics_path: /metrics scheme: http kubernetes_sd_configs: - api_server: null role: endpoints namespaces: names: - istio-system relabel_configs: - source_labels: [__meta_kubernetes_service_name, __meta_kubernetes_endpoint_port_name] separator: ; regex: istio-telemetry;prometheus replacement: $1 action: keep The above definition is using Prometheus’s Kubernetes service discovery, and simply means: “scrape the endpoints istio-telemetry service through the prometheus (named) port which are found in the istio-system namespace”. This job, make the istio_requests_total metric (among others) available in Prometheus. Let’s leave Istio for now and do a recap on autoscaling workloads in Kubernetes. Kubernetes contains an API resource named HPA — HorizontalPodAutoscaler. HPA is in charge of autoscaling kubernetes workloads. By default, it allows you to scale according to cpu and memory usage of PODs within a deployment. This works out of the box with the metrics api, which the HPAs use themselves, to calculate current usage values. kubectl get apiservice v1beta1.metrics.k8s.io NAME AGE v1beta1.metrics.k8s.io 60dkubectl get --raw /apis/metrics.k8s.io/v1beta1/namespaces/kube-system/pods | jq -r 'first(.items[])' { "metadata": { "name": "kube-proxy-gke-highcpu-048834aa-b42v", "namespace": "kube-system", "selfLink": "/apis/metrics.k8s.io/v1beta1/namespaces/kube-system/pods/kube-proxy-gke-highcpu-048834aa-b42v", "creationTimestamp": "2019-04-14T13:10:35Z" }, "timestamp": "2019-04-14T13:10:20Z", "window": "30s", "containers": [ { "name": "kube-proxy", "usage": { "cpu": "7137682n", "memory": "26296Ki" } } ] } Now, any metric that is either cpu nor memory is considered as a custom metric. Custom metrics in Kubernetes involves using a separate api — the custom metrics api — and it does not supply any time series metrics for you by default. Rather, you need to do that yourselves using a feature by Kubernetes named API aggregation. The API aggregation feature in Kubernetes — a part of the API Extensibility capabilities of Kubernetes — allows (APIService) to claim any available url under the Kubernetes api. All requests to this api are hence proxied to a service (Defined in the APIService) that runs in the cluster. Actually the metrics api discussed above, is claimed by the metrics server out of the box. by Stefan Prodan. CPU & Mem metrics are retrieved from all cAdvisors (embedded in any kubelets node agents) and aggregated by the metrics server. HPA then queries the metrics api which proxies the request to the metric server to calculate the latest usage Lets run the command we previously ran, but now lets observe the full object.I narrowed it down to the relevant sections but you can try it on every Kubernetes cluster. kubectl get apiservice v1beta1.metrics.k8s.io -oyaml apiVersion: apiregistration.k8s.io/v1 kind: APIService metadata: labels: addonmanager.kubernetes.io/mode: Reconcile kubernetes.io/cluster-service: "true" name: v1beta1.metrics.k8s.io spec: group: metrics.k8s.io insecureSkipTLSVerify: true service: name: metrics-server namespace: kube-system version: v1beta1 the metrics api is claimed by the metrics-server as part of the api aggregation by default As this is an example that exists in any proper fresh Kubernetes cluster, the registration of the custom metrics api needs to done by the admin. It’s worth mentioning that the custom metrics api url is special compared to other user-defined ones in a sense that HPAs uses it by default when defined with custom metrics. Still, this url is not claimed by default and running kubectl get apiservice will not list it on a fresh cluster. We will see in just a minute how to register a Prometheus adapter to this url, but for now, assuming we did registered, HPAs can work with customer metrics as illustrated (with Prometheus example) : by @Stefan Prodan. Prometheus can be replaced with any other server that can answer the request with the right contract Lets stop for a second and see what parts we have covered and what is left for us to get to where we want — scale a deployment with an Istio metric. We know that Istio provides metrics and that they are being scraped with Prometheus that is delivered with the Istio chart. We know we can claim the custom metrics api url so all requests to it by an HPA will be proxied to the server that is registered under this url (defined by the APIService Kubernetes resource) All that is left is to connect the dots — choose a metric and register an apiservice (that pulls that metric from the ISTIO mesh) under the custom metrics api and test it with an HPA. We already have a Prometheus server in the istio-system namespace that does that. YAY! But not so fast... HPA works on a pod level metrics and calculates it self the average so you can scale on a target average. The istio_requests_total, which is available in this Prometheus by default is already aggregated on service level. This will only confuse the HPA and we will get undesired results. Sure, we can use a calculation somehow like this: istio_requests_total / #pods in the service This means that the HPAs are dependant on the istio-telemetry availability and it means that its less realtime that getting metrics directly from the PODs. However, it is doable. An alternative, more independent way is to use the envoy metrics collected by the ISTIO delivered prometheus server. These are POD level metrics! since every pod has an envoy injected into it in the mesh. Every envoy in an ISTIO mesh by default exposes prometheus metrics under the /stats/prometheus endpoint. You can observe the relevant Prometheus scrape job ‘envoy-stats’ that comes with Istio. It’s very long so I’m not including the full spec here. - job_name: 'envoy-stats' metrics_path: /stats/prometheus kubernetes_sd_configs: - role: pod..... The metric I want to use is requests per second or in the envoy prometheus metrics ‘envoy_http_rq_total’. unfortunately the default envoy_stats job configuration excludes this metric (while include many others), but you can easily include it if you replace the setting in the envoy_stats job under metric_relabel_configs of: - source_labels: [ http_conn_manager_prefix ] regex: '(.+)' action: drop with: - source_labels: [ http_conn_manager_prefix ] regex: '(0\.0\.0\.0_).*' action: drop If you don’t understand why, feel free to contact me! NOTE: for the newer versions of Istio — by default — the envoy proxies do notreport this metric. in order for it report it, so it can be scraped by prometheus, you need to add it with the http key in the annotation: sidecar.istio.io/statsInclusionPrefixes in the pod template section in the deployment. for more information check https://istio.io/docs/ops/telemetry/envoy-stats/ Assuming we made this change, on the Prometheus side we can now see this metric: Yay! The metric can be seen now in prometheus. Now let’s make queries to the custom metrics api be proxies to this Prometheus server. For that we have ready-to-deploy chart of the prometheus adapter. https://hub.kubeapps.com/charts/stable/prometheus-adapter This chart will create an APIService — v1beta1.custom.metrics.k8s.io — and will direct the requests to it to the adapter deployment which is also part of the chart. You can install for example like that: helm upgrade --install --namespace $MONITORING_NAMESPACE custom-metrics stable/prometheus-adapter \ --set=prometheus.url=http://prometheus.istio-system \ --version $PROMETHEUS_ADAPTER_VERSION --wait For HA, the chart support podAntiAffinities and replicaCount parameters. We need to reconfigure it so it queries what we want from the ISTIO’s Prometheus server, which now has our requested metric. apiVersion: v1 kind: ConfigMap metadata: labels: app: prometheus-adapter chart: prometheus-adapter-v0.4.1 heritage: Tiller release: custom-metrics name: custom-metrics-prometheus-adapter namespace: prometheus-operator data: config.yaml: | rules: - seriesQuery: '{container_name!="POD",namespace!="",pod_name!=""}' seriesFilters: [] resources: overrides: namespace: resource: namespace pod_name: resource: pod name: matches: "envoy_http_rq_total" as: "" metricsQuery: sum(rate(<<.Series>>{<<.LabelMatchers>>}[1m])) by (<<.GroupBy>>) You can set this configuration while installing the chart, giving the helm command the parameters, but I found it hard and not needed. You can use the above CM as reference. If you did apply the above cm after installation, you need to rollout the deployment of the adapter… kubectl patch deployment custom-metrics-prometheus-adapter -p "{\"spec\":{\"template\":{\"metadata\":{\"labels\":{\"date\":\"`date +'%s'`\"}}}}}" -n $MONITORING_NAMESPACE You should now be able to see the apiservice object kubectl get apiservice v1beta1.custom.metrics.k8s.io -oyaml apiVersion: apiregistration.k8s.io/v1 kind: APIService metadata: labels: app: prometheus-adapter chart: prometheus-adapter-v0.4.1 heritage: Tiller release: custom-metrics name: v1beta1.custom.metrics.k8s.io spec: group: custom.metrics.k8s.io insecureSkipTLSVerify: true service: name: custom-metrics-prometheus-adapter namespace: prometheus-operator version: v1beta1 And be able to see the following: kubectl get --raw "/apis/custom.metrics.k8s.io/v1beta1/namespaces/istio-system/pods/*/envoy_http_rq_total" | jq -r 'last(.items[])'{ "describedObject": { "kind": "Pod", "namespace": "istio-system", "name": "istio-telemetry-7f6bf87fdc-xn489", "apiVersion": "/v1" }, "metricName": "envoy_http_rq_total", "timestamp": "2019-04-14T14:51:29Z", "value": "70377m" } This means the pod istio-telemetry-7f6bf87fdc-xn489 has currently 70.3 requests per second in the last minute… And now define an HPA with this metric so a deployment can scale on the average RPS of its pods. apiVersion: autoscaling/v2beta1 kind: HorizontalPodAutoscaler metadata: name: rps-hpa spec: scaleTargetRef: apiVersion: extensions/v1beta1 kind: Deployment name: test-deploy minReplicas: 3 maxReplicas: 10 metrics: - type: Pods pods: metricName: envoy_http_rq_total targetAverageValue: 75 Listing the HPA will look something like this (clean view): kubectl get hpa -n test NAME REFERENCE TARGETS MINPODS MAXPODS REPLICAS AGE rps-hpa test-deploy 62023m/75 3 10 3 1d which means ±62 requests per second while that target utilisation the HPA will autoscale according to will be 75. You might notice that, really, scaled according to an Envoy metric. Nonetheless, you can apply the above to any other Envoy metric in Istio, or use an Istio generated metric like the istio_requests_total. All are scraped from istio-telemetry by Prometheus and that’s what’s important. Feel free to ask anything. Iftach Schonbaum (Linkedin).

Read More
CloudZone

AWS AutoScaling Group-Spot: Capacity Optimised Allocation Strategy

Welcome to the world of money saving where everything you do should save you some cash to spend it on whatever you like !!! What is Amazon EC2 Auto Scaling? Simple and automatic capacity provision Replacement of unhealthy instances Balanced capacity across availability zones Support for multiple purchase options Scaling of your infrastructure (up and down) Why Spot Instances? Amazon EC2 Spot Instances let you take advantage of unused EC2 capacity in the AWS cloud for up to a 90% discount compared to On-Demand prices. When making requests for Spot Instances, you can take advantage of “allocation strategies” within services such as EC2 Auto Scaling and EC2 Fleet. Auto Scaling Group (ASG) Intro: So now that we are ready to start using the Auto Scaling groups and feel the AWS vibes all over the place, let’s go over some of the basics: I might use the term “ASG” for autoscaling groups because it’s Friday and I am lazy….Don’t judge me! ASG is a logical group of instances for your service The keys to activate this magnificent resource are: Desired Capacity: the number of instances you want you autoscaling group to spin at any given time Min: the minimum number of instances you want your autoscaling group to maintain at any given time Max: the maximum number of instances you want your autoscaling group to maintain at any given time “Wait a minute…. There is the “auto” in “autoscaling”! So how…..what…..huh? Calm down, calm down, although those are not a part of this article’s focus, here are the autoscaling methods !!!: Manual Scaling: you guessed it from the name, you just go and scale your ASG manually via the AWS CLI, API or directly from the console. Manual labor is still a part of our world in 2020 and it’s not going away any time soon Scheduled Scaling: you can and may go ahead and schedule the scaling of your ASG based on your needs and predictions. For example, if you know that your website gets a high amount of traffic on Mondays, every other month, between 9 and 10 AM, while it’s raining (just kidding), you can go ahead and set this schedule to launch more instances for that time frame to handle the load and then simply scale it down for you at the end of the given schedule. Dynamic Scaling: sounds cool right?! Well…it is! You can and may use Scaling Policies. This a super powerful tool that can be configured any way you like to meet your most specific and custom needs. Predictive Scaling: Just like one of Harry Potter’s classes, AWS can too look into the past and future. This is possible with this super cool scaling method that uses machine learning to look into your past scaling patters and try to predict what, why, when and how your ASGs should scale If you want to know more about ASG in general, go ahead and visit the AWS Documentation Section and dive in! We are getting closer to the real bread and butter of this story but first, a quick look at the past and the present of the ASG structure: Multiple ASGs Each type was in a different ASG Many resources to manage Many actions to take in case of scaling Single ASG to rule them all ! Easy control over each type One source to scale from The above images are showing that you can now configure and customise one ASG to use all three of the purchase types: On demand: instances that you launch and never go away while you keep paying the same stable price for them (just like my needy dog) Spot: A Spot Instance is an unused EC2 instance that is available for less than the On-Demand price. RI: basically, you “rent” and instance while paying a fixed price with option for an upfront payment as well to lower that fixed payment Now we are getting to the good stuff! Allocation Strategies: Lowest-price (diversified over N pools) allocation strategy: this strategy will deploy instances from each pool of instance types and the price limits you give it. Since the price is constantly changes, those instances will be terminated and replaced by new, cheaper once thus potentially disrupting your service at a higher rate. Capacity-optimised allocation strategy: the Star of our show today! This strategy does not look at the prices of the instance types in each pool configure but instead looks for the optimal capacity volume and chooses those instances to run your service on. Since it does not care about the price, even if it changes, the instances will remain online and will not terminate as frequently as the Lowest-price strategy. The only time it may and will replace the instance is if a better pool with the highest capacity needed for your service is available. Lets review this use case and assume you are using the below: A “c5.large”, “c4.large” , “c3.large” instance types for your ASG, three availability zones : us-east-1a, us-east-1b and us-east-1c, the “c3.large” costs less than “c4.large” and “c5.large” but has less free capacity left in each availability zone: Lowest-price: will look inside the available instance pool in each availability zone and launch the least priced one which will select the: - “c3.large” and “c5.large” in us-east-1a - “c3.large” and “c4.large” in us-east-1b - A mix of the three in us-east-1c This happens because the price is in fact lower for “c3.large” but it does not have a lot of capacity left to play with. For the Lowest-price allocation strategy A mix of types were chosen and spread across the availability zones. Since the price of all three types may and will change frequently, the instances in those families will terminate and be replaced by a new cheapest type. Capacity-optimised allocation strategy: will look at the free capacity in. each availability zone and launch the types with the most capacity left: - “c5.large” in us-east-1a - “c3.large” in us-east-1b - “c5.large” in us-east-1c For the Capacity-optimised allocation strategy the types with the most capacity were chosen regardless of the price thus they will not be impacted by the price fluctuation and remain up and running until the free capacity amount changes. Since that happens less frequently then the price change, the volume of interruptions to the instance and your service will be minimised. This allocation strategy may be especially useful for workloads with a high cost of interruption, including: Big data and analytics Image and media rendering Machine learning High performance computing Well well well, now you know how to take care of your precious application/server/whatever magic you want to run and make sure that the interruptions to your money maker are minimised and you can finally afford that coffee machine you always wanted for your office !!!

Read More
CloudZone

Running Elastic GPU Workloads Cost Effectively on Kubernetes with Azure Low Priority VMs

About two months ago we had an opportunity to build a multi-cloud Kubernetes solution for a client that need to run elastic (in quantity, frequency and run time) image processing workloads with TensorFlow. The first cloud provider they wanted to start with was Azure. I want to share with you our journey here at CloudZone, as I haven’t found anything yet on the Internet that can provide such a technological solution for this specific need. First, we can start with the fact that AKS was planned as a managed Kubernetes solution for the job, but we quickly understood that it still lacked three major features to achieve our goal: Cluster autoscaler for node pools is still in preview state — we need to be able to scale from zero to X at any time. Only thing that should stop us is Azure account resource limits. In addition to that, AKS VMSS node pool cannot be size zero. Low priority virtual machine scale sets (VMSS) — we require to run job type workloads that can benefit from LPVM in terms of cost. Multiple node pools to run mixed workloads — we need to run various kinds of pods. Some of them will need very small amount of resources and some of them will need a powerful Nvidia Tesla V100 GPU and a lot of RAM, using “Standard_NC6s_v3” compute instances. One of the immediate alternatives on the horizon was Spotinst Ocean, but this is a third party product that cannot be paid with Azure credits and the idea was not to pay real money for the compute resources used in Azure. Another solution, which is kubespray has Azure support, but will not work with pulling configuration, where we need nodes to come up and down all the time. Another option was a DIY cluster setup with kubeadm, but after some time we found that this solution was too complex and chasing after all Azure API aspects and bootstrap phases (main method was creating node images with Packer that had all dependencies, setup CNI and joining the cluster with cloud-init script upon start) was taking way too much time from the project. After some trial and error, we came back to a solution that is used by Spotinst Ocean and can provide us all the features we need until AKS will become a mature enough product. It was important for us that this solution is supported by Microsoft too. We started to use AKS-Engine. Nvidia Tesla V100 die AKS-Engine provided us the features that are still not available in AKS, and more. We can create a highly available control plane, external load balancer, use latest version of Kubernetes and many more enhancements to our Kubernetes infrastructure. AKS-Engine is using a single Go binary that accepts an API module input JSON file and generate an ARM template (that use many of the methods we used in our DIY cluster attempt and more) then deploy the template to create a fully featured Kubernetes cluster with Azure resources. This behaviour is similar to how KOPS create Kubernetes resources in AWS. In order to start working with it, it’s required to authenticate against your Azure subscription with Azure CLI, create a Service Principal account and run it against your subscription either with a existing resource group or creating a new one. Our API module JSON looked like this: Anatomy of the API module file: General: See MS documentation here. On the first code block we have “apiVersion” and “orchestratorType” that defines the resource we want to create. AKS-Engine is an evolution of ACS-Engine and can work with multiple container orchestration engines. Kubernetes version is defined in “orchestratorRelease”, otherwise we stuck at aks-engine default, which is 1.12 at this time. Add-ons: Next step is to define which Kubernetes add-ons we want to use in our cluster and their parameters. Examples for add-ons can be found here. Right now, we use two add-ons: Cluster-Autoscaler and Nvidia Daemonset. Cluster-autoscaler add-on allows us to use cluster-autoscaler for Azure. AKS-Engine will take care of setting it up in Kubernetes once we include it in the API model input file. We provide min and max instances per cluster (the setup is global as it doesn’t support per VMSS setting this day) then the scan interval, where it will check of nodes need to be added or removed following resource requests from pods. Nvidia plugin takes care of device driver and Docker engine runtime settings on each node so we can use GPU resources. Upon node inspection, we should see “nvidia.com/gpu: 1” in addition to CPU, RAM and disk resources. Read more about it here and here. Control plane profile (master nodes): We can install a distributed control plane with aks-engine, that will take care of etcd, availability set and internal/external load balancers for all the master nodes. In our case, a 3 nodes control plane is sufficient enough and its defined in “count”. Our DNS prefix will be defined in “dnsPrefix” so a domain under “YOUR_NAME.REGION_NAME.cloudapp.azure.com” will be registered. We need to define the size of the compute instances that are going to be used in “vmSize”. When we deploy the cluster into a custom VNET, we need to define the resource of the target subnet in “vnetSubnetId”. Starting IP address will be defined in “firstConsecutiveStaticIP” to prevent collision with other resources. Each master nodes allocates a lot of private address upon setup. Data plane profile (worker nodes): The node pool we create first is for general purpose workloads that don’t require much resources and a GPU to operate. Next are the GPU enabled node pools that run with Nvidia Tesla V100 compute instances. We provide the pool a name that can be used in VMSS creation with “name”. Minimum number of instances defined in “count”. Although VMSS support zero instances size, the node pool cannot be created with zero instances in ask-engine yet. Cluster autoscaler will take care of scale to zero later on. VMSS, that is created with less than 100 instances, will not scale to more than max 100 until multiple placement groups will be set for it. See more details here. Therefore, we set it to false in “singlePlacementGroup”. Just like with master nodes, we define VM size for each pool in “vmSize”. Because we are working with VMSS, we need to define the “availabilityProfile”. Each new instance coming up or down will be registered with cluster autoscaler (using azure.json with it’s kubelet) so adding and removing nodes will be in sync as both Kubernetes node objects and VM’s inside the VMSS. When we describe such node, we can observe the following: ProviderID: azure:///subscriptions/****/resourceGroups/aks-canadacentral/providers/Microsoft.Compute/virtualMachineScaleSets/k8s-gencanada-10448498-vmss/virtualMachines/0 Managed disk for VMs is defined in “storageProfile”. General and Fallback nodes can run on-demand, while the main load should be running with low priority VMs. This is defined in “scaleSetPriority” and removing evicted VMs with “scaleSetEvictionPolicy” so we will not confuse our autoscale. See Kubernetes docs for how node affinity is set to achieve this. Node pool labels that we use for node selector in deployment and affinity rules (to prefer run workload on LPVM and then on-demand) are defined in “customNodeLabels”. As with master nodes, we need to provide the subnet ID where they will run with “vnetSubnetId” for each node pool. Linux instances profile: Because this is not a managed solution, all VMs within the the Kubernetes cluster can be managed with SSH. Every instance in the VMSS can be also accessed with 5000X port with VMSS LB NATN rule. In order to supply credentials for that, we need to provide an SSH login user with “adminUsername” and a public key in “keyData”. Credentials will be added to VMs with cloud-init, upon creation. Running the “aks-engine” command: Command structure: aks-engine deploy --subscription-id [SUBSCRIBTION_ID] --location [LOCATION] --api-model [INPUT_FILE].json --debug --client-id [SP_USER_GUID] --client-secret [SP_PASSWORD_GUID] -g [RESOURCE_GROUP_NAME] Kubernetes resources: Using ACR as a Docker image registry: Azure provides a managed container image registry (ACR) that can be used by Kubernetes. In order to pull images from it, we need to create another Service Principal account that will allow us to only run pull commands within the resource scope of the registry. This credential will be used as secret API object for all our pull operations and define in our deployment: imagePullSecrets: — name: acr-auth Fallback to on-demand if LPVM is not available: Low priority VMs has no SLA or guarantee to be provisioned at all, so we need to make sure that we can fallback to on-demand when LPVM are not available. We achieve this with node affinity in the deployment API resource (remember that we provide labels for out two node pools). Here is our example: Running GPU workloads only on nodes with GPU and vice versa: We use node selection deployment to pin which deployments will run on which node (with the power of labels) pools: nodeSelector: gpu: “true”nodeSelector: general: “true” Putting it all together: Run aks-engine and create the cluster. Use “_output/[YOU_CLUSTER_NAME]/kubeconfig/kubeconfig.[LOCATION].json” to connect to Kubernetes API, export it as $KUBECONFIG inside your shell or merging into your existing “~/.kube/config”: KUBECONFIG=~/.kube/config:_output/[YOU_CLUSTER_NAME]/kubeconfig/kubeconfig.json kubectl config view --flatten 3. Apply your API resources with “kubectl” (You can also use helm as tiller is already installed with the cluster). 4. ??? 5. Profit! Feel free to contact me at yevgenytr@cloudzone.io, LinkedIn or here.

Read More
CloudZone

Google Anthos – Google’s Enterprise Hybrid & Multi-Cloud Platform

At the recent Google Cloud Next 19' conference, Anthos — an Enterprise Multi & Hybrid cloud platform — was announced. You could feel the excitement of many Kubernetes lovers in the crowd. You could also notice that it was something the Googlers presenting it were very excited about as well. Indeed, Anthos announcement stands out. Google Anthos provides a consistent experience — in visibility and control, wether you are running on-premise or in the cloud— together with centric consistent view on the infrastructure. Thus, it allows easier management of application across the hybrid and multi-cloud, with greater awareness, security and control — making the investment worth it with more agility and shorter time-to-market. Anthos transforms your architectural approach, lets you focus on innovation, and allows you to move faster than ever without compromising security or increasing complexity. Anthos is a platform composed of several technologies integrated together, rather than a single product. It is powered by Kubernetes along with other technologies like GKE, GKE-OnPrem, Istio Service Mesh and others.   cloud.google.com Let’s go into details on the building blocks of Anthos. Computing The main computing components enabling Anthos is the Google Kubernetes Engine (GKE) and GKE On-Prem. GKE On-Prem, in short, allows you to manage Kubernetes clusters where the workloads run on worker nodes on-premise (or other clouds), with the benefit of a matured & managed (GKE) Control-plane like any other GKE Cluster. All together, it allows to manage Kubernetes installations in the environments where you need your applications to run, and more over, having a common orchestration layer that manages application deployment, configuration, upgrade, and scaling — cross cloud providers and datacenters. Networking In short, for gaining all of Anthos functionalities, you need to have connectivity all over. This means connectivity between on-premise datacenters to workloads deployed on the cloud and to GCP APIs. You can achieve that with managed services such as Google Cloud VPN for vpn tunnels or Google Cloud Interconnect for direct connectivity with consistent latency and high bandwidth (Dedicated or with Partner Interconnect — like with us in CloudZone) Service Mesh As the microservices pattern is (you could tell) the most popular today, and cloud native tools and platform (e.g. k8s) are all around us, more challenges arise when you aim to deploy these services spanning multi-cloud and hybrid-cloud. Anthos solves this using the Istio service mesh. For a high level recap on Istio check the first sections in this post about Google’s Traffic Director. Anthos uses GCSM (Google Cloud Service Mesh), a fully managed service mesh for complex microservices architectures. GCSM manages the ISTIO mesh on both GKE & GKE On-Prem, providing the best of Istio without the toll of configuration, installation, upgrading and CA setup. Note: if you ever tried to manage a multi-cluster mesh with Istio you would find out that setting it up and managing it is not such an easy task. having something that does it for you, cross clouds or datacenters is truly great. Centralized configuration Anthos provides unified model for computing, networking & service management. This enables easy resource management and consistency globally across clouds and datacenters. Anthos provide configuration as code via Anthos Config Management, which uses the Kubernetes Operator pattern which gained velocity in the last year (see the operator hub). Anthos deploys ACM Operator to your GKE and GKE On-Prem clusters, allowing you to monitor and apply any configuration in a declarative, git committed and triggered way. In addition, this provides one source of truth and unified deployment and change management to all environments Anthos manages. Single UI With GKE-Connect you can register GKE On-Prem based clusters to GCP Console and securely manage the resources and workloads running on them together with the rest of the GKE clusters. This is enabled by installing the GKE Connect Agent. You get the idea, right? Anthos in very high level, is a platform that manages compute, networking, and applications via service-mesh — across datacenters and clouds — with unified visibility and control. It is, as said , a multi-cloud and hybrid platform. Thats Awsome!   cloud.google.com Moreover, Anthos aims to provide cloud migration and application modernization and aims to let you convert brownfield application to Kubernetes PODs with Google’s acquired Velostrata (Cloud Migration tech) and become the first P2K (physical-to-Kubernetes) provider. Anthos is for the Enterprise Google made a shift in collaboration around Anthos. It partnered up with leading companies, some are existing partners of Microsoft and Amazon, to make Anthos an enterprise ready platform. One to notice is the partnership with Cisco. Anthos will be tightly integrated with Cisco data center technologies such as Cisco HyperFlex, Cisco ACI, Cisco SD-WAN and Cisco Stealthwatch Cloud, offering a consistent, cloud-like experience whether on-prem or in the cloud Another is with VMware, where Anthos will integrate with the NSX Service Mesh (within PKS as well) and with VMWare SD-WAN by VeloCloud. Anthos integrated with VMware NSX Service Mesh will empower customers to cost effectively digitize their businesses, leveraging modern cloud-native and open-source technologies to build new applications and services quickly.” There are many more vendors that join this effort for making Anthos the best enterprise multi and hybrid cloud platform. Among them are HP, DellEMC and Intel. In addition, many ISVs also join, from beginning, in integrating their software and platform with Anthos. Among them are MongoDB, NetApp, Citrix, F5, GitLab and more.   Anthos is available as a monthly, term-based subscription service with a minimum one-year commitment and based on blocks of 100 vCPUs, no matter where they are. List price is $10K/Month per 100 vCPU Block in the time this post was written. With the rise of Google Anthos, many good side effects will impact the open source community and especially the cloud native echo system, as Anthos aims to make Kubernetes-everywhere easier. Iftach Schonbaum (Linkedin).

Read More
CloudZone

XGBoost Distributed Training and Parallel Predictions with Apache Spark

Background In Boosting (ML ensemble method), algorithms implement a sequential process (as opposed to Bagging where it is parallelised) that generates weak learners and combine them to a strong learner (as in all Ensemble methods). In Boosting, at each iteration of this process, the model tries to correct the mistakes of the previous one in adaptive way — Unlike Bagging in which weak learners are trained independently. One of the Boosting algorithms, Gradient Boosting, is using the gradient descent to minimise the loss function directly in these sequential models (As opposed to another boosting algorithm, AdaBoosting, where fitting is achieved by changing weights of training instances) The weak learners created in Gradient boosting as part of training are usually implemented with decision trees. The major inefficiency in Gradient Boosting is that the process of creating these trees is sequential — i.e. it creates one decision tree at a time. To overcome that, an extension of Gradient Boosting was introduced (by Tianqi Chen and Carlos Guestrin) named XGBoost which stands for Extreme Gradient Boosting. It’s kind of Gradient Boosting on steroids and is used for mainly classification, but also regression and ranking. It introduces lots of performance enhancements through hyper-parameters, GPU support, cross validation capabilities & algorithm regularisations over the tradition Gradient Boosting to make the overall model more efficient, faster to train and less prune to overfitting. XGboost became popular in the last years and and won many of the machine learning competitions at Kaggle and considered to have more computational power and accuracy. XGBoost with Apache Spark A common workflow in ML is to utilize systems like Spark to construct ML Pipeline in which you preprocess and clean data, and pass the results to the machine learning phase, usually with Spark MLlib once you already use Spark. In the context of this article the important feature XGBoost introduces is parallelism for the tree building — it essentially enables distributed training and predicting across nodes. This means that if I am an Apache Spark MLlib user or company, i could as well use it to empower XGBoost training and serving in a production grade way and enjoy both the high performant algorithm of XGboost and Spark’s powerfull processing engine for feature engineering and constructing ML pipelines. Meet XGBoost4J-Spark — a project that integrates XGBoost and Apache Spark by fitting XGBoost to Apache Spark’s MLlIB framework. XGBoost4J-Spark makes it possible to construct a MLlib pipeline that preprocess data to fit for XGBoost model, train it and serve it in a distributed fashion for predictions in production. With this library each XGBoost worker is wrapped by a Spark task and the training dataset in Spark’s memory space is sent to XGBoost workers that live inside the spark executors in a transparent way. To write a ML XGBoost4J-Spark application you first need to include its dependency: <dependency> <groupId>ml.dmlc</groupId> <artifactId>xgboost4j-spark</artifactId> <version>0.90</version> </dependency> Data Preparation (Iris example) As said, XGBoost4J-Spark enables fitting of data to the XGBoost interface. Once we have the Iris dataset read into a DataFrame we need to: Transform String-typed label cols to Double-typed label. Assemble the feature columns as a vector to fit to the data interface of Spark ML framework. import org.apache.spark.ml.feature.StringIndexer import org.apache.spark.ml.feature.VectorAssemblerval stringIndexer = new StringIndexer(). setInputCol("class"). setOutputCol("classIndex"). fit(irisDF)val labelTransformed = stringIndexer.transform(irisDF).drop("class") val vectorAssembler = new VectorAssembler(). setInputCols(Array("sepal length", "sepal width", "petal length", "petal width")). setOutputCol("features")val xgbInput = vectorAssembler.transform(labelTransformed).select("features", "classIndex") The above results in a DataFrame with only two columns, “features”: vector-representing the iris features and “classIndex”: Double-typed label. A DataFrame like this can be fed to XGBoost4J-Spark’s training engine directly. Distributed Training import ml.dmlc.xgboost4j.scala.spark.XGBoostClassifier val xgbClassifier = new XGBoostClassifier(). setFeaturesCol("features"). setLabelCol("classIndex"). setObjective("multi:softmax") setMaxDepth(2). setNumClass(3). setNumRound(100). setNumWorkers(10). for a full list of XGBoost parameters see here. Note that in XGBoost4J-Spark you can use also the camel case format as seen above. Notes: multi:softmax objective means we are doing multiclass classification using softmax. This requires to set the number of classes using the num_class param. 2. max_depth is the maximum depth of a tree created in each boosting iteration. Increasing this value will make the model more complex and more likely to overfit. XGBoost consumes lots of memory when training deep trees. 3. num_rounds is the number of rounds for boosting. 4. The num_workers parameter controls how many parallel workers we want to have when training a XGBoostClassificationModel. This will later on translated to Spark pending tasks which in term will be handled by the cluster manager (YARN in most cases). Early Stopping is supported using the num_early_stopping_rounds and maximize_evaluation_metrics parameters. Now we can create the transformer by fitting XGBoost Classifier with the input DataFrame. This is essentially the training process that yields the model that can be used in prediction. val xgbClassificationModel = xgbClassifier.fit(xgbInput) Parallel Prediction XGBoost4j-Spark supports batch prediction and single instance prediction. For batch prediction, the model takes a DataFrame with a column containing feature vectors, predict for each feature vector, and output a new DataFrame with the results. In this process XGBoost4J-Spark starts a Spark task containing a XGBoost worker for each partition of the input DataFrame for parallel prediction of the batch. val predictionsDf = xgbClassificationModel.transform(inputDF) predictionsDf.show()+----------------+----------+-------------+-------------+----------+ | features |classIndex|rawPrediction| probability |prediction| +----------------+----------+-------------+-------------+----------+ |[5.1,3.5,1.2,.. | 0.0|[3.4556984...|[0.9957963...| 0.0| |[4.7,3.2,1.3,.. | 0.0|[3.4556984...|[0.9961891...| 0.0| |[5.7,4.4,1.5,.. | 0.0|[3.4556984...|[0.9964334...| 0.0| +----------------+----------+-------------+-------------+----------+ For single prediction, the model accepts a single Vector. val features = xgbInput.head().getAs[Vector]("features") val result = xgbClassificationModel.predict(features) Single prediction with XGBoost is not recommended because of the overhead that will be triggered internally compared with the just one prediction. The latest release (0.9) of XGBoost’s XGBoost4J-Spark now requires Spark 2.4.x. mainly because it uses facilities of org.apache.spark.ml.param.shared which are not fully available on earlier versions of Spark. This version also includes more consistent handling of missing values, better performance for multi-core CPUs, better control for caching partitioned training data to reduce training time and more. for more information about XGBoost check out the docs. References: XGBoost with CUDA Gradient Boosting, Decision Trees and XGBoost with CUDA | NVIDIA Developer Blog Gradient boosting is a powerful machine learning algorithm used to achieve state-of-the-art accuracy on a variety of… devblogs.nvidia.com 2. XGBoost in spark with GPU with RAPIDS XGboost4J-Spark

Read More
CloudZone

Making Government Data Accessible with Google Kubernetes Engine

Recently, I’ve had the pleasure of working alongside a group of subcontractors in charge of creating the first cloud-based public data portal available to the public. We set out to create a solution, which we didn’t know at the outset if it was feasible or not. It was a mighty endeavour, and of course, we had a lot of pressure to meet deadlines and complete the work on a very tight schedule. We didn’t let any of that interfere with our mission. Our mission was clear: Make CKAN — a common Data Portal solution — deployable and securable using GKE and managed services where possible. We had organizational users who will need to access the application securely from their premises. We also had one programmatic user, an automated file uploader using rsync over ssh. Common Enterprise Data Portal Solution And so we set off and started researching how CKAN has traditionally been deployed, what kind of experiences were other implementers reporting on using it, reviewed its Docker-related documentation, and gathered as much background information as we could to avoid common pitfalls and unnecessary delays. We also discovered several attempts by such implementers using Helm Charts, which we thought would be a good idea. We ended up not using any of their solutions, but we certainly drew knowledge from experimenting with them to the extent that we were able to author our own Helm Chart and make it work on Google’s cloud-provided Kubernetes cluster. We even hooked it up with Filestore, Google’s managed NFS, to facilitate batch uploads securely. Here’s how we ended up stitching the Helm Chart together. Kudos to everyone who pitched in! Deployment apiVersion: apps/v1 kind: Deployment metadata: name: {{ .Values.fullNameOverride }} labels: app: {{ .Values.fullNameOverride }} spec: replicas: {{ .Values.deploy.replicas }} selector: matchLabels: app: {{ .Values.fullNameOverride }} template: metadata: labels: app: {{ .Values.fullNameOverride }} spec: containers: — name: {{ .Values.fullNameOverride }} image: {{ .Values.deploy.image.registry}}/{{ .Values.fullNameOverride }}:{{ .Values.deploy.image.tag}} imagePullPolicy: {{ .Values.deploy.image.pullPolicy}} ports: — containerPort: 5000 protocol: TCP resources: {{ toYaml .Values.deploy.resources | indent 12 }} volumeMounts: — mountPath: /etc/ckan/config.ini name: config-volume subPath: config.ini — mountPath: /usr/lib/ckan/venv/src/ckan/upload_files/ name: ckan-files volumes: — configMap: defaultMode: 420 name: {{ .Values.fullNameOverride }} name: config-volume — name: ckan-files nfs: path: {{ .Values.nfs.path }} server: {{ .Values.nfs.server }} Service apiVersion: v1 kind: Service metadata: labels: app: {{ .Values.fullNameOverride }} name: {{ .Values.fullNameOverride }} spec: ports: - port: 80 protocol: TCP targetPort: {{ .Values.service.port }} {{ if eq .Values.service.type "NodePort" }} nodePort: {{ .Values.service.NodePort }} {{ end }} selector: app: {{ .Values.fullNameOverride }} sessionAffinity: None type: {{ .Values.service.type }} Ingress apiVersion: extensions/v1beta1 kind: Ingress metadata: name: {{ .Values.fullNameOverride }} annotations: kubernetes.io/ingress.global-static-ip-name: "RESEERVED_IP_NAME" spec: backend: serviceName: {{ .Values.fullNameOverride }} servicePort: {{ .Values.service.port }} path: / loadBalancerSourceRanges: - *RESERVED_IP*/32 Configmap apiVersion: v1 kind: ConfigMap data: config.ini: |- {{ if eq .Release.Namespace "env1" }} {{ .Files.Get "files/env1.ini" | indent 4 }} {{ end }}{{ if eq .Release.Namespace "env2" }} {{ .Files.Get "files/env2.ini" | indent 4 }} {{ end }}{{ if eq .Release.Namespace "env3" }} {{ .Files.Get "files/env3.ini" | indent 4 }} {{ end }}{{ if eq .Release.Namespace "env4" }} {{ .Files.Get "files/env4.ini" | indent 4 }} {{ end }}metadata: name: {{ .Values.fullNameOverride }} CKAN is a distributed application which employs 4 significant services: 1. Backend web server(s) 2. PostgresSQL database server(s) 3. Solr indexing and search server(s) 4. Frontend load balancer/web server(s) We decided to keep only the backend server component in an unmanaged container hosted on GKE. The rest of the services we found managed solutions for, including Cloud SQL for the PostgresSQL database, Bitnami-based HA Solr with Zookeeper, and an HTTP(S) Load Balancer provided in GCP as a service for the frontend. To accommodate the security requirements set forth by the client, we had to install a software “next-generation” web application firewall. The chosen product was Reblaze, a local development, which meant support during the project was responsive and fluid. This was at the crux of our architecture for the solution and represented the main entry point for all incoming communication to the application. We constructed a separate VPCs for Application, Security, and Management. In order to allow these networks to communicate with one another we set up VPC peering. The main administrative endpoint was a bastion host we spun up where only authorized use was enforced. This machine was where we wrote most of our infrastructure code (Using Google’s Source Repos) and managed our Kubernetes cluster. We had to overcome many obstacles before the project was over. There was so much to do and very little time, we had a mission after all. And it was a straightforward one. So we sewed up all the underlying services and we set up everything to connect and allow the types of communications we had outlined. The last details were still being ironed out the day before we flipped the switch. We had to cut some corners, and carry some technical debt past our launch date, but we launched on schedule. Our mission was accomplished. The project is far from over. We still need to implement the Devops processes that will allow the client’s developers to enjoy CI/CD over their new Dockerized CKAN server. And to secure those processes using the fresh installation we got from the Google Marketplace of Aqua Security. A wonderful cloud-security manager for Kubernetes which has already proved its worth in tracking and authorizing deployable artifacts, providing endpoint security, container firewalls, and much more.

Read More
CloudZone

Google Cloud GKE Deep Dive

Meetup on Google Cloud Kubernetes Engine (YouTube Video, Hebrew)       All you need to know about the Google Kubernetes Engine (GKE) and the addition features and values on top of Kubernetes. Understand how GKE integrates with the Google Cloud Platform’s different services in the aspects of Networking (GKE network modes), Compute, Storage, Authentication & Authorization, Monitoring & Logging   This Meetup took place at Google offices in Tel-Aviv in August, 2018 [embed]https://youtu.be/6Oyv_BqZsD8[/embed]   GKE Related Terms you should be Familiar with   Master Node - K8s system components: kube-apiserver, kube-scheduler and kube-controller Worker Node - Kubelet / kube-proxy & user workloads kube-apiserver - Kubernetes api for user / components Kube-scheduler - Decides where to place Pods Kube-controller - Controllers loops (e.g. RCs, HPAs) Pod - group of container/s RCs - manages group of PODs of the same spec Service - static VIP / LB for a RC's pods (endpoints)     GKE Basic Info   GKE, GCP's managed K8s offering exists since 2015 GKE is the most matured managed K8s service GKE manages masters lifecycle (not listed as nodes)      

Read More
CloudZone

Why Cloud Migration is More Important Than Ever and How To Do It Better

It may seem “old news” to be talking about cloud migration towards the end of 2020 — isn’t everyone already in the cloud?! On the one hand, the answer seems to be clearly yes. According to the 2020 Flexera State of the Cloud Report nearly 93% of enterprises are not only using the public cloud, but have already embraced a multi-cloud strategy. Of these, 87% have adopted a hybrid architecture that combines both public and private clouds. The report also shows clearly that annual enterprise public cloud spend has increased considerably. In 2020 20% of enterprises spent more than $12 million, compared to only 13% in 2019. Similarly, 74% spent more than $1.2 million, compared to only 50% in 2019. On the other hand, enterprises are, by definition, not “born in the cloud”. For these organizations, cloud migration continues to be an ongoing process and there are still technical and organizational roadblocks that get in the way. In the first part of this article we take a look at some of those cloud computing challenges.   Now enter stage left — the COVID-19 pandemic. Suddenly cloud-based digital transformation has to be accelerated in order to survive in an altered reality. People working from home have to be kept productive. Data centers are not always accessible and their on-site staff has to be kept to a minimum. And everyone is talking about the post-pandemic “new normal” in which very high levels of cloud maturity will be imperative in order to stay competitive. In this article we look at why it has always been crucial that enterprises migrate to the cloud, how COVID-19 has accelerated the need for cloud migration, and how enterprises can mitigate cloud migration challenges in order to lower risk and shorten time-to-value.   Enterprises and Cloud Computing     Let’s remind ourselves about the advantages of cloud computing for enterprises. Perhaps the most important is the agility gained from self-service provisioning and an on-demand service model. This agility promotes innovation and faster time-to-market for new products and their revenue streams. Another clear benefit is optimized scalability so that infrastructures can respond quickly to dynamic business requirements. Enterprises have also learned that the public cloud’s high availability and resilience support enhanced business continuity SLAs.   Other benefits include:   Harnessing big data analytics to drive sales and marketing strategies. Improving the end-user experience for customers, employees, suppliers, and partners. Shifting infrastructure costs from CAPEX to OPEX, which introduces greater budget flexibility. Reducing operational costs — or at least the potential to do so if cloud spend is carefully managed.   According to the Flexera report already mentioned, enterprises are running 48% of their workloads and storing 45% of their data in a public cloud. Why is it that after 10+ years of public cloud availability and all of the clear advantages cloud computing brings to enterprises, they have migrated less than half of their workloads and data? The answer is that enterprises are still addressing significant public cloud challenges, with security, managing cloud spend, and governance topping the list. Moreover, 70% of enterprises still see cloud migration as a top challenge, as broken down into the following issues: The Catalytic Impact of COVID-19   The COVID-19 pandemic abruptly presented a new reality to enterprises, who were suddenly driven to accelerated cloud usage by: Work-from-home employees, whose productivity (and sanity) now depended on reliable remote access to apps, data, and IT service desks. This spurred enterprises to embrace cloud native services and apps that could meet these needs quickly and at scale. Difficulty in accessing and/or staffing data center facilities, which made cloud-based backup and disaster recovery more important than ever to ensure business continuity and data integrity. Delays in hardware supply chains were yet another reason for looking to scale up cloud rather than on-prem infrastructure in order to meet the new demands. Even greater customer and partner expectations for always-on, low-latency online interfaces. The Flexera report shows clearly that all the major cloud service providers have experienced growth since the onset of COVID-19, with AWS continuing to lead the market. The providers have all had to scale quickly to ensure that their users have the compute-storage-network resources that they need. They also offer cloud native apps that have been instrumental in helping enterprises respond quickly to COVID-19 demands. For example, AWS offers the following fully managed services: Amazon Connect, an omnichannel cloud contact center that lets companies provide superior customer and IT service with a cost-effective pay-as-you-go pricing model.Users can easily and quickly set up a full-featured contact center that can scale to support millions of end-users. Amazon Chime, a communications service for meeting, chatting and placing business calls within and outside the company. It can be consumed either as a standalone service, or as an SDK for integration into enterprise apps and services. Amazon WorkSpaces, a fully managed and secure Desktop-as-a-Service (DaaS) solution that provisions Windows or Linux desktops in minutes and frees up IT from the capital expenditures and ongoing maintenance burden associated with on-prem Virtual Desktop Infrastructure (VDI).. For example, Enova, one of the largest licensed lenders in the USA, used Amazon Workspaces to deploy a secure and compliant work-from-home solution for 1,200+ employees in less than 24 hours. And BlueVine, a Fintech start-up, collaborated with AWS to develop a product that helps small US businesses access Paycheck Protection Program (PPP) loans as part of the US government COVID-19 relief stimulus package. The product uses a number of AWS services, including Amazon Textract — a fully managed machine learning service that automatically extracts text and data from scanned documents.   In the healthcare sector, which is on the front lines of the pandemic, AWS is helping companies like BenevolentAI and Arcadia.io scale up their services in order to facilitate new drug discovery or streamline communications between healthcare providers and COVID-19 patients.     With an eye to the future, a recent McKinsey report exhorts CEOs to leverage the COVID-19 pandemic to accelerate their cloud journeys in order not to fall behind nimbler competitors in the post-COVID world. They discuss how CEOs can and should back the cloud migration efforts of CIO/CISOs by getting stakeholders to work together: to establish sustainable funding models for cloud investments, embrace new business-technology operating models that break down silos, and acquire the talent necessary to migrate to and operate in the cloud. A Winning Cloud Adoption Strategy   The July 2020 AWS blog Evolving GRC to Maximize Your Business Benefits from the Cloud notes that 70% of cloud adoption programs falter or fail due to nontechnical challenges, i.e., mindset or organizational stumbling blocks. Although the context of the article is establishing cloud-based GRC (Governance, Risk, Compliance), we believe the excellent insights and guidelines are applicable to any and all cloud migration strategies.   The author points out that the nontechnical issues typically arise when the cloud program moves into its later stages, when assets and apps are moving from small-scale, isolated development and test environments into larger, public-facing production environments. All of a sudden conflicts will arise when, for example, teams want to continue applying traditional controls to agile cloud environments. This attempt to impose a legacy mindset undermines one of the prime motivations to migrate to the cloud, i.e., benefit from cloud agility. It is important, therefore, to get all the stakeholders involved and informed from the outset.   The AWS Cloud Adoption Framework(CAF) enumerates six organizational units, or Perspectives, that must be involved in discussing and buying into the fundamental mindset and organization changes that are key to a successful cloud adoption program. The following table summarizes the Perspectives and their responsibility in the cloud migration strategy: If followed diligently, the CAF ensures that all these different perspectives are brought on board from the very beginning of the cloud adoption process and collaborate to develop and implement a cross-enterprise action plan.   Other cloud migration best practices that are recommended in the AWS blog within the context of  evolving to cloud-based GRC (but are generally applicable) include:   Experiment with challenger operating models in parallel to legacy models in order to learn how cloud adoption can be accelerated and desired business outcomes achieved faster. The example they give is a traditional bank that lets a digital bank subsidiary develop outside the legacy GRC framework. A more general example could be experimenting with agile project management methods for selected projects. Clearly signal the prioritization of cross-organization transformation by assigning a board-level executive to oversee the program and designating other high-profile “transformation champions”. Leverage the cloud migration to adopt advanced capabilities such as big data analytics and machine learning — technologies that can boost more focused and better informed business decisions. Conclusion   Adopting the best cloud migration practices described above will surely mitigate the risks inherent to any transformative undertaking. They should go a long way in developing a sound long-term cloud migration strategy that’s aligned with your business needs, and keeping the implementation on track. Another way of enhancing the success rate of your cloud migration strategy — and especially when that strategy is disrupted by dramatic events like the COVID-19 pandemic — is to use AWS Partners like CloudZone to overcome gaps in cloud adoption knowledge, experience, and skill. CloudZone has the competencies and proven track record to guide enterprises through the planning and implementation phases of a future-proof cloud adoption strategy, as well as provide ongoing advisory services and FinOps to ensure optimized architectures and cloud spend.

Read More
CloudZone

Apache Spark 3.0 Review

Apache Spark echo system is about to explode — Again! — this time with Sparks newest major version 3.0. This article lists the new features and improvements to be introduced with Apache Spark 3.0 — which its preview is already out — very exciting! Just for the stimulate — Alibaba Group competed with Spark 3.0 on the TPCDS benchmark and achieved the top spot! Spark 3.0 is said to perform 17x faster compared with current versions on the TPCDS benchmark which is pretty impressive. If you are a Spark user and you are familiar with Spark skip to the next section for the Spark 3.0 review   What is Apache Spark? For those who are not yet familiar with Apache Spark — it is a lightning fast, fault tolerant and in-memory general distributed data processing engine (kind of a MPP) that supports both batch and streaming processing and analytics. Spark became very popular in late years and many organisations from small to enterprises adopted it including major cloud vendors where you can find a managed service that includes Spark. Spark features APIs for distributed processing of structured and unstructured data like the RDD (Resilient Distributed Dataset), DataSet, DataFrame and more. it features SQL Capabilities including hooking up into any Hive metastore supporting catalogs (like AWS Glue) enabling great capabilities of explorations and analytics. On top of that it features Machine Learning capabilities (The Notorious Spark MLlib). Spark was meant to be a processing hub where it can connect many data sources — from relational and NoSQL databases, data lakes and warehouses and more — computing aggregations, data preprocessing and much more. Spark 2.x introduced many improvements (Like Project Tungsten and the catalyst optimiser) and have made Spark shine out as a great tool and solution for ETL pipelines, Analytics in a Data Lake, engine for distributed machine learning training and serving, Streaming & Structured Streaming (If mini-batches fits you) and more. Spark can hook into many sources supported by the DataSource API Apache Spark Version 3.0 Important Features: Language support Spark 3.0 will move to Python3 and Scala version is upgraded to version 2.12. In addition it will fully support JDK 11. Python 2.x is heavily deprecated . Adaptive execution of Spark SQL This feature helps in where statistics on the data source do not exists or are in accurate. So far Spark had some optimizations which could be set only in the planning phase and according to the statistics of data (e.g. the ones captured by the ANALYZE command when deciding weather to perform a Broadcast-hash join over an expensive Sort-merge join. In cases in which these statistics are missing or not accurate BHJ might not kick in. with adaptive execution in Spark 3.0 spark can examine that data at runtime once he had loaded it and opt-in to BHJ at runtime even it could not detect it on the planning phase. Dynamic Partition Pruning (DPP) Spark 3.0 introduces Dynamic Partition Pruning which is a major performance improvement for SQL analytics workloads that in term can make integration with BI tools much better. The idea behind DPP is to apply the filter set on the dimension table — mostly small and used in a broadcast hash join — directly on the fact table so it could skip scanning unneeded partitions. from Databricks session in Spark AI DPP’s Optimisation is implemented both on the logical plan optimization and the physical planning. It showed speedup in many TCPDS queries and works well with star-schemas without the need to denormalize the tables. Running TPCDS Query #98 with DPP. From Databricks session on DPP Databricks’s session on DPP. Enhanced Support for Deep Learning Deep Learning on Spark was already possible so far. However Spark MLlib was not focused on Deep Learning and did not offer deep learning algorithms and in particular didn't offer much for image processing. Existing projects like TensorFlowOnSpark, MMLSpark and some others made it possible somehow but presented significant challenges. For example — given that Spark resiliency is very good and knows to recompute tasks over partitions on failure — in deep learning for if you loose a partition in the middle of a training job and you recompute this individual partition Tensorflow or others will not work well. It requires to train on all partitions in the same time. Spark 3.0 handles the above challenges much better. In addition it adds support for different GPUs like Nvidia, AMD, Intel and can use multiple types at the same time. In addition Vectorized UDFs can use GPUs for acceleration. For Kubernetes it offers GPU support in a flexible manner when running on Kubernetes. Better Kubernetes Integration Spark support for Kubernetes is relatively not matured in the 2.x version and difficult to use in production and performance was lacking in compare with the YARN cluster manager. Spark 3.0 introduces new shuffle service for Spark on Kubernetes that will allow dynamic scale up and down (more precisely out and in) Spark 3.0 also supports GPU support with pod level isolation for executors which makes scheduling more flexible on a cluster with GPUs. Spark authentication on Kubernetes also has some goodies. Graph features Graph processing can be used in data science for several application including recommendation engine and fraud detections. Spark 3.0 introduces a whole new module named SparkGraph with major features for Graph processing. These features include the popular Cypher query language developed by Neo4J which is a SQL like for graphs, the Property Graph Model processed by this language and Graph algorithms. This integration is something Neo4J worked on for several years and it’s named Morpheus (formerly named Cypher for Spark) but as said will be named SparkGraph inside the spark components. Morpheus extends the Cypher language with multiple-graph feature, Graph catalog and Property graph data sources for integration with Neo4j engine, RDMS and more. It allows usage of the cypher language on graphs in a similar way SparkSQL operates over tabular data and it will have its own catalyst optimiser. In addition it would be possible to interoperate between SparkSQL and SparkGraph which can be very useful. For a deep dive: Check out this session ACID Transactions with Delta Lake Delta Lake is an open-source storage layer that brings ACID transactions to Apache Spark 3.0 and through easy implementation and upgrading of existing Spark applications, it brings reliability to Data Lakes. It announced to join the Linux foundation to grow its community. It solves issues presented when data in the data lake is modified simultaneously by multiple modifiers and allows you to focus on logic and not worry from inconsistencies. Its very valuable for streaming applications but also very relevant for batch scenarios. Over 3500 organizations already use Delta Lake. Spark 3.0 supports data lake out of the box and can be used just as it is used for example with parquet. sometimes replacing the read class to the deltalake’s one is enough to start using Delta Lake. Quick Start: https://docs.databricks.com/delta/quick-start.html Growing integration with Apache Arrow data format Apache Arrow is an in-memory columnar data structure for efficient analytical operations. Its has benefits like being cross-language platform, performing zero-copy streaming messaging and interprocess communications without serialization costs which often occur with other systems. In Spark 3.0 Usage in Apache Arrow takes bigger place and its used to improve the interchange between the Java and Python VMs. This usage enables new features like Arrow accelerated UDFs, TensorFlow being able to read error data in CUDA and more features in the Deep Learning section in Spark 3.0 Binary files data source Spark 3.0 supports binary file data source. You can use it like this: val df = spark.read.format(“binaryFile”) The above will read binary files and converts each one to a single row that contains the raw content and metadata of the file. The DataFrame will contain the following columns and possibly partition columns: path: StringType modificationTime: TimestampType length: LongType content: BinaryType writing back a binary DataFrame/RDD is currently not supported. DataSource V2 Improvements Few improvements for the DataSource API are included with Spark 3.0: Pluggable catalog integration Improved predicate push down for faster queries via reduced data loading In addition there are many JIRAs to solve many issues existing with the current DataSource API. YARN Features Spark 3.0 can auto discover GPUs on a YARN cluster and schedule tasks specifically on nodes with GPUs. More Features: The above features are somehow the major and more influencing one but Spark 3.0 ships more enhancements and features with it. Mostly it is clear that Spark 3.0 is a big step up for data scientists and enables them to run Deep Learning with distributed training and serving. What’s being Deprecated or Removed More than a few things are being deprecated or removed. Make sure you read the deprecation and migration notes to see that you are covered the time you want to test your code with Spark 3.0. Python 2.x Python 2.7 will still work, but not anymore tested in the release lifecycle of Spark. this effectively means — you DON’T use it. This is relevant for all Panadas and NumPy users in Python 2. So from Spark 3.0 PySpark users will see a deprecation warning if Python 2 is used. A migration guide for PySpark users to migrate to Python 3 will be available. Completely removing Python 2 support is expected to occur in 1.1.2020 when PySpark uses will see an error in case Python 2 is used. After this date patches for Python 2 might be rejected for Spark versions 2.4.x Spark MLlib I coudnt totaly figure what will be the future of SparkMLlib with Apache Spark 3.x versions. Ill update this blog asap once I know more. I hope you liked this thorough review and that it was helpful. Please feel free to leave any questions on the comment sections. I’de like to thank: holden karau for continuously being a source of inspiration and knowledge. Parts of this article comes from his talks and posts on the subject. Databricks for giving great sessions and leading innovations around Apache Spark — also being a source for this post.

Read More
CloudZone

CNCF: What’s Incubating — Part 1: NATS Messaging

  The Cloud Native Computing Foundation is the home for Cloud Native projects which seats right under the Linux foundation. It hosts very well known projects (and for some their CI/CD) like Kubernetes, Prometheus, Envoy, Fluentd and more. Well, these are the graduated ones. Graduated projects are projects that are passed their major adoption levels and been voted for and considered very stable. Project creators and communities has high incentives to host their project under the CNCF. “In a world where GitHub use is ubiquitous, it is no longer sufficient for a software foundation to offer just a software repo, mailing list, and website. An enhanced set of services is required as it facilitates increased adoption.” CNCF provides the projects hosted by it with many services and incentives as money investments, community tooling and foundations, program management, event management, marketing services, certifications, legal services and more. As part of our work at CloudZone, a multi cloud premier consulting partner and CNCF Silver Member and a CNCF Kubernetes Certified Service Provider, we include many of the CNCF tools and frameworks in our solutions. This series of blog posts is intended to summarize in detail the CNCF hosted projects that are currently in the incubation stage (after sandboxing, before graduating).   NATS Messaging NATS is a lightweight cloud native messaging system for next generation cloud native distributed applications, edge computing platforms and devices. It is already an 10-years old and is production proven (Originally Built to power CloudFoundry) NATS is: Highly Resilient Highly Secured Highly scalable with built in load balancing and auto scaling Extremely lightweight frictionless for developers in an agile environment Provides QoS for messaging Support for 30 client SDKs NATS is focused on performance, security, simplicity , and availability. Its community has grown in the last 2 years. Use Cases: Cloud Messaging: Microservices Transport, Control Plane, Service Discovery and Event sourcing IoT and Edge Mobile High Fan-out messaging Augmenting or replacing legacy messaging systems Core Entity: Subject: You can think of it as a Topic to which any client can subscribe. It is a string representing an interest in data and subscribers can subscribe to subjects using wildcards that matches these subject strings. Messaging Patterns Pub/Sub: publish a message to a subject. Subscribers on this subject will receive this message. Used for high fanout and parallelization of work.   nats.io Load balanced queue subscribers: When you create subscribers you can add them to a group. When a message is published, one of them will receive it. You can think of it as a Kafka Consumer Group. Used for load balancing, auto-scaling, lame duck mode during upgrades.   https://nats-io.github.io Request/Reply: Unique subjects that enables request/reply patterns where you can send request to many subscriber and receive only 1 response from the NATS cluster thus getting the fastest response with least latency. In this case NATS will prevent the messaging from continuously propagating after a response is been sent. Used for request to many and handling first response where you can scale the subscribers to achieve faster response.   https://nats-io.github.io Graceful shutdown using Drain API Clients can invoke graceful shutdown using the drain API where the client unsubscribes and stop receiving new messages but continue to process buffered ones. Used to prevent data loss in shutting down or scale-down events and in application upgrades. Availability & Resiliency NATS prioritises the health of the system as a whole over individual client or server. For example, when a NATS client is not consuming fast enough the NATS server will cut this client off, considering it as not healthy. The NATS cluster is a full mesh of NATS server where any of them can go down and the rest will take over its clients. Also, connections of servers and clients are self healing meaning they will try to reconnect. NATS was proved to be very stable and running under load for long duration of times without any interruption. Performance Extremely fast: 18 million messages per second with single server and single data stream and up to 80 million per second with multiple streams. It is very scalable. Simplicity NATS is single binary proved with 8MB docker image. the text-protocol payloads are binary. Configuration is not more than a url and credentials. Servers are auto-discoverable and share discovered topology and configuration is shared — which is all transparent to the clients. The client APIs are simple and straight forward. NATS has a prometheus exporter for exposing metrics and a Fluentd plugin. Delivery modes NATS support two delivery modes: At most once (Core) where there is no guarantee of message delivery. in this case application must detect and handle lost messages At least once (Streaming) where a message will always be delivered and in certain cases more than once. NATS by choice does not provides Exactly once mode as it is considered unnecessary and is slow and complex which does not stands together with one of the core missions of NATS where it focuses on simplicity and high performance. Streaming also includes features as replaying by time or sequence number, rate matching per subscriber, storage tiers (memory, file ,database), HA and scale through partitioning.   Multi-tenancy Multi-tenancy is possible in NATS via accounts and enriched with Services and Streams. Accounts — Isolated communication contexts with which you can use a single NATS deployment for multiple isolated operators. Accounts can share data with other accounts via Services and Streams. Service — RPC endpoints that enables a Request/Reply delivery pattern between accounts — one on one conversation. Used for: monitoring probes, certificate generation services, secure vault. Streams — Enables publish/subscribe pattern between Accounts. Used for: Global Alerts, Slack like solutions, Twitter feeds. For example, given two clients that publish and subscribe on Subject X in account A , no Subscriber of Subject X in account B will receive this message unless there is a Stream allowing it. The great things is that for all of the above no client configuration is needed. Security NATS is secured with: Authentication via TLS certificates,, basic credentials & NKeys (based on ED25519) and JWTs Encryption with TLS Policy Allow/Deny based Subject authorization with wildcard support All updated to these entities are with zero down-time. NATS Global Deployment with SuperClusters Clusters of NATS clusters can be used for global implementation of NATS messaging. In its core you can use a global distributed load balanced queue subscribers which is geo aware. For example, given a queued subscribers in Europe and in the US, if i publish a message from Europe, NATS will deliver the message to one of the subscribers in Europe. More goodies: Integration with more messaging projects like Kafka Native MQTT Support & Microcontroller clients for IoT WebSocket Support Integration with Kubernetes Integration via the NATS Operator which creates and manages NATS cluster. The Operator uses K8s RBAC for authorization with service accounts. Provides Hot reload of Secrets stored configuration. An Helm chart is available for installing on Kubernetes Among NATS Adopters    

Read More
CloudZone

5 Machine Learning Models You Can Deploy Using Big Query

Deploying machine learning models requires multiple teams and coordination. Developing a statistical model or picking which one to use is simply not enough. A machine learning engineer must also be able to implement it into a large system. Between the various teams required to deploy the model and all the expertise to design it, new models can often become blocked or slowed down. Pre-made machine learning models that can be easily integrated can speed up the deployment of ML models and reduce the need to involve experts to handle them. BigQuery, for example, allows you to implement several models into your SQL queries using BigQuery ML. Through BigQuery ML, teams can gain access to ML models in BigQuery, which enables them to create and execute them easily using SQL rather than having to push the data to another language such as Python or Java. BigQuery ML was designed to democratize machine learning and shorten the time required to develop and implement models. This article covers some of the key models supported by BigQuery ML and how your team can benefit from them.   5 ML Models Supported by BigQuery     BigQuery ML offers a wide variety of machine learning models that can be implemented into your SQL queries. This includes pre-created models that BigQuery ML allows you to easily implement in order to load neural networks you’ve created externally. Below are five statistical models you can use in BigQuery ML. Binary Logistic Regression One popular statistical model is binary logistic regression. Logistic regression is a classification algorithm for categorizing data with a binary output such as true/false or yes/no. This model can utilize multiple input variables to calculate what is known as the log odds and then provide a true/false style output. Use Cases Binary logistic regression works when trying to predict a binary output. Some examples include true/false outputs such as whether or not a person is likely to click “buy” or whether a medical patient will be readmitted to the hospital within 30 days. This conceptual simplicity is what makes binary logistic regression such a popular model. Implementation of Binary Logistic Regression Implementing binary logistic regression involves following two distinct steps. The first step is to create the model, as demonstrated in the code below. Once you’ve created a model, your team can implement the said model using the ML.PREDICT function and then reference your model’s name. Time Series There are many classic time-series models. For example, the ARIMA model is a standard predictive model used for forecasting outputs like sales, users, attendees, etc. Time series relies on two points of data; that is time and the actual value you are trying to predict. By using historical data as well as considering such concepts as seasonality, time series can create finely tuned models with very limited inputs. BigQuery allows you to choose from several popular time-series models like ARIMA and also enables you to set parameters to manage holidays. This allows you to develop a fine-tuned time-series model. Use Cases Time series models are useful for predicting concepts such as monthly sales or the number of attendees (e.g., at a theme park). This is due to the fact that time series is able to take seasonality and other factors into account when you calculate them, thus making for a very robust output. In addition, time series only require a single value to calculate. Implementation in BigQuery Once again, you will use the CREATE MODEL clause to implement this model. Next, you can reference the date column, time-series data, and your preferred model. It is also possible to add in other columns to break down the categories you are trying to predict on. Boosted Trees Boosted trees are like decision trees, except that they also integrate the concept of ensemble ML algorithms. Ensemble learning is the process in which multiple weak learners provide input for the final classification and form a single strong learner — the model. While there are many different methods of ensemble learning, with boosted trees, boosting trains models in succession. Based on the output of the previous learner, the next one will be trained to improve upon the errors made by the previous ones. This layering technique helps in turn to improve the model’s performance. One of the most performant and wildly used algorithms is XGBoost.   Use Cases Boosted trees have become a catch-all model. Due to the robustness of the model as well as its flexibility to fit most use cases, users can use them to predict the likelihood of a person asking for a loan paying it back, a recommendation system, or weather, for example. Because of how the model is set up in BigQuery ML, it is easy to implement into your workflow. Implementation in BigQuery   Linear Regression   Both linear regression and multivariate linear regression models take a set of independent variables and use them to determine some form of linear relationship with a dependent variable. For example, a single variable linear regression model looks like the y = mx + b formula. This is because that is what a single variable linear equation is. You are essentially trying to figure out what you need to add and multiply by x to get y. Multivariable regression is similar, except you can have many more variables. BigQuery’s Linear regression can be used for both multivariate regression and basic linear regression models. Use Cases   The BigQuery linear regression model can be used to calculate outputs such as housing costs or the impact that advertising spend has on your company’s bottom line, based on multiple variables. Linear regression is often a great place to start when your team is trying to find the relationship between two or more variables. Implementation in BigQuery     Tensorflow     Tensorflow is an open-source framework used to articulate and process complex mathematical calculations. Tensorflow is particularly known for neural networks. Tensorflow can be used to train and run deep neural networks and is one of many libraries that has made neural networks much more accessible to developers. Now it’s also possible to implement a Tensorflow model into your SQL queries. Implementing Tensorflow in BigQuery involves a slightly different process than some of the previous models referenced in this article. Unlike the previous models that exist as functions in BigQuery, in order to use Tensorflow, you will need to import your Tensorflow model. This is demonstrated in the code below. Use Cases     Before we discuss how to implement Tensorflow into your BigQuery queries, let’s talk about where these models can be useful. Typically, Tensorflow is used to develop neural networks that classify videos, pictures, and text. For example, many self-driving cars utilize neural networks to help classify what is in front of them. Other examples of where you could implement a Tensorflow neural network is classifying text for sentiment. Overall, Tensorflow allows for a broad range of solutions that can now be implemented into BigQuery. Implementation in BigQuery The Benefits of BigQuery ML     BigQuery is an ideal solution for teams with limited technical resources. Rather than spend time implementing a model in code, teams can use SQL, enabling them to naturally integrate their ML models into the rest of their data infrastructure, like ETLs. BigQuery can also be a good temporary solution. Perhaps you need to deploy a model quickly and want to fine-tune it later. Instead of developing a complex code-based model, your team can start with a BigQuery model and see how it works out. Based on the user interaction, you can choose to fine-tune it or leave it as is. Overall, BigQuery ML is an effective solution for faster ML model deployment. For development teams lacking an ML expert in their ranks but looking to implement ML models quickly, BigQuery ML is a viable alternative. Written in SQL, which is widely known among developers, BigQuery ML is easy to use, whether you’re a data engineer, software engineer, or perhaps even an analyst. The real question then is which model is right for you. Whether a simple binary regression model or something more complex like Tensorflow is required can only be determined once you start testing out your next model.

Read More
CloudZone

AWS Managed Services VS On-Premise Managed Services

Managed Services nowadays are very different from the way we use to run traditional IT desktop or server management system. They are so advanced and complicated, that it is becoming difficult to cope with the new challenges the Cloud brings; with more services, DevOps processes and other new technologies. As part of this transition, AWS Managed Services Partners (MSPs) and the customers are adjusting to the new opportunities the Cloud has to offer.   In many cases, AWS Cloud Services make things simpler, faster and often cheaper. However, while solving the problems traditional hardware system or on-premise data center have AWS also created new challenges. While Startups and newly born companies understand and embrace the latest technologies and trends, things are more complicated for larger and more “old-school” traditional enterprises. This is where MSPs (Managed Service Providers) come into play. The Cloud revolution brings with it new solutions and opportunities, however applying them is not simple. With years of experience working with the AWS Cloud, MSPs help customers to understand new technologies while explaining the pros and cons of applying them.   Enterprises are slowly discovering the many benefits of Cloud automation, which enables their ability to control, monitor and manage complex and large systems, programmatically. This too is very different from traditional data center environments. However, to be clear, no piece of code was ever able to get a new Dell R430 server installed and configured in 60 seconds, the code can only orchestrate dozens of servers with the same configuration and related services up and running.   The DevOps process can benefit from this in particular; starting with Auto-Scaling, then moving to Continuous Integration (CI), and finally to Infrastructure-as-Code. These increasing levels of automation, process, and complexity are key areas where an MSP can help customers understand, implement, and succeed. MSP services are especially suitable for traditional enterprises which usually have very little exposure or experience in these areas. The MSP helps jumpstart customer efforts, guide their processes and ensure early success.   Traditional MSPs and Cloud MSPs Traditional MSPs and Cloud MSPs do similar work but under different circumstances. Traditional MSPs help with monitoring and maintenance just like Cloud MSPs, but, because the cloud is a new platform that is constantly evolving, working with a Cloud MSP is key in keeping up to date with new emerging technologies.     Cloud Managed Services VS. Traditional Managed Services Speed, efficiency & control With Cloud Managed Services, things move quicker, whether it’s buildup, monitoring, or alerting. Since the physical hardware is already up and running on the cloud provisioning of servers is that much faster. Once the provisioning is finished, the configuration can be sped up only if the MSP truly embraces a DevOps approach and make the environment “infrastructure as code”. Cloud MSPs have full control and visibility on the environments they manage, enabling them to complete tasks on the spot. Traditional MSPs however, have to do a lot of ordering, waiting, installing and testing which eats up a lot of time. Traditional Data Center VS Cloud Data Center A traditional data center hardware-based, hardware based, and stores data within a local network. This means your MSP will need to perform updates, monitoring, and maintenance in-house. This can slow things down and cause inefficiency. The Cloud sits on an off-premise data center and stores data anywhere over the internet. The Cloud’s location is redundant, so your Cloud MSP can perform any update, monitoring and maintenance from any location, making things quick and efficient. In addition, since cloud vendors have multiple data centers in various geographic locations, your cloud MSP can safeguard availability during outages. Problem Solving The job of every MSP is to make things easier for their customers. However, it’s much more difficult for a traditional MSP to handle some issues. In order to fix a situation, traditional MSPs have to make phone calls, order parts, wait for shipping, installation, and so on. Cloud MSPs have a much easier time with a guarantee that everything is taken care of 100% by AWS, giving the end customer piece of mind. Ease of Operation In the Cloud, everything you need is but a click away, which is why it is easy to perform dev tests and quickly setup new environments. Traditional MSPs will have a more difficult time getting things done. Ordering parts that can take months to arrive, finding the right people to install them, and then testing to make sure everything is working correctly, can become a tedious and long process. The role of an MSP is to guide customers through a methodology of best practices and also help them to best apply new technologies and processes, to grow their business, meet their needs, ensuring a better future. The combination of traditional support, operations, innovation, automation, planning & transforming, and a joint view to the future is the key to MSP success in and on the clouds in the 21st century.

Read More